Let’s get started with the basics. Once you successfully purchase Elements from the HubSpot marketplace, you arrive a confirmation screen and all the template files will be added to your HubSpot account Design Tools.
The Design Tools section can be found inside Marketing > Files and Templates. If you see a folder from Inbound Elements inside the @marketplace folder in your Design Tools, it means you now have the templates in your account, and these are ready to be used!

Now you already have the email templates on your HubSpot account, let’s create your first email.
In order to create an email, you need to go to Marketing > Email > Create email, and you are going to arrive to a screen similar to this:

Once you see this screen, you need to click on the Custom tab in the top, and it will show you all Custom email templates available on your HubSpot account.
All Elements email templates will appear here, along any other custom email templates you had previously downloaded or purchased.
Select the one you would like to use, type a name to your new Email, and you will be ready to start editing.

It’s time to edit your email template. At the moment, HubSpot doesn’t support drag and drop editor on custom email templates yet, so we present you 2 different email editors depending on how much you would like to customize the templates.
Once you type the name of your template and click Create email, you will arrive to the Basic HubSpot Editor.
In this editor you will be able to:
In this editor you won’t be able to:
Once you enter the editor, you will notice everything is based on modules, which means if you hover any element, you will see a small Pencil icon to allow you to edit it.
Feel free to click on any element, and you will see the content and visual editor at the left.

In many cases, you will also notice that the editor at the left also offers additional customization settings. For example, if you try editing a button, you will notice we incorporated advanced options to customize the button color, border radius, alignment, and some other customization details.

Also, in case you would like to hide a section, you can always go to the Settings of the module and untick the “Enable Module” feature, which will automatically hide that complete module/section.
If on the other hand you would like to add a section, or re-arrange some sections to have a different order, you will need to use the Advanced Editor.
Sneak Peak: HubSpot is already working on supporting drag and drop functionality, so in the coming future you will be able to do add and re-arrange sections directly from the Basic Editor.
If you want to make more advanced adjustments to the Elements email templates, please be prepared, as this can get a little technical.
With the Advanced Editor you will be able to:
So, if you would like to to any of these, you are in the right place. In order to edit the Template, you just need to click on Design > Actions and then Edit this template.
You will see a popup notification asking you if you would like to edit the actual template, or clone it first. We highly recommend you to clone it first, so you still have access to the original.

Once you clone it, you will arrive to the email template editor in the HubSpot Design Tools.
In this editor, you can start re-arranging or duplicating sections, however, it’s important to know the basics of web design in order to do it properly. While some things like duplicating a section can be very easy (as you just need to do Right Click + Clone), some other adjustments can be a little more complicated.
If you ever have questions, you can always email us at [email protected], or if you are looking for advanced assistance, you can get in touch with our HubSpot Development Agency, so our team of HubSpot Experts can help you design and landing page, website or email template as needed.

As you edit your email templates, you will notice some of the sections (for example, some hero sections that have text with background images) are images instead of actual text in the HubSpot editor.
This happens because not all email clients support background images, so this way we guarantee that all popular email clients will be able to correctly view the emails you send.
However, you don’t need to worry, as you don’t need to re-create these images. All of these images are available in this Figma file.

In case you are not aware, Figma is a design software like Adobe Photoshop or Illustrator, but with the main benefit that it works directly on your browser.
So, in order to access these designs, you just need to create a free account on Figma.com, and then enter to the Figma link above and duplicate the file. This will allow you to have an editable version of this file in your Figma drafts, so you can easily create any image needed, or edit the color of any graphic to match your brand style.

For example, let’s say you want to edit the graphic in the Thanks for subscribing email template. You can easily edit the colors on Figma to match your brand colors, and then you just re-upload the image to your HubSpot template, and you are ready to go!
Sometimes, due to a common HubSpot bug, when you purchase the Elements Email Template Pack, or a single email template from the Elements collection, it may happen that the template you receive is not perfectly responsive, and it doesn’t look exactly like the one on the preview.
Our apologize for this, this is a bug in the HubSpot platform, not ours, so we don’t have control over it. However, there is nothing to worry about, as this can be fixed in less than 2 minutes, by doing the following.
1. Identify if you are having this problem: First, it’s important to identify if this is the issue you are having.
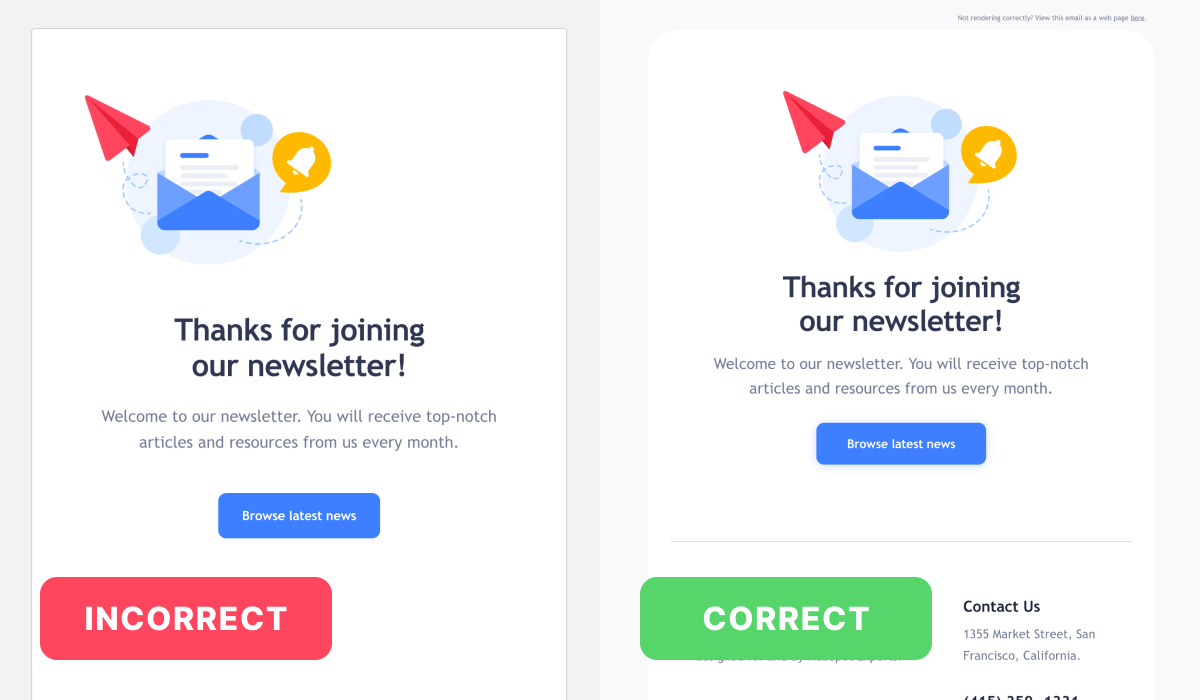
To do so, you just need to try the email templates, and if these are not responsive, or the templates look like below (notice the email box doesn’t have rounded corners, and it has a grey border, unlike the one in the preview), it means this email transfer bug affected your template/templates.
2. Go to Marketing > Files and Templates > Design Tools: Once you identified the problem, you need to go to the Design Tools, and identify the location of the email templates. These are usually in @marketplace > inboundelements > Elements > Elements Email Pack, or a similar folder.
3. Update the Templates: You need to click on each of the email templates, and then update them from ‘Basic Email Template‘ to ‘Responsive Email Template‘. Once you do this, all the issues will be fixed automatically.
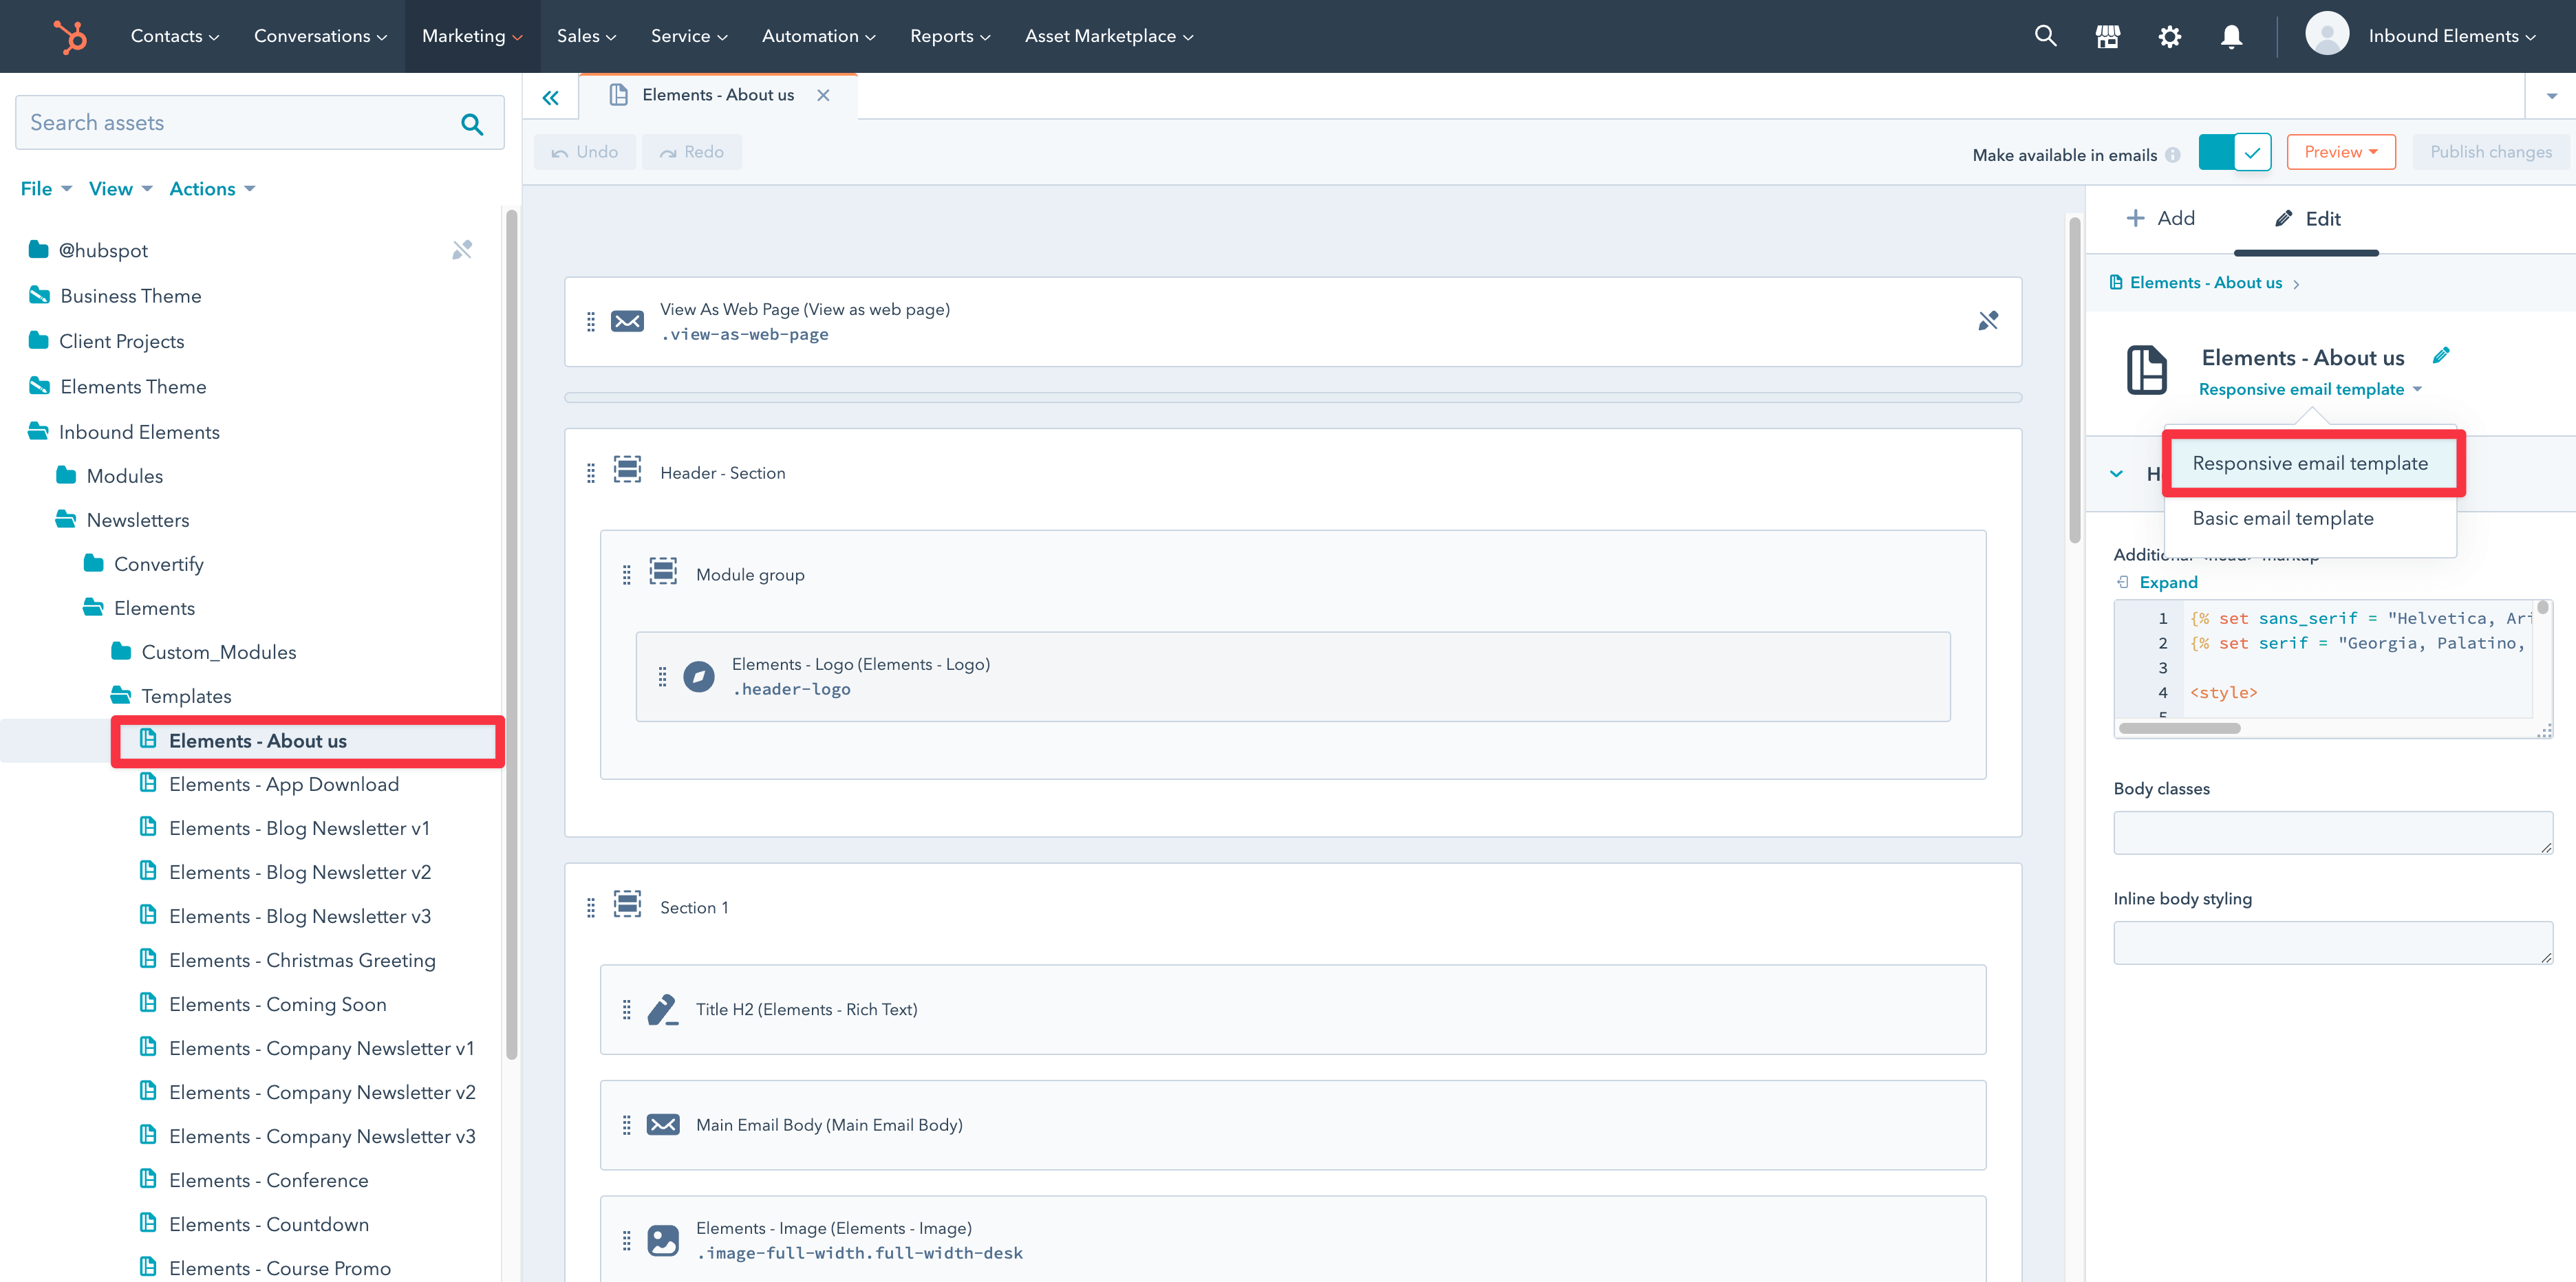
Once you do that, just click ‘Publish changes‘, and then repeat the process with all the emails. After that, all responsive or design issues on the email templates will be fixed automatically.
If you want us to do this for you, we are more than happy to help with that! Please just email us at [email protected], and our team will be happy to assist you.
And that’s all for now. As you start editing your new Elements HubSpot email templates, you will notice it’s super easy and simple to customize them.
However, if you ever have any questions about the templates, find an issue that you need help with, or just want to reach out to say hi, feel free to send us an email at [email protected], our team will be ready to help you.
On the other hand, if you are looking for advanced help with HubSpot development for your company, feel free to reach out to our team of HubSpot Experts.