If you are reading this, it means you had purchased one of the themes from Inbound Elements, so first of all: thanks for your purchase. In this document, we will explain all the basics so you can start using your new Elements HubSpot theme.
Please keep in mind that we have 4 variations of the Elements theme, which are the following:
All of these are based on the same core Elements foundation, so while the screenshots for this documentation will be focused on Elements HubSpot Theme, it will apply to all of them.

Let’s get started with the basics. Once you successfully purchase Elements HubSpot theme from the HubSpot marketplace, you will arrive to a confirmation screen, and after a few minutes (it can take up to 5 minutes for the theme installation to be completed), you should be able to find your new theme on the Design Tools.
You can confirm this by going to Marketing > Files and Templates > Design Tools. Once here, you should see something like this:
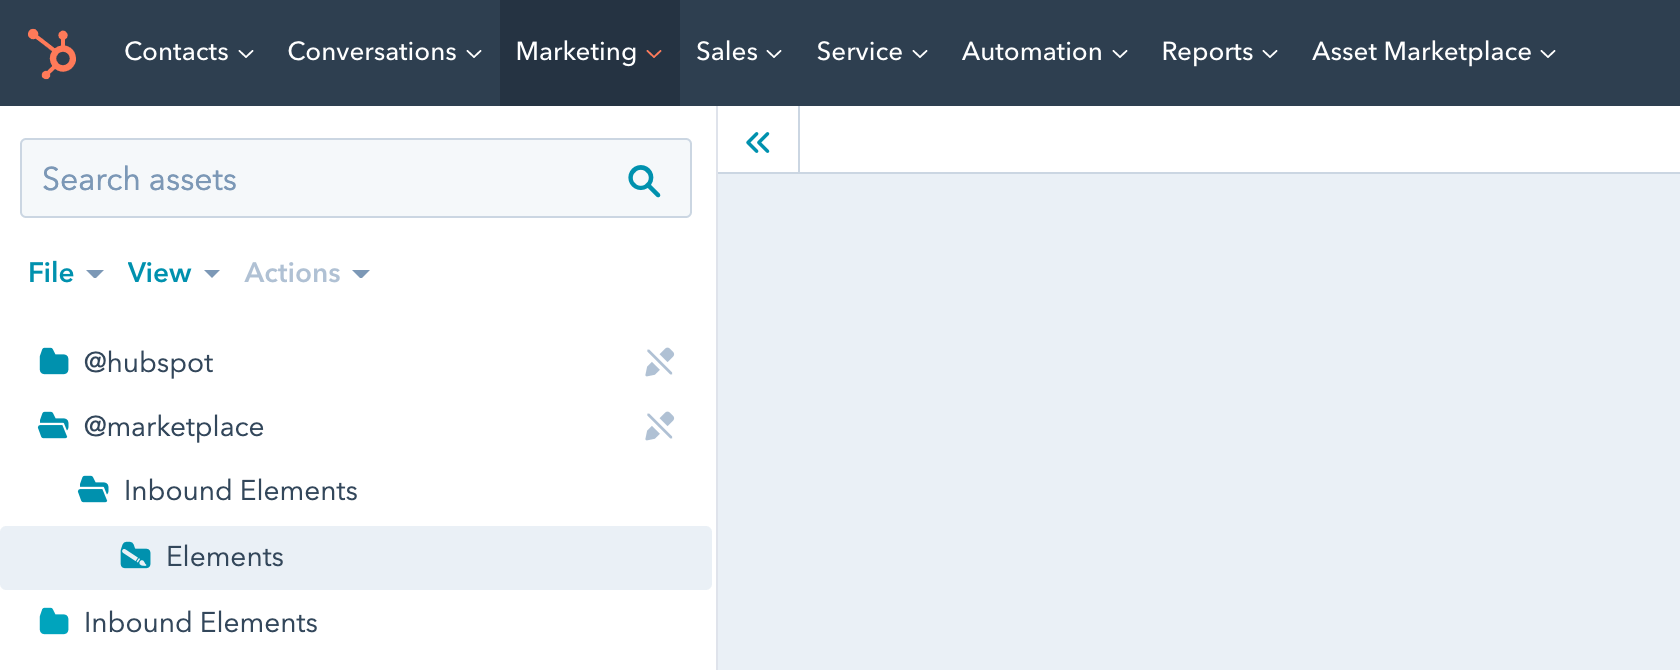
If you see the theme as you are seeing it above (note the name may vary, depending on the version of Elements that you purchased), congratulations, the theme has successfully installed on your HubSpot dashboard.
In rare cases, due to an unusual bug on the HubSpot marketplace, your theme may not arrive successfully to your account.
If this happens to you, no worries, you just need to go to Asset Marketplace > Purchased, and then select Elements HubSpot theme, click Actions, and then Uninstall.
It will take a few minutes, and after that, you need to click Actions again, and then Reinstall.
This will fix any issues that could have occurred. While this is a very unusual issue, in case it happens to you, the solution is simple and easy.
Once your new HubSpot theme is ready, it’s moment to create a Child Theme.
While this is not a required step, it is highly recommended to create a child theme of the Elements HubSpot theme before start using it.
This is because a Child Theme allows you to customize the theme files if required, without affecting the updates. For example, let’s say your HubSpot Developer tweaks a module to have a particular functionality you need, but then, the HubSpot theme updates and you lose the tweaks previous applied.
With a Child theme, this doesn’t happen, as all the settings applied overwrite the original theme, but still allow updates to be applied.

In order to do it, you just need to go to Marketing > Files and Templates > Design Tools, and then select the Inbound Elements folder from the @marketplace folder. Once there, you just need to do a Right click, and then click Create child theme.
After that, just wait a few minutes for the Child Theme creation to be completed, and you’re done. From this point on, please just ensure that if you make changes to the theme, always do them on the child version.
If you want more advanced information about the functionality of Child Themes, please feel free to check the HubSpot documentation here.
3.1 – Will my website get affected if I purchase/install the Elements theme?
No. Purchasing the Elements HubSpot theme will only install the theme files on your HubSpot account, however, it won’t affect in any way your current website.
Once you purchase it, you will be able to start creating new page by page using the new theme, and you will be able to push it live whenever you are ready, so there is nothing to worry about.
3.2 – Can I use Elements HubSpot Theme in more than one site?
The Elements license lets you use the Elements HubSpot Theme on as many sites as you want, within the same company or project.
This means that if your company has 5 websites, you can use Elements theme on all of them, as it’s already included in your license.
However, if you are creating websites for another companies (i.e. if you are an agency or a freelancer), you should ask your client to purchase the template so they can have it licensed to receive support and updates.
Once your child theme of one the Elements HubSpot themes is ready, it’s time to start customizing it to match your company brand styling.
In order to do this, you can go to Marketing > Website > Website Pages, and then click Create > Website page.
This will show you the Choose a theme screen, where you can choose your Elements Child Theme, and select any page you want to get started with (for example, the Homepage).
Once you are editing the Homepage (or any other page), it will look something like this:
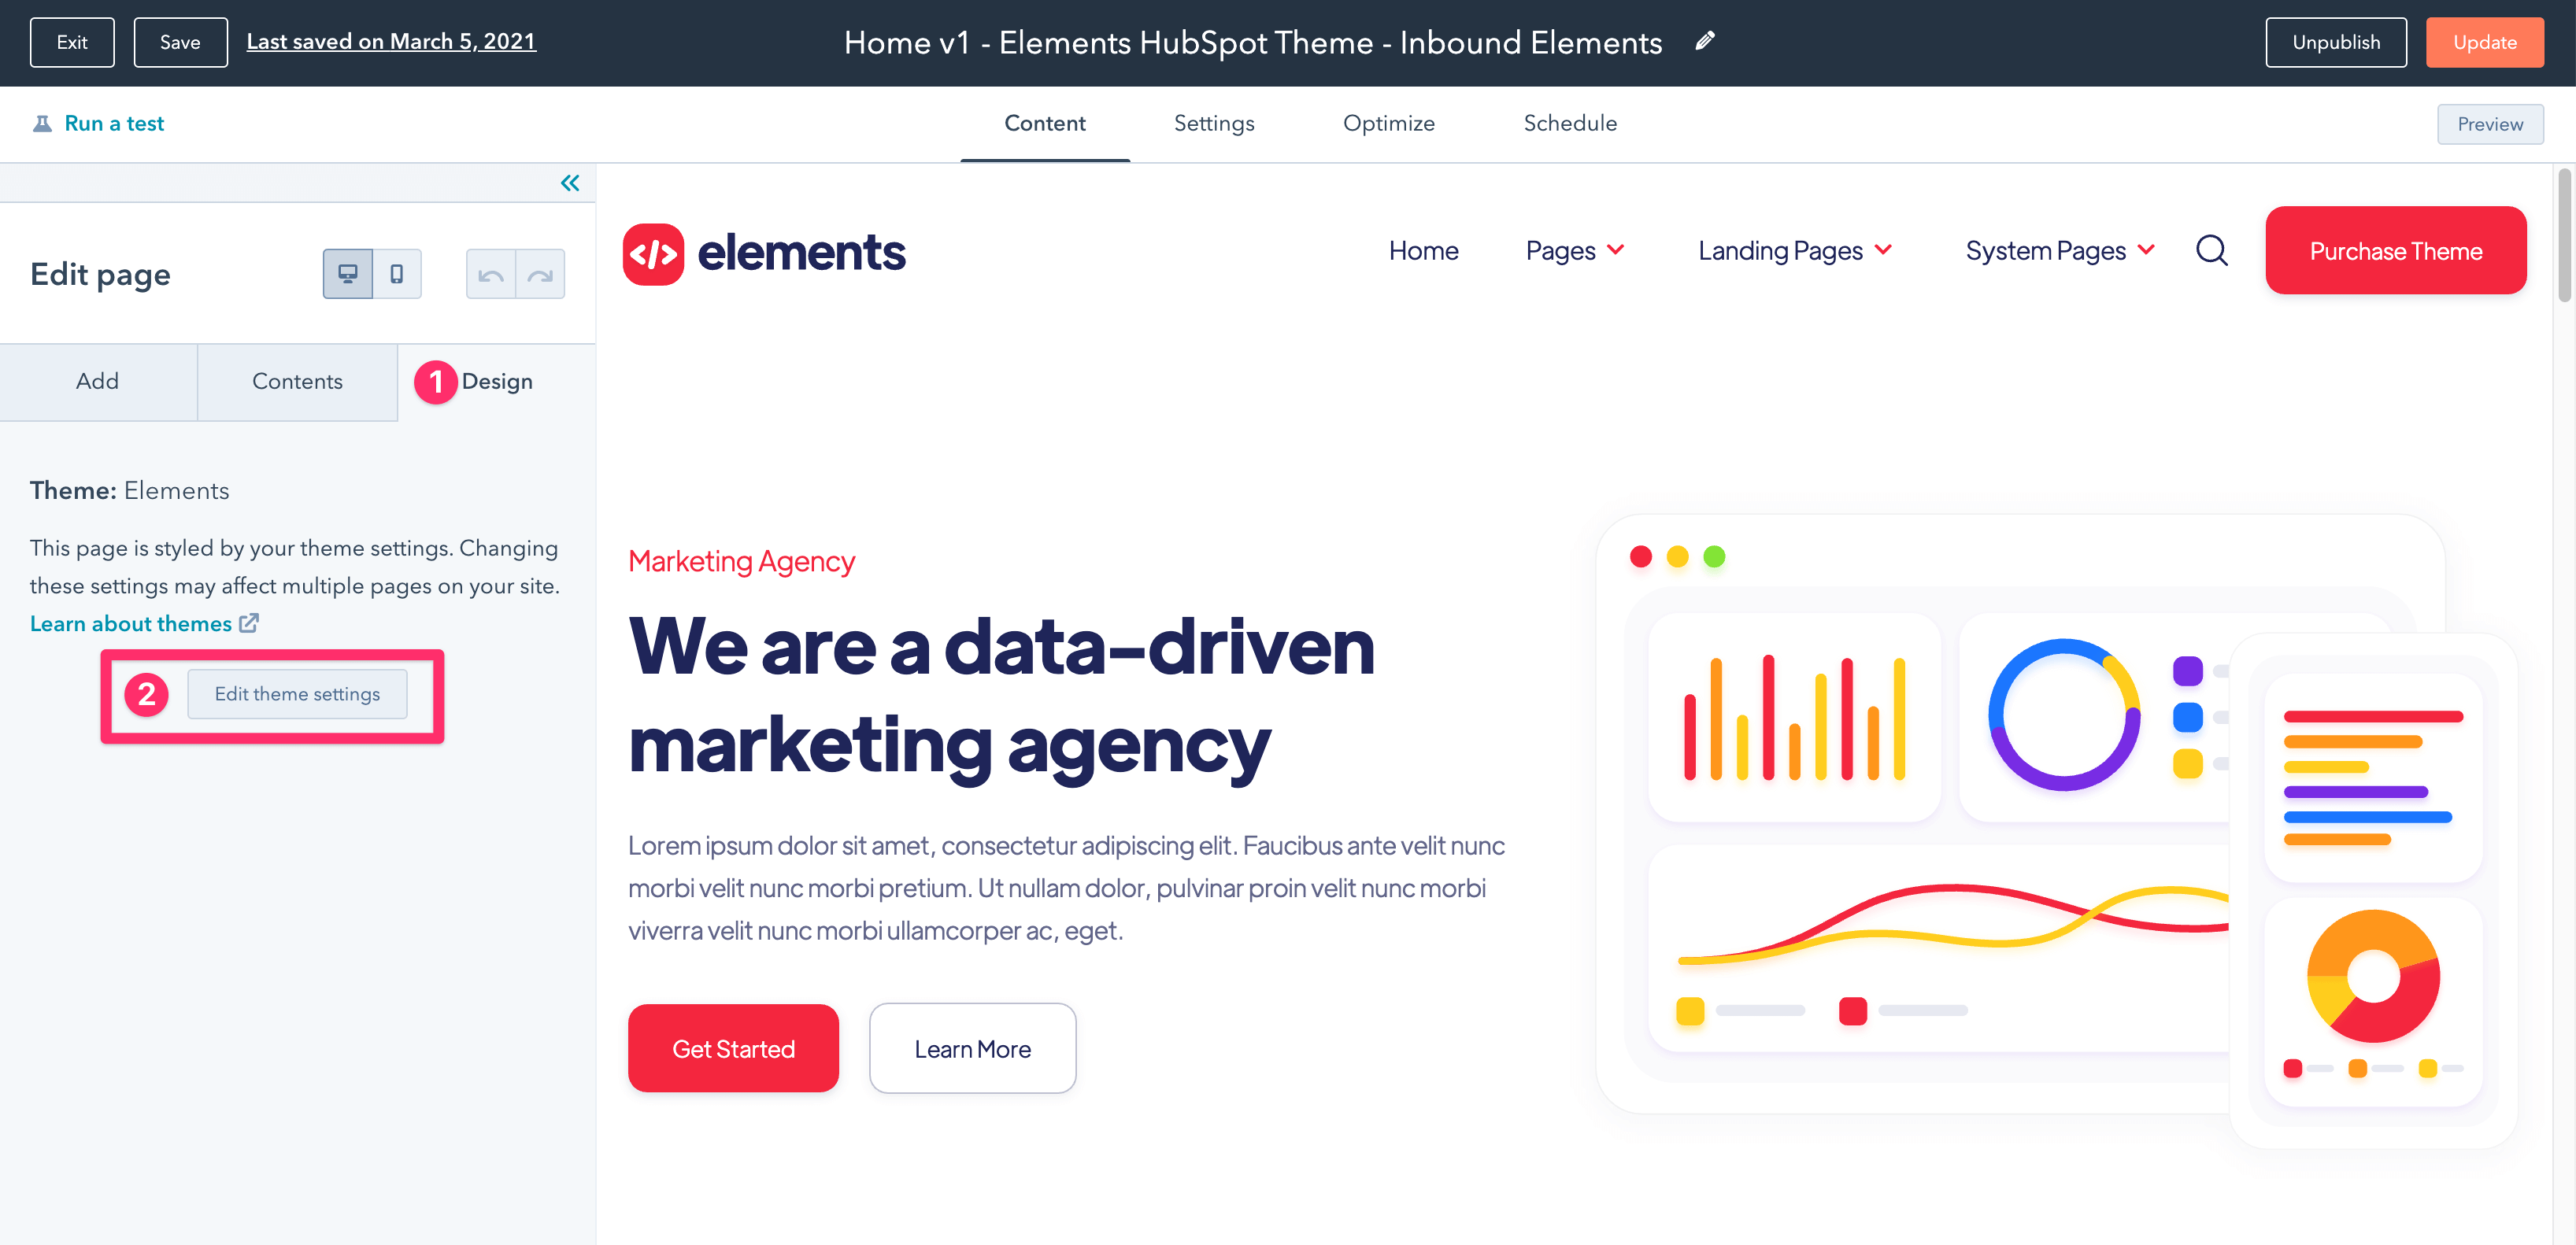
Once you are there, before you start editing the Homepage itself, let’s start with the global theme customization.
Click Design > Edit theme settings, and you will be redirected to the Theme settings screen, which looks like this:
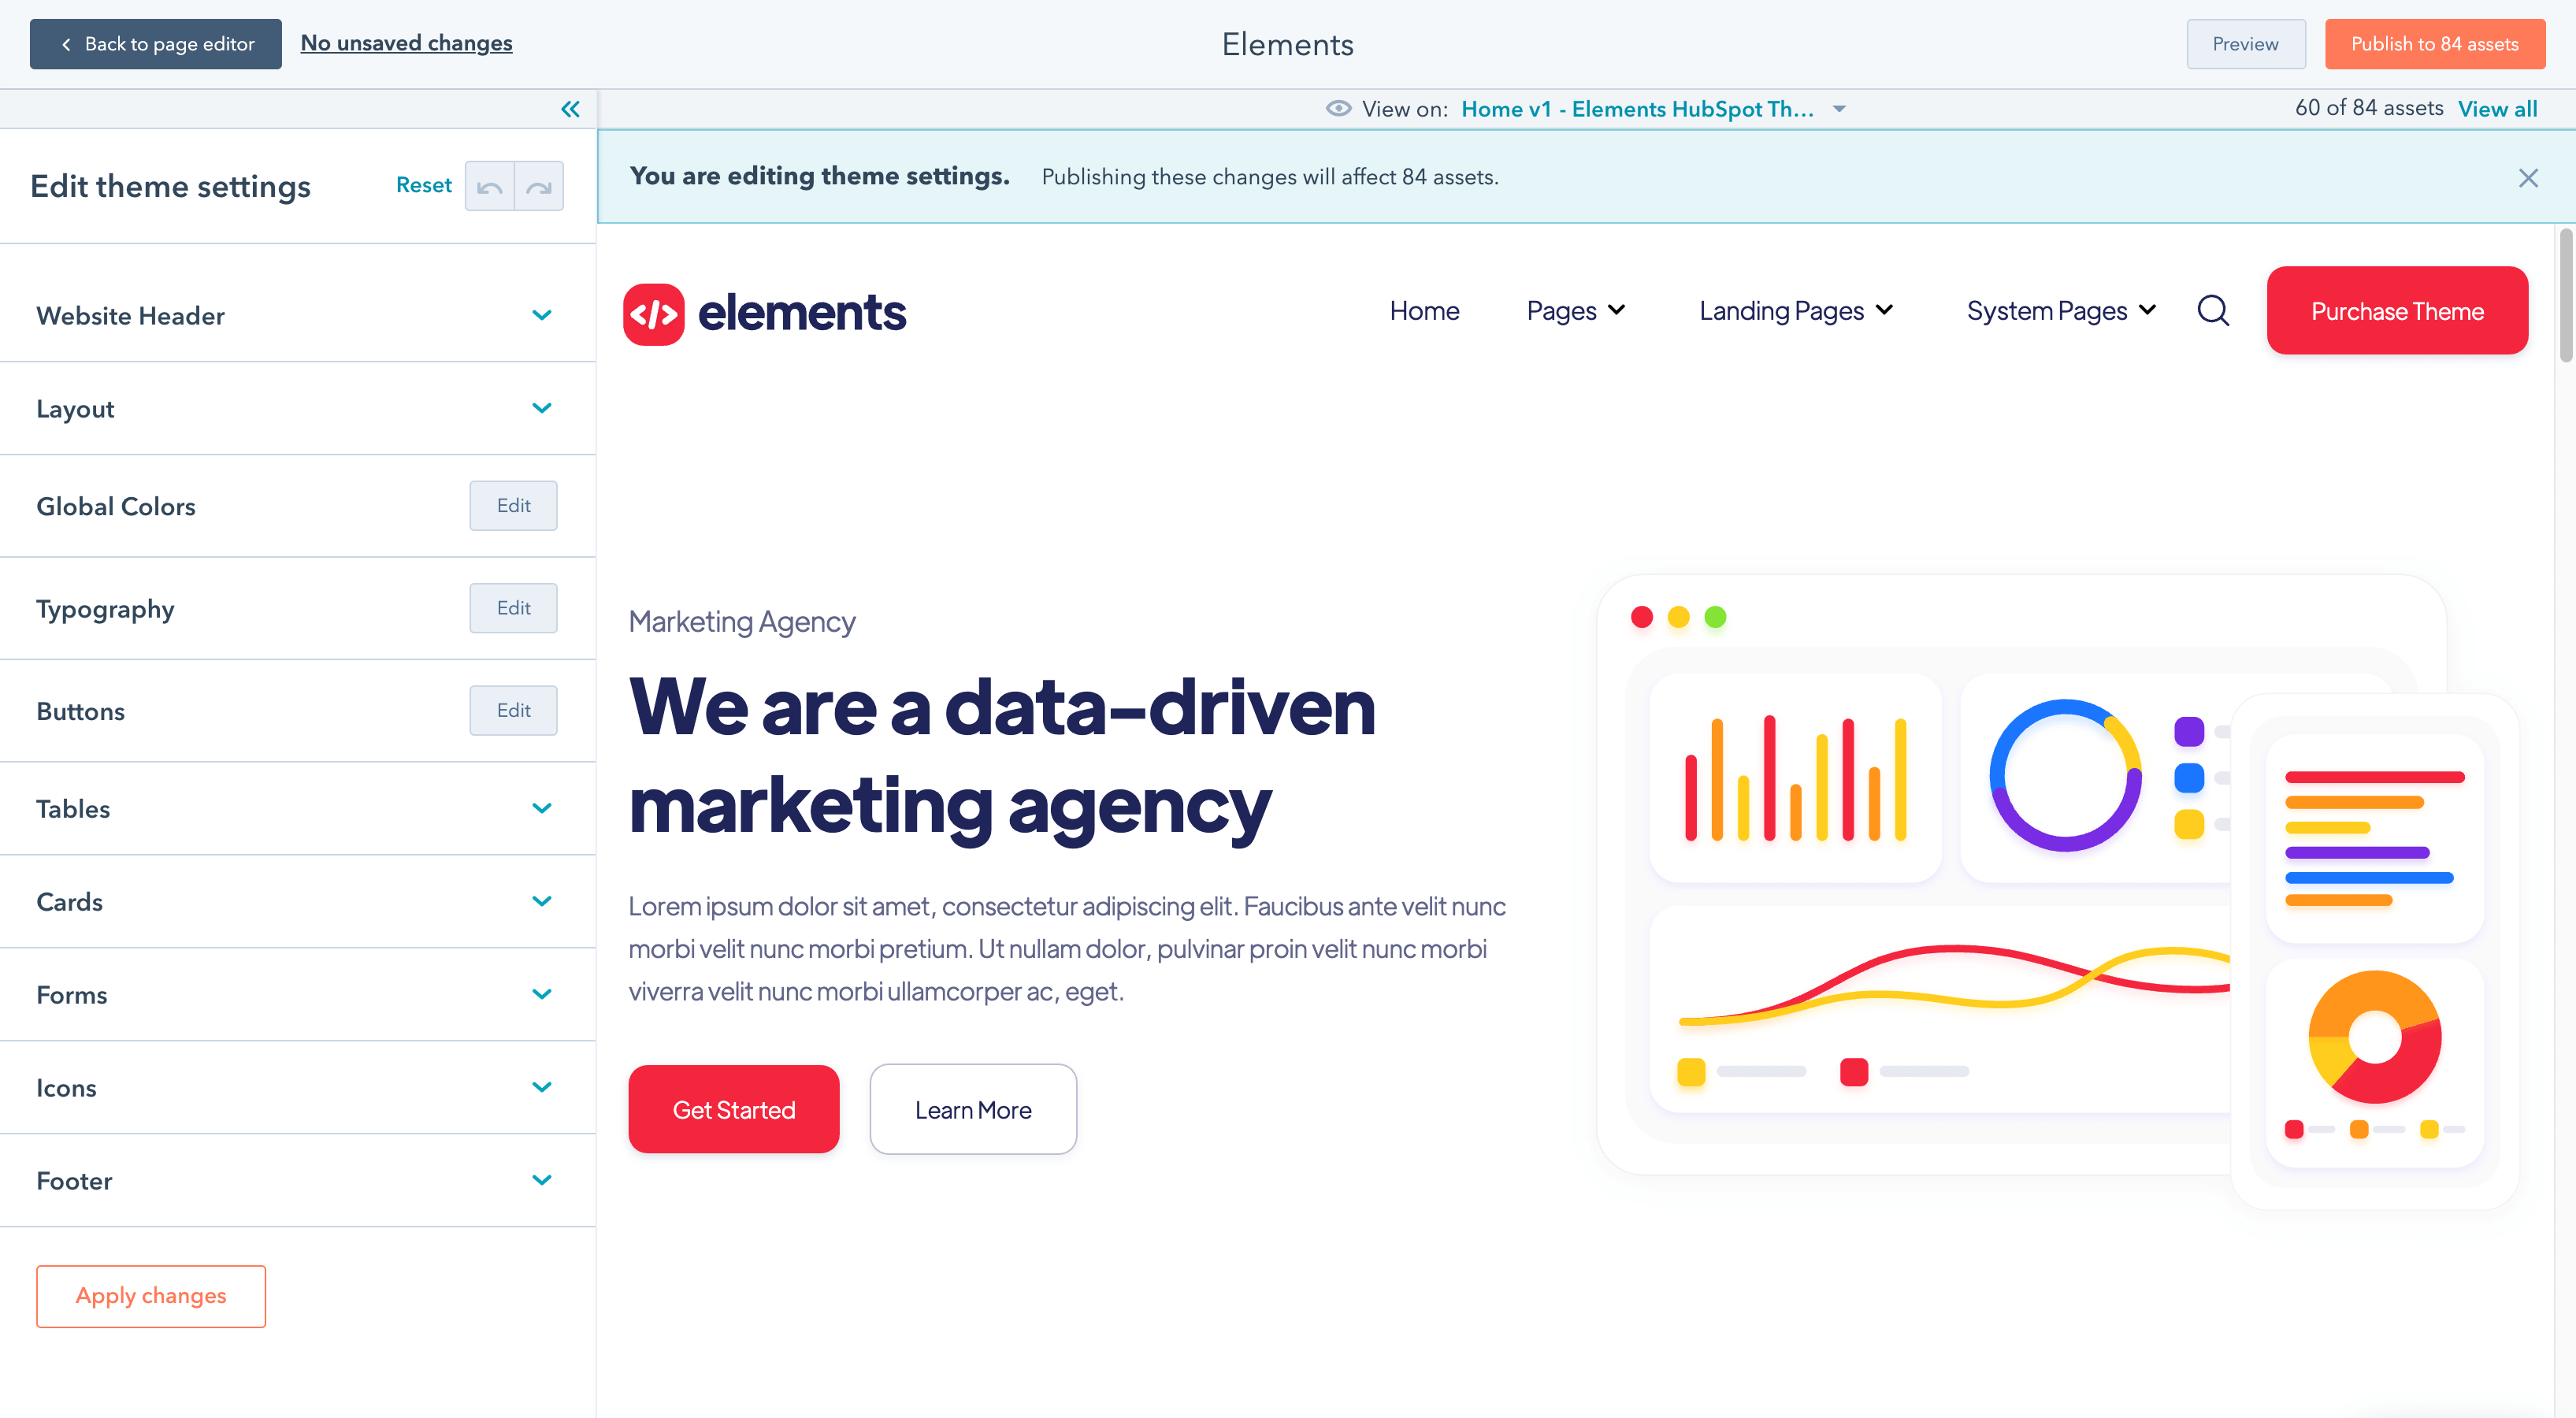
In this screen you will have access to all global design customization settings of Elements HubSpot theme. You will be able to select any of the sections, and start editing right away.
We will cover the 3 main customization options (Colors, Typography and Buttons), however, feel free to dive into all the more advanced ones such as Cards, Layout, etc.
If you click Global Colors in the customization screen, you will be redirected to another screen just like this:
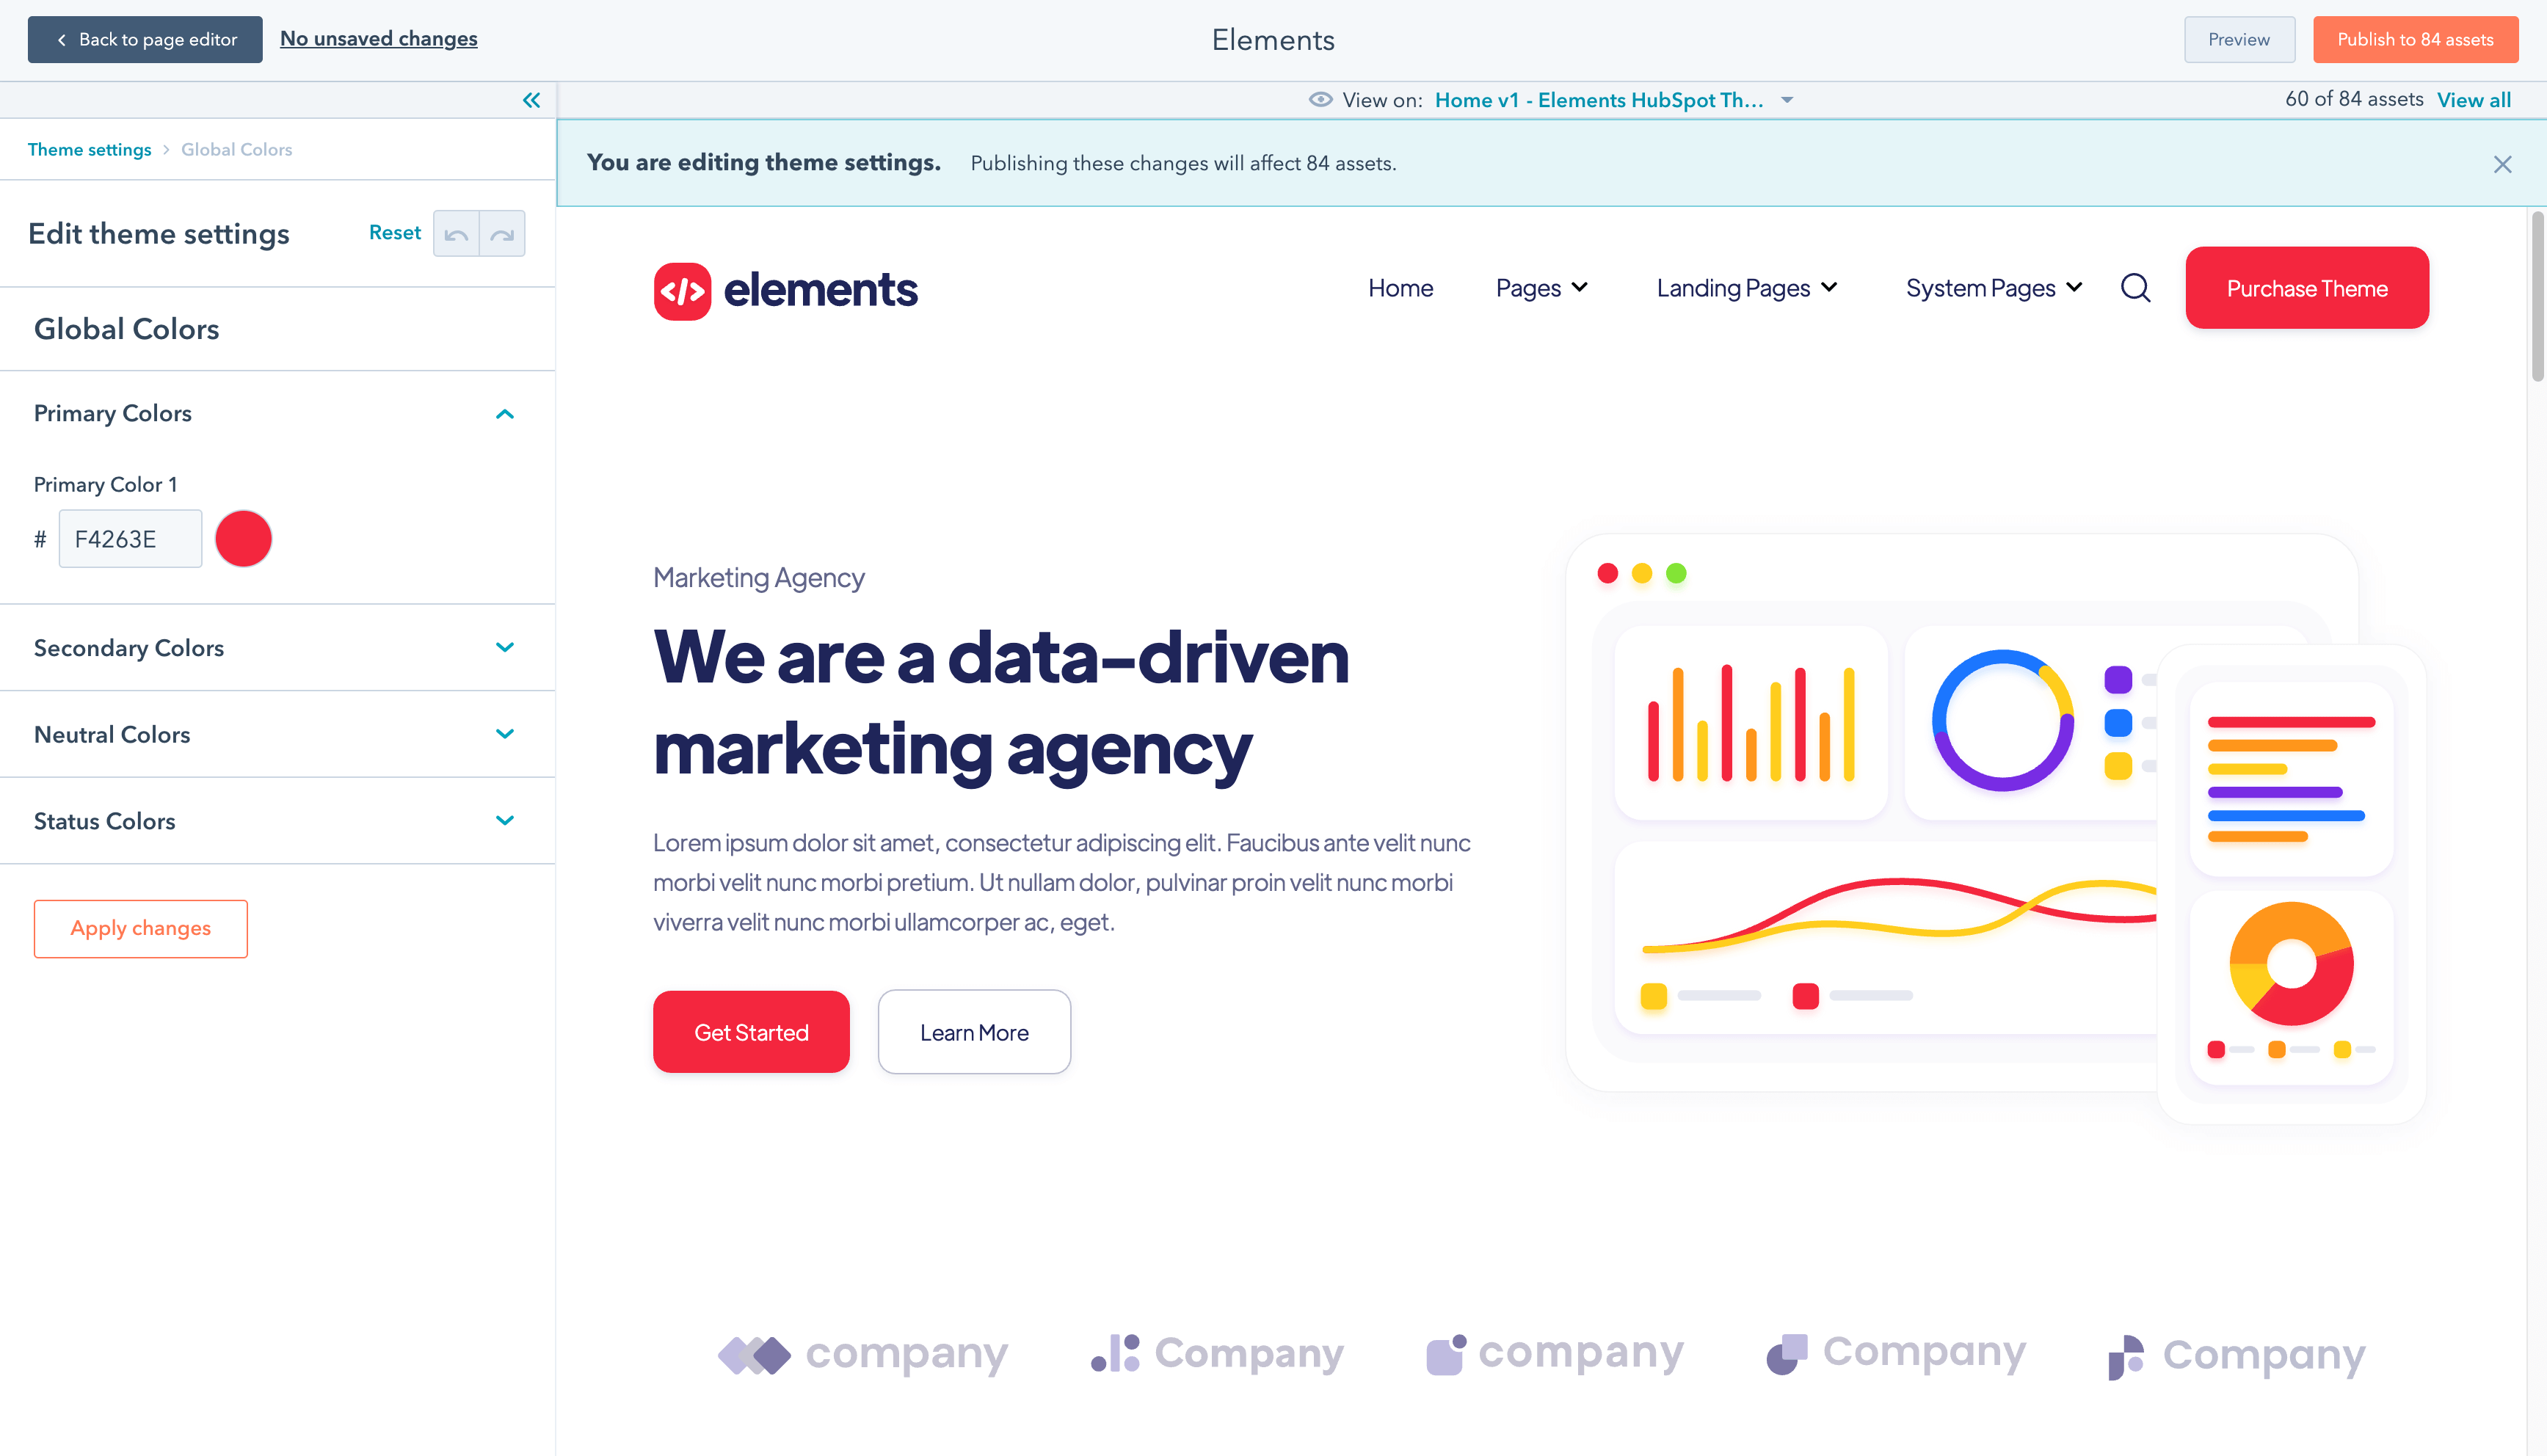
You will see the colors divided into 4 different areas. While the main ones are just Primary and Secondary colors, we highly recommend you to update all of them to colors that match your brand style guide, so even the smallest color detail matches your company brand.
Just for reference, the 3 color categories are the following:
Once you finish updating the colors, just click Apply changes.
Let’s change the typography now. Just as with the Colors, you just need to click Edit on the Typography option, and you will arrive this screen:
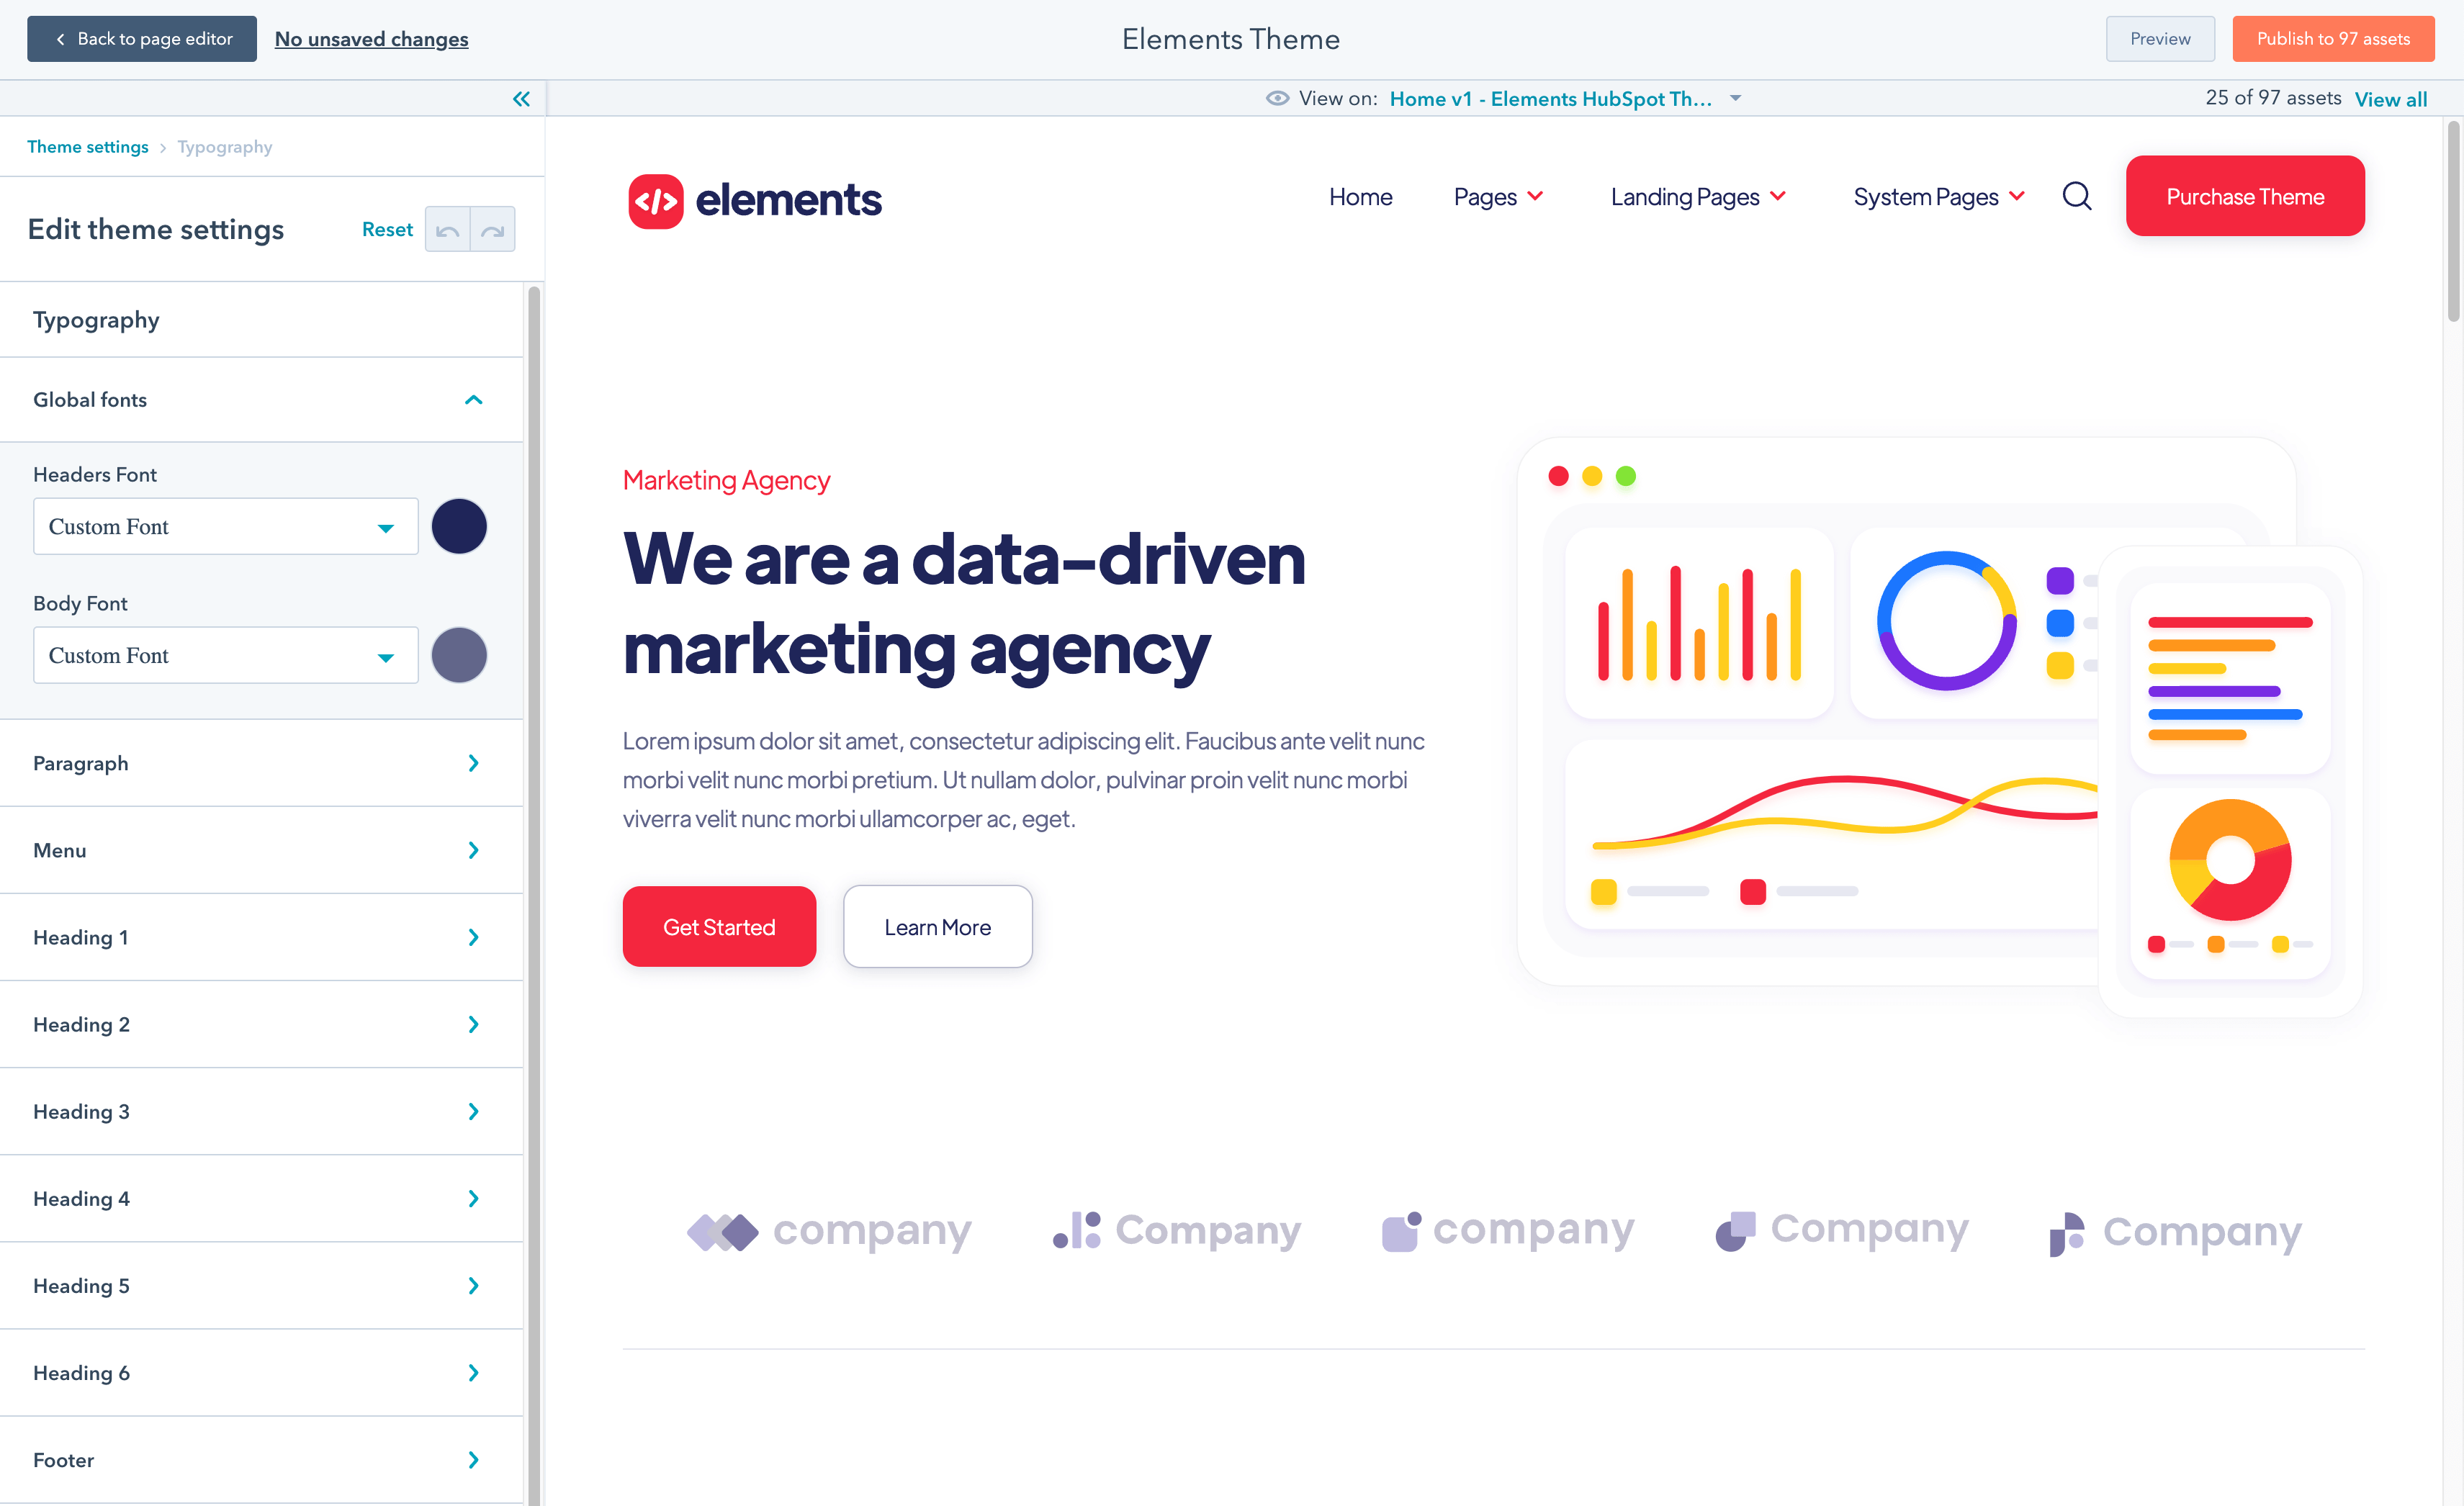
Once you arrive here, you will notice the typography has 2 main different customization options, which are the following:
You will notice that you can easily choose between 100s of Font families, and this is because the Elements series HubSpot themes are integrated natively with Google Fonts, so you can use any Google font without any extra work. Just choose your preferred font, click Apply changes, and you are on the other side.
But, what happens if you want to use a custom font that is not available in Google Fonts and is unique to your brand? We got you covered too.
You just need to go to Marketing > Files and Templates > Design Tools. Once you are in there, it is now matter of finding the CSS file that loads the custom typography. You can do that by going to the following route:
@marketplace > inboundelementscom > Elements Theme (Or your child theme, if you are using one) > css > elements > _typography.css
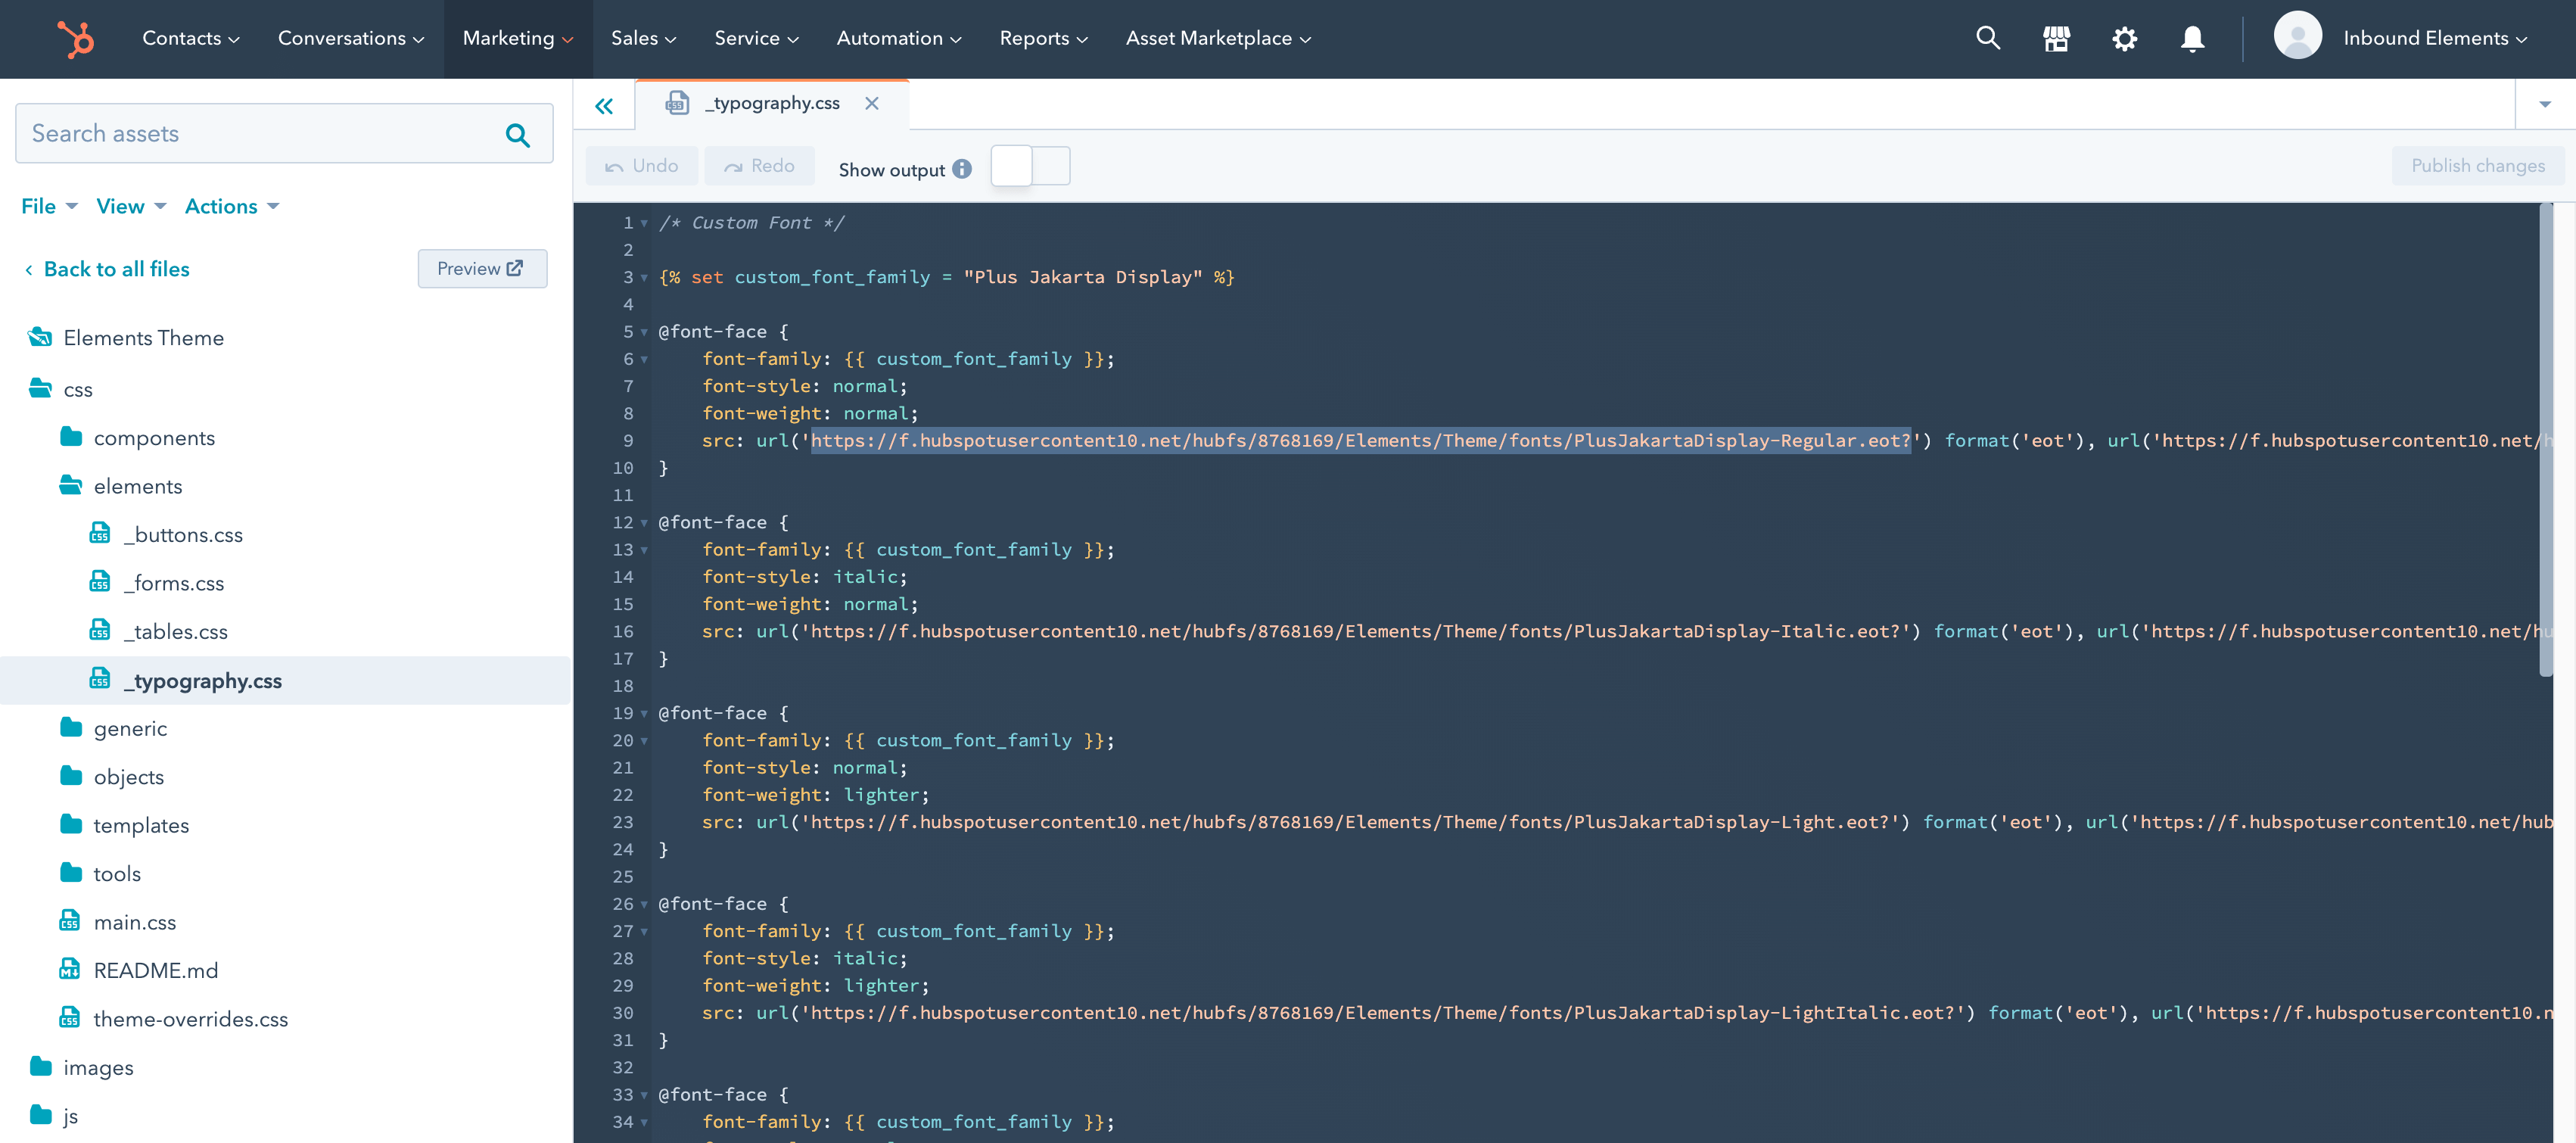
Once you are in there, you need to replace the font URLs to the selected fonts. If you are using a third party service like Typekit or Fonts.com, they will already provide you with the server URL where the font is located.
On the other side, if you are using a custom font you purchased and you have all the font files (i.e. EOT, WOFF, etc), you should upload it to HubSpot in Marketing > Files and Templates > Files, so you can link it back from here.
Please keep in mind that in order to make the font load properly on all browsers, you should add at least the following formats: EOT, WOFF, TTF.
Also, if you want to add more font weights or styles, you can easily just copy and paste one of the @font-face font callings, and add any extra fonts you would like to add.
Once you are done with updating the typography, let’s change your theme buttons.
Open the Buttons tab, and you will arrive this screen:
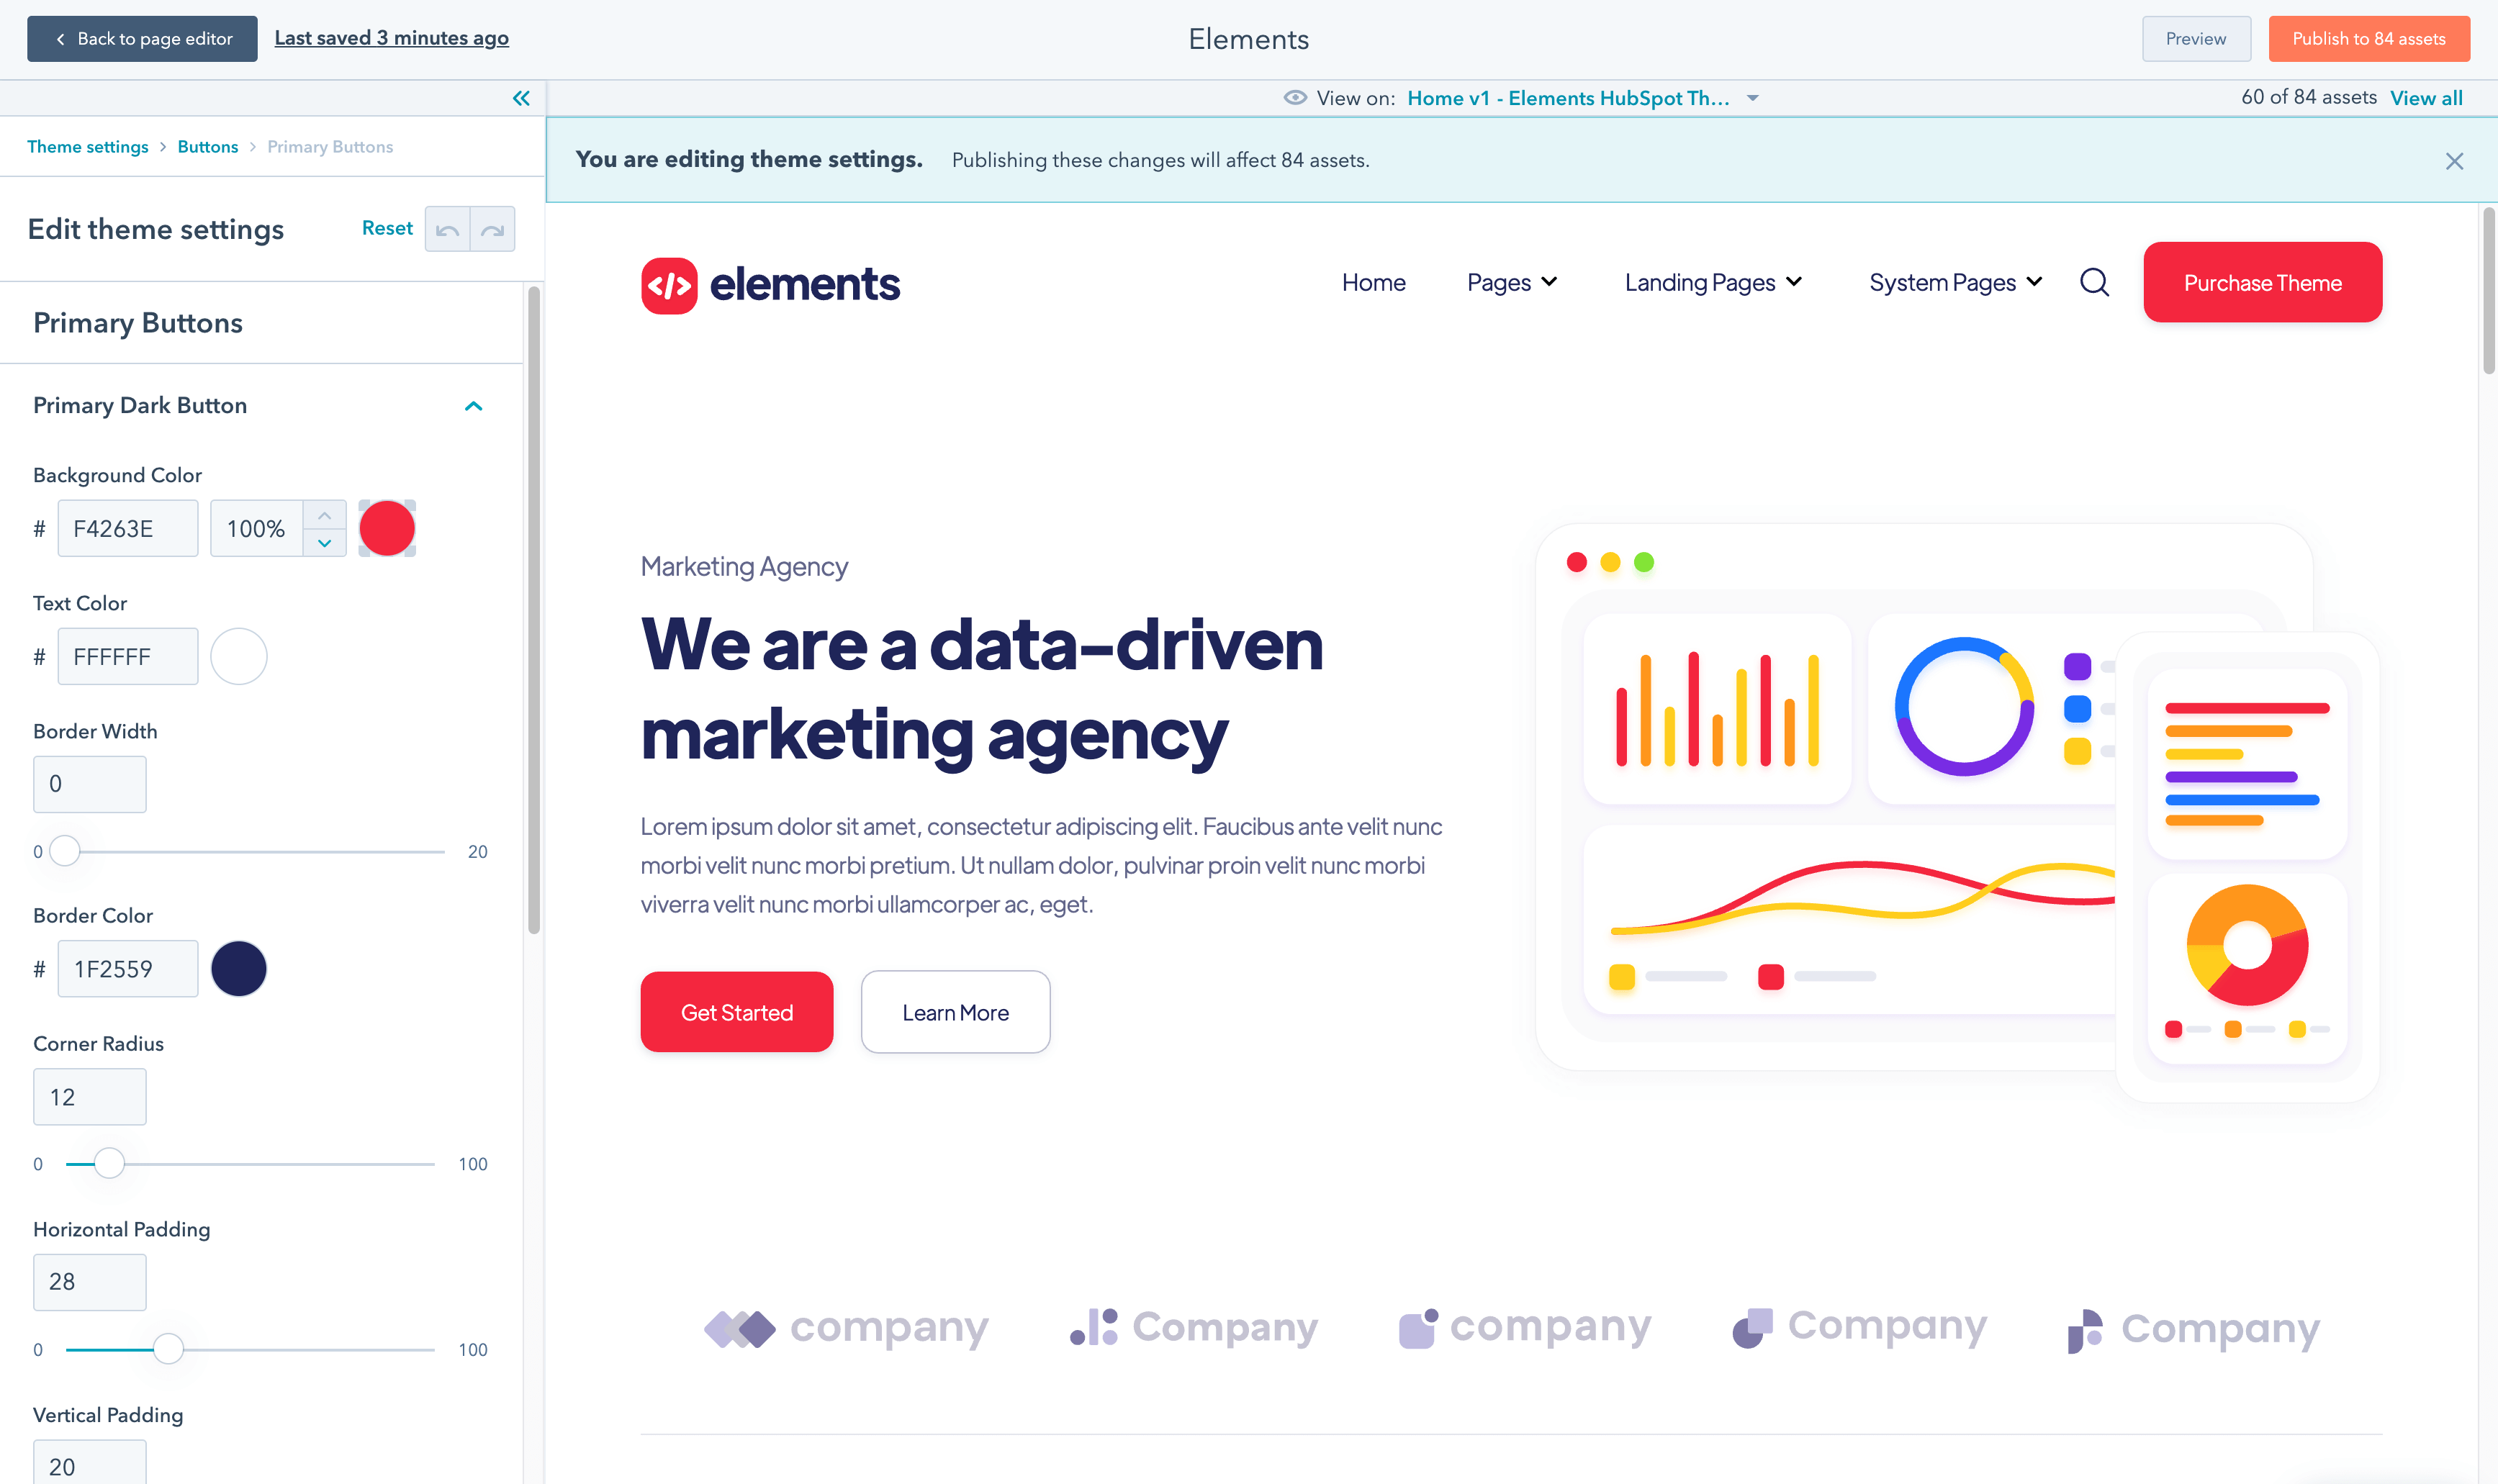
In here you will notice all buttons are divided by types. Please go one by one to change all of these, so all your theme buttons are updated site-wide.
You will also notice that all buttons have a lot of customization options, such as hover color, animations, border radius, padding and more, so you can customize them as much as you want to fit your brand style guide.
Once you are done with the buttons, you will finish customizing all the basics of the Elements HubSpot theme. However, there are more customization options such as layout width and more, so feel free to keep exploring and customizing as much as you want.
As a final tip, it’s important to mention that even you have all of these customization options as global settings, you also have the option to override these global colors and aesthetics on each individual page. So don’t worry, with Elements HubSpot theme you can have as much flexibility as you want.
The header is one of the most important parts of your website, so let’s continue with it.
First, it’s important to mention that all the Elements HubSpot Themes include a total of 5 headers, so before starting to edit your header, you must select which one you want to use.
Go to any page, then click on Design > Theme Settings, and once you are in there, you will find the ‘Website Header‘ option. Click on it, and you will be able to choose the header style, as well as enable or disable the sticky header functionality.
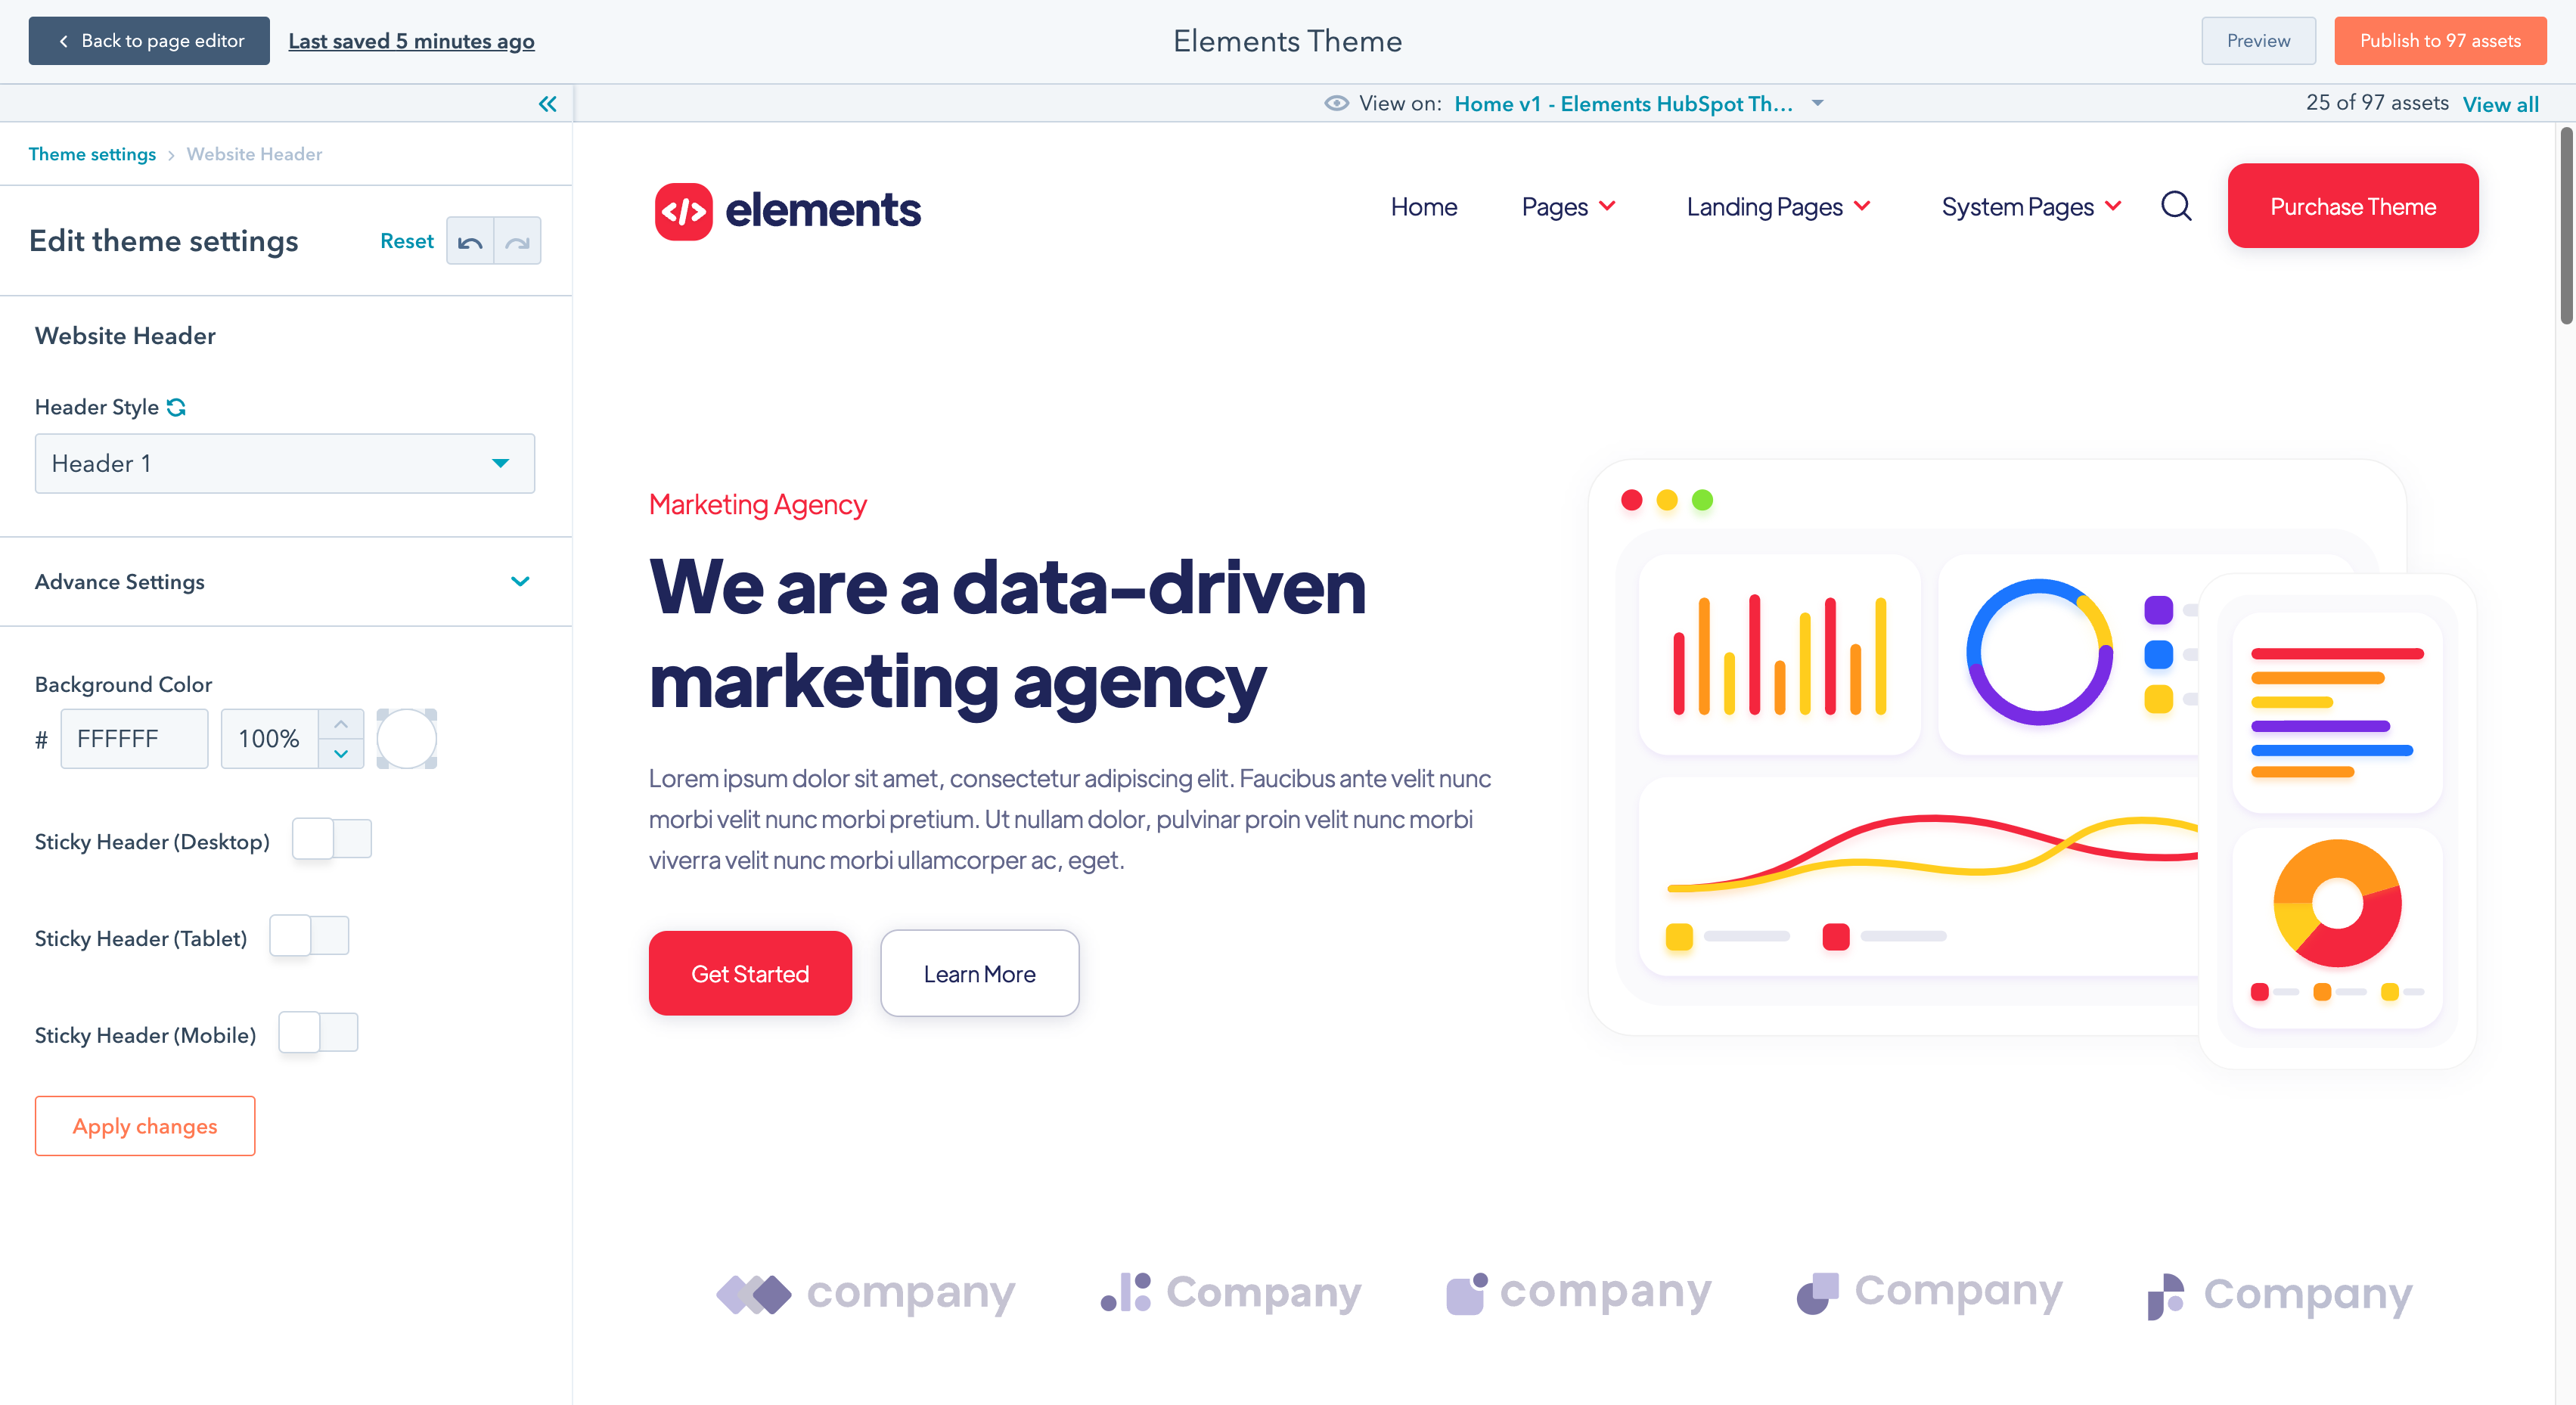
Once you select your preferred Header, you can click Apply changes and then Preview so you can see how it looks like, so you can settle for your favorite.
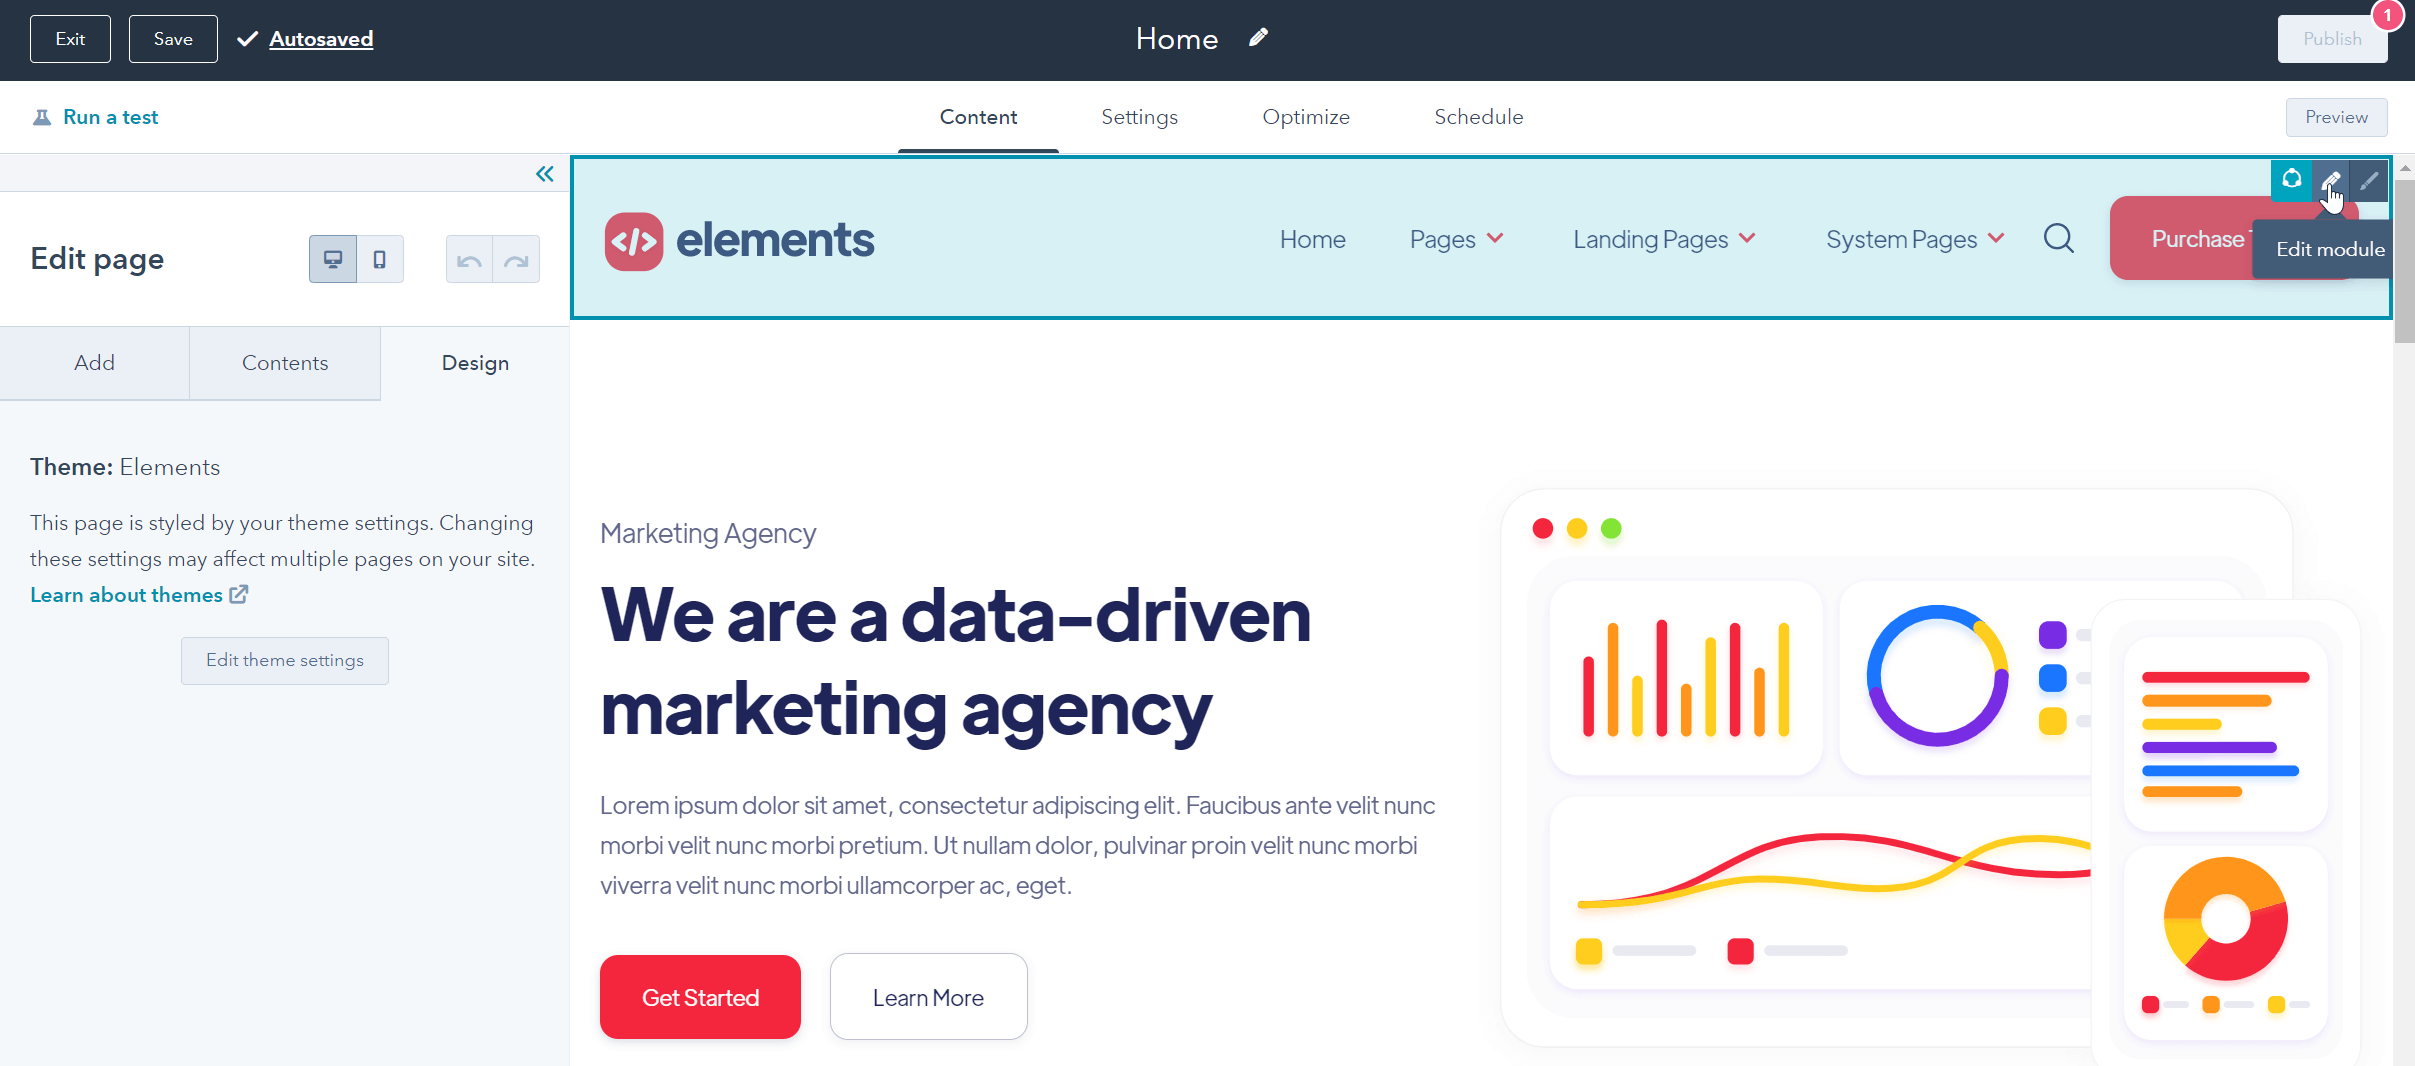
After you selected your favorite Header, it is now time to go ahead and start customizing it with your own logo, menu links, etc. To do this, you need to go ahead and edit any page (i.e. the Homepage), and once you do so, you will see the option to edit the Global Header section, as you can see below:
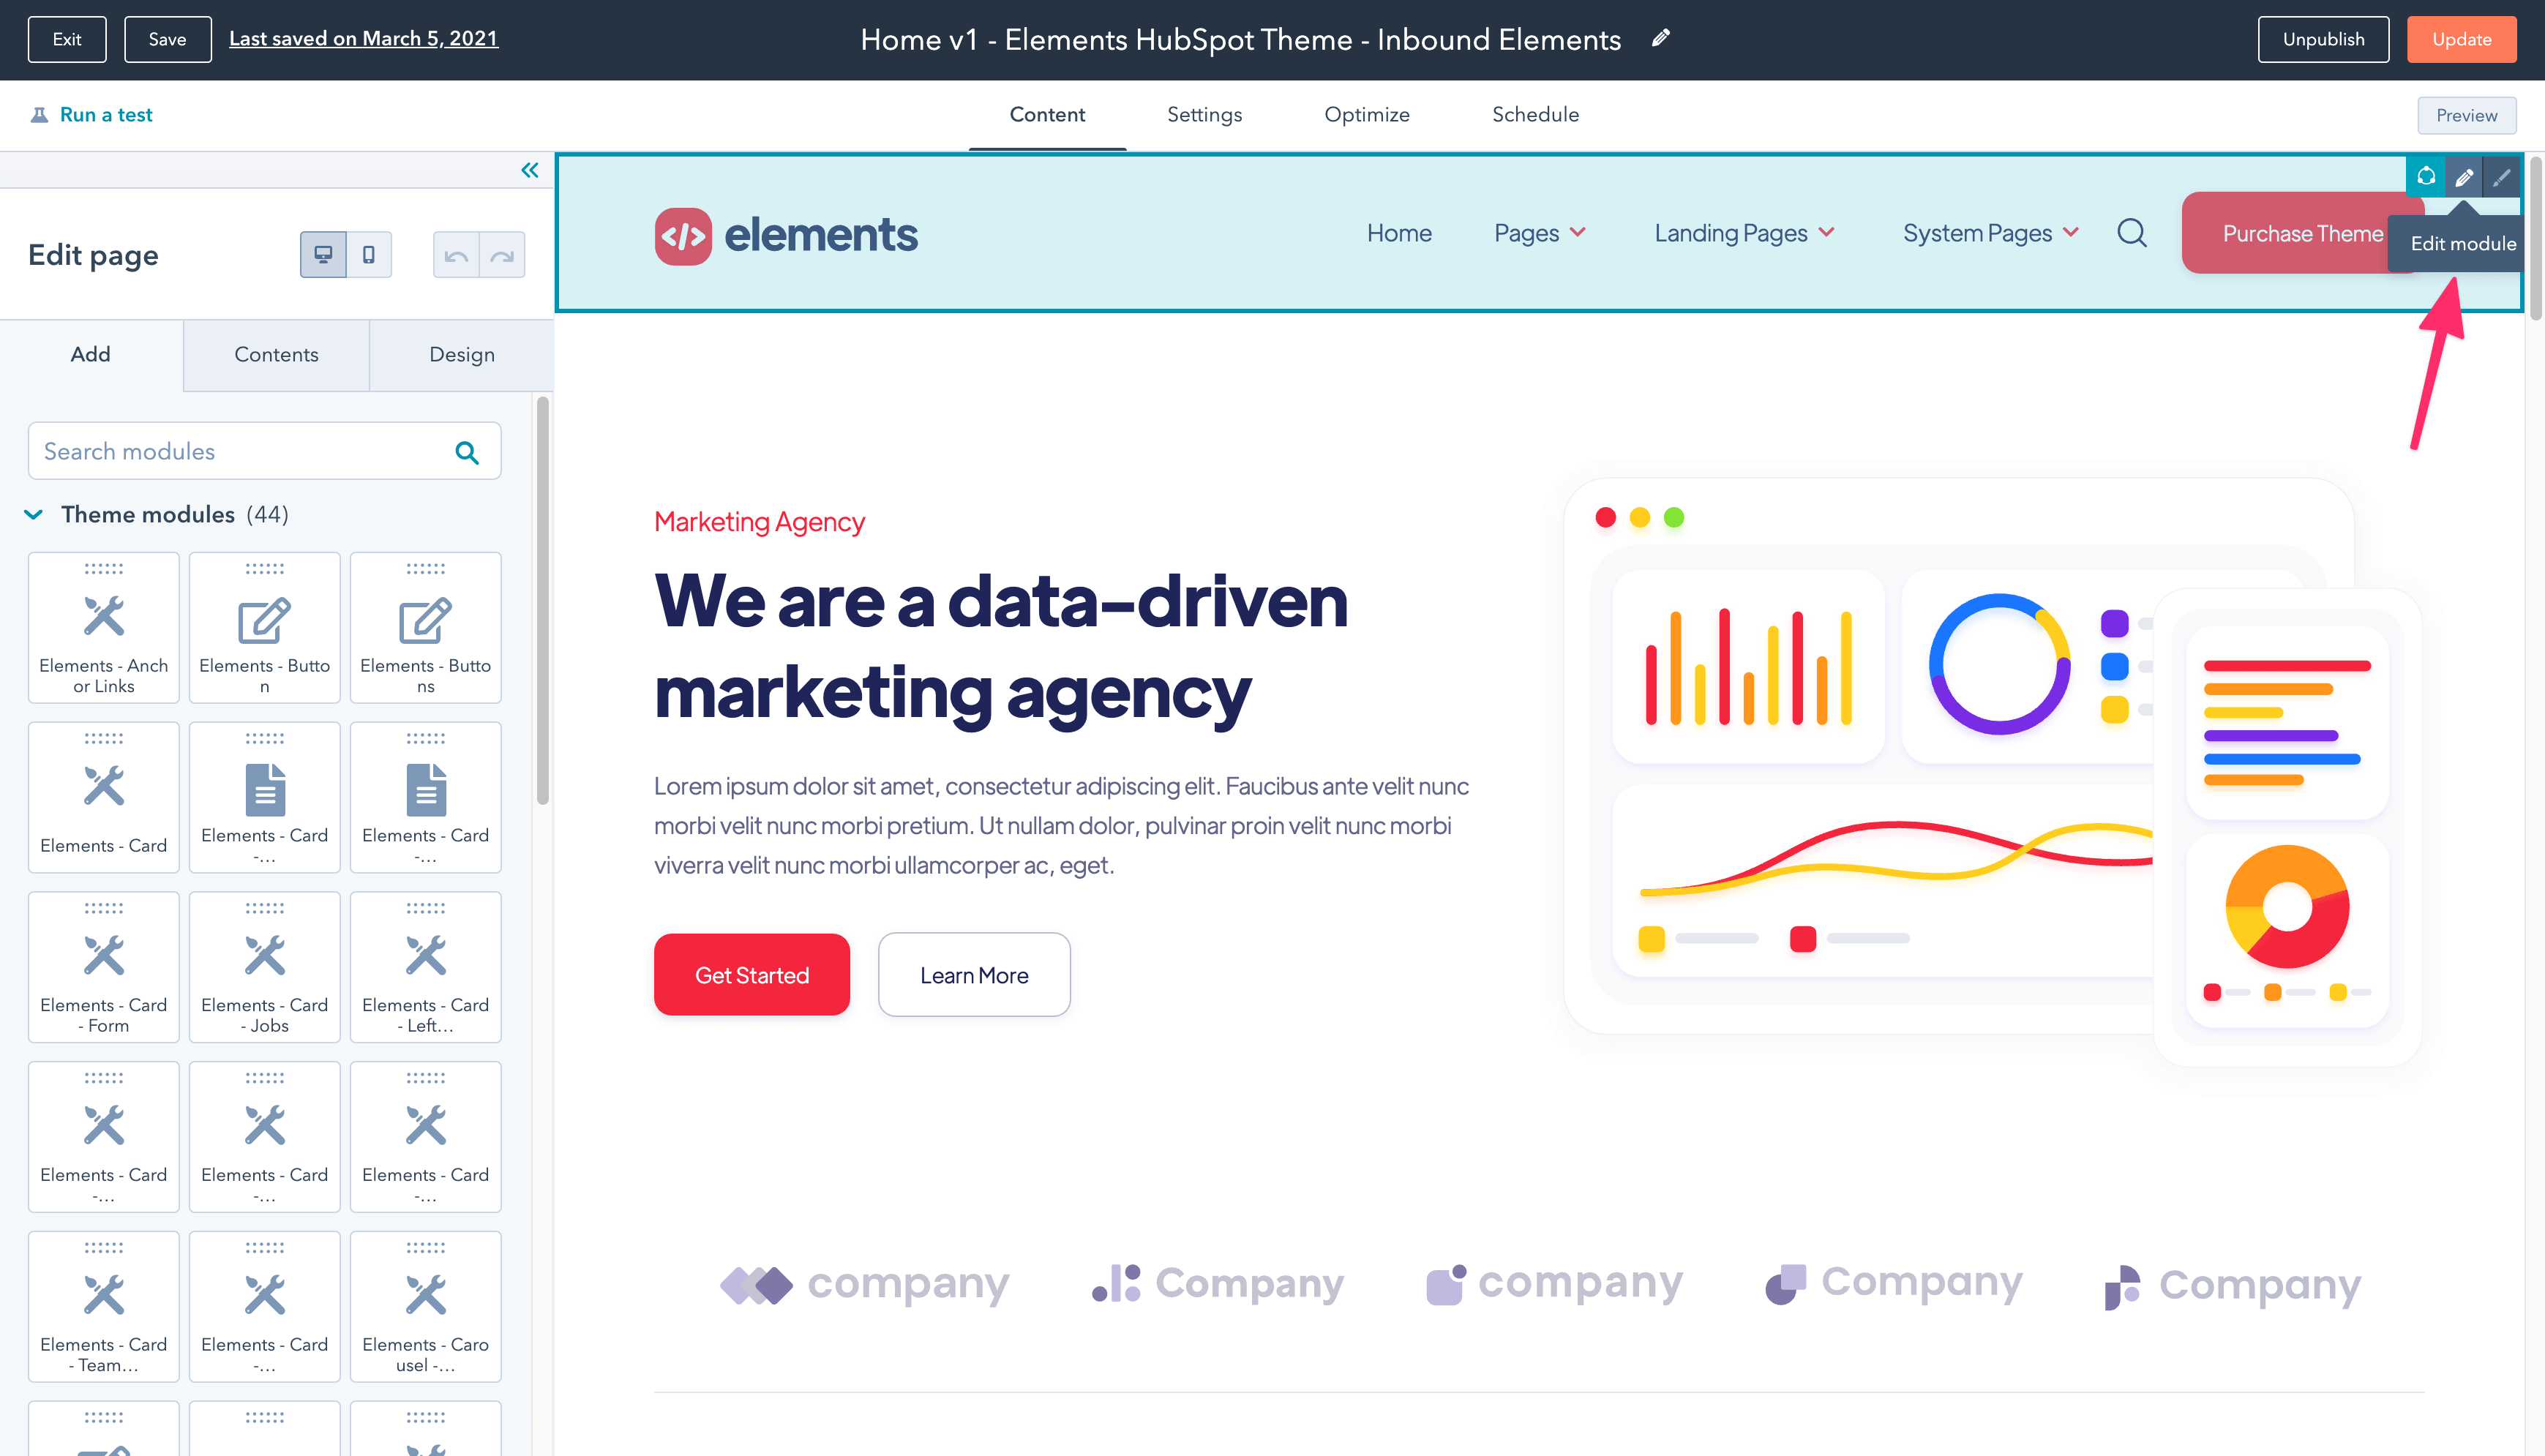
Click “Edit module“, and you will be redirected to the Global Header section, so you can start editing it. Once you arrive, you will see the header is based on modules, and includes the following:
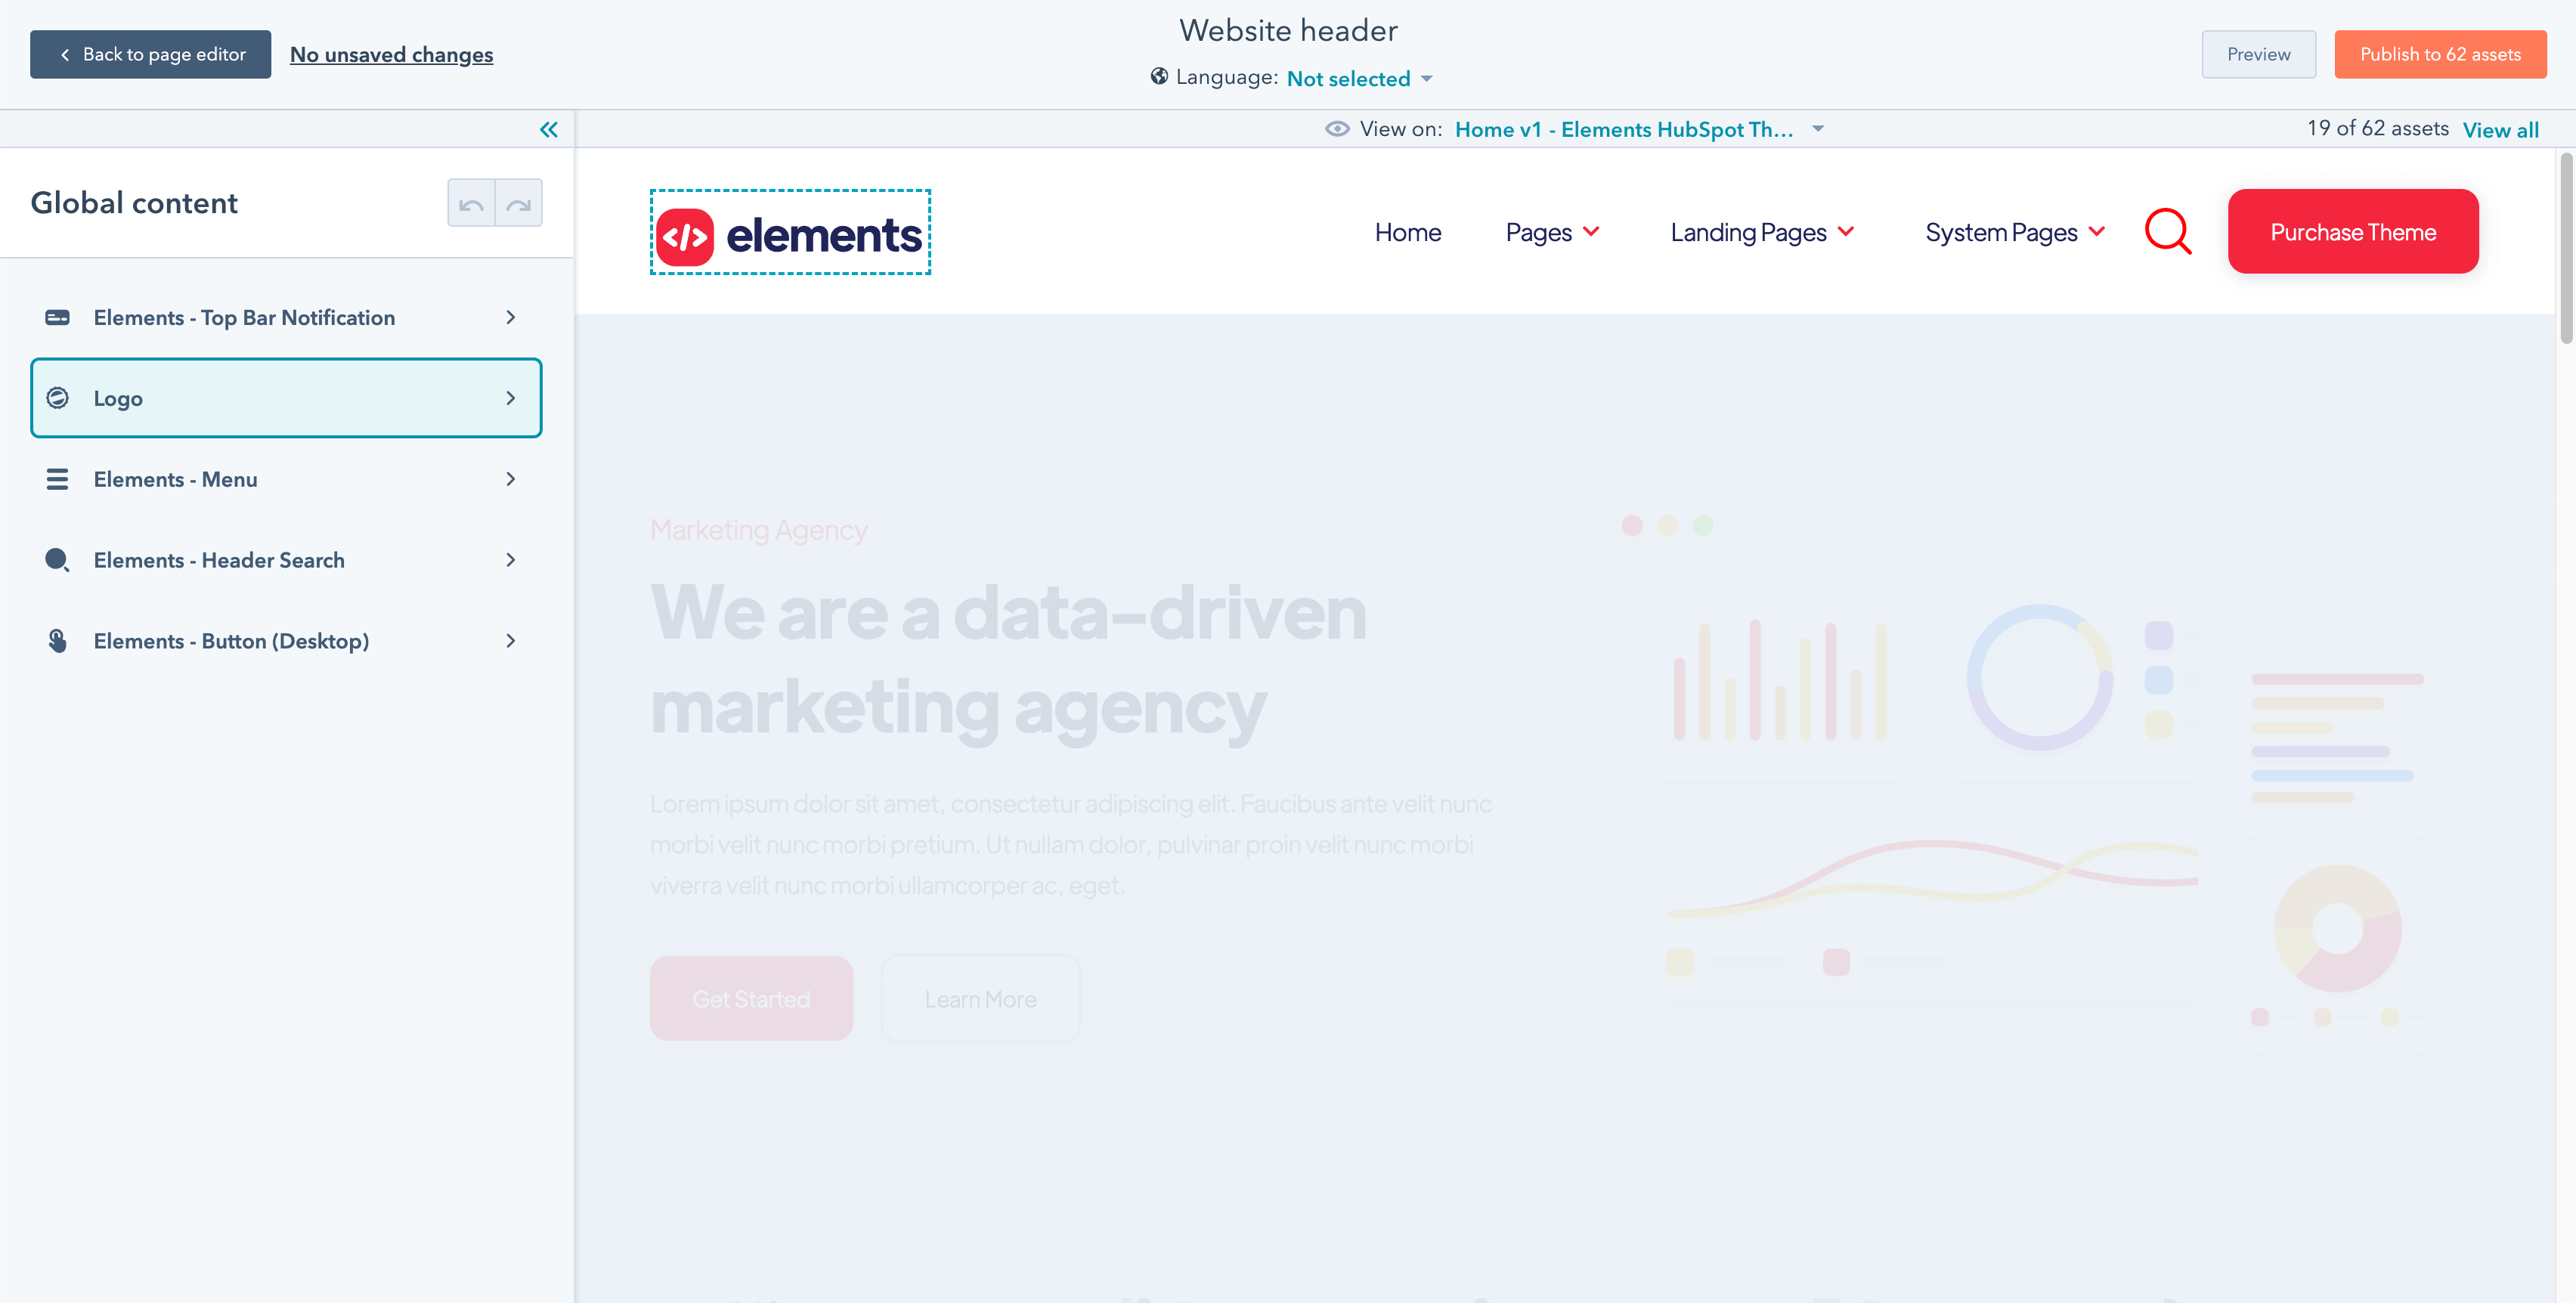
In order to edit any of these modules, you just need to click on them on the left sidebar, and it will open the customization settings for that individual module.
While you will be surprised editing these is very simple, let’s cover individually the Logo, Menu Links and Mega Menus, which are the most basic customizations you will need.
Let’s start with the easiest one, the logo.
In the Global header section, you will be able to just click the logo module, and then you will see the sidebar options to edit it, as you can see below:

We recommend you to upload the logo as SVG format (Scalable Vector Graphics) as it will be super light and look perfectly sharp on every device. However, if you don’t have a vector version of your logo, a PNG or JPG will work great too.
Once you finish with the logo, let’s continue with the Menu Links.
All the menu links are managed on the Navigation section within the Website settings on HubSpot, so it’s very likely you are already familiar on how to edit them.
In case not, don’t worry, you just need to go to Settings > Website > Navigation. The screen will look something like this:
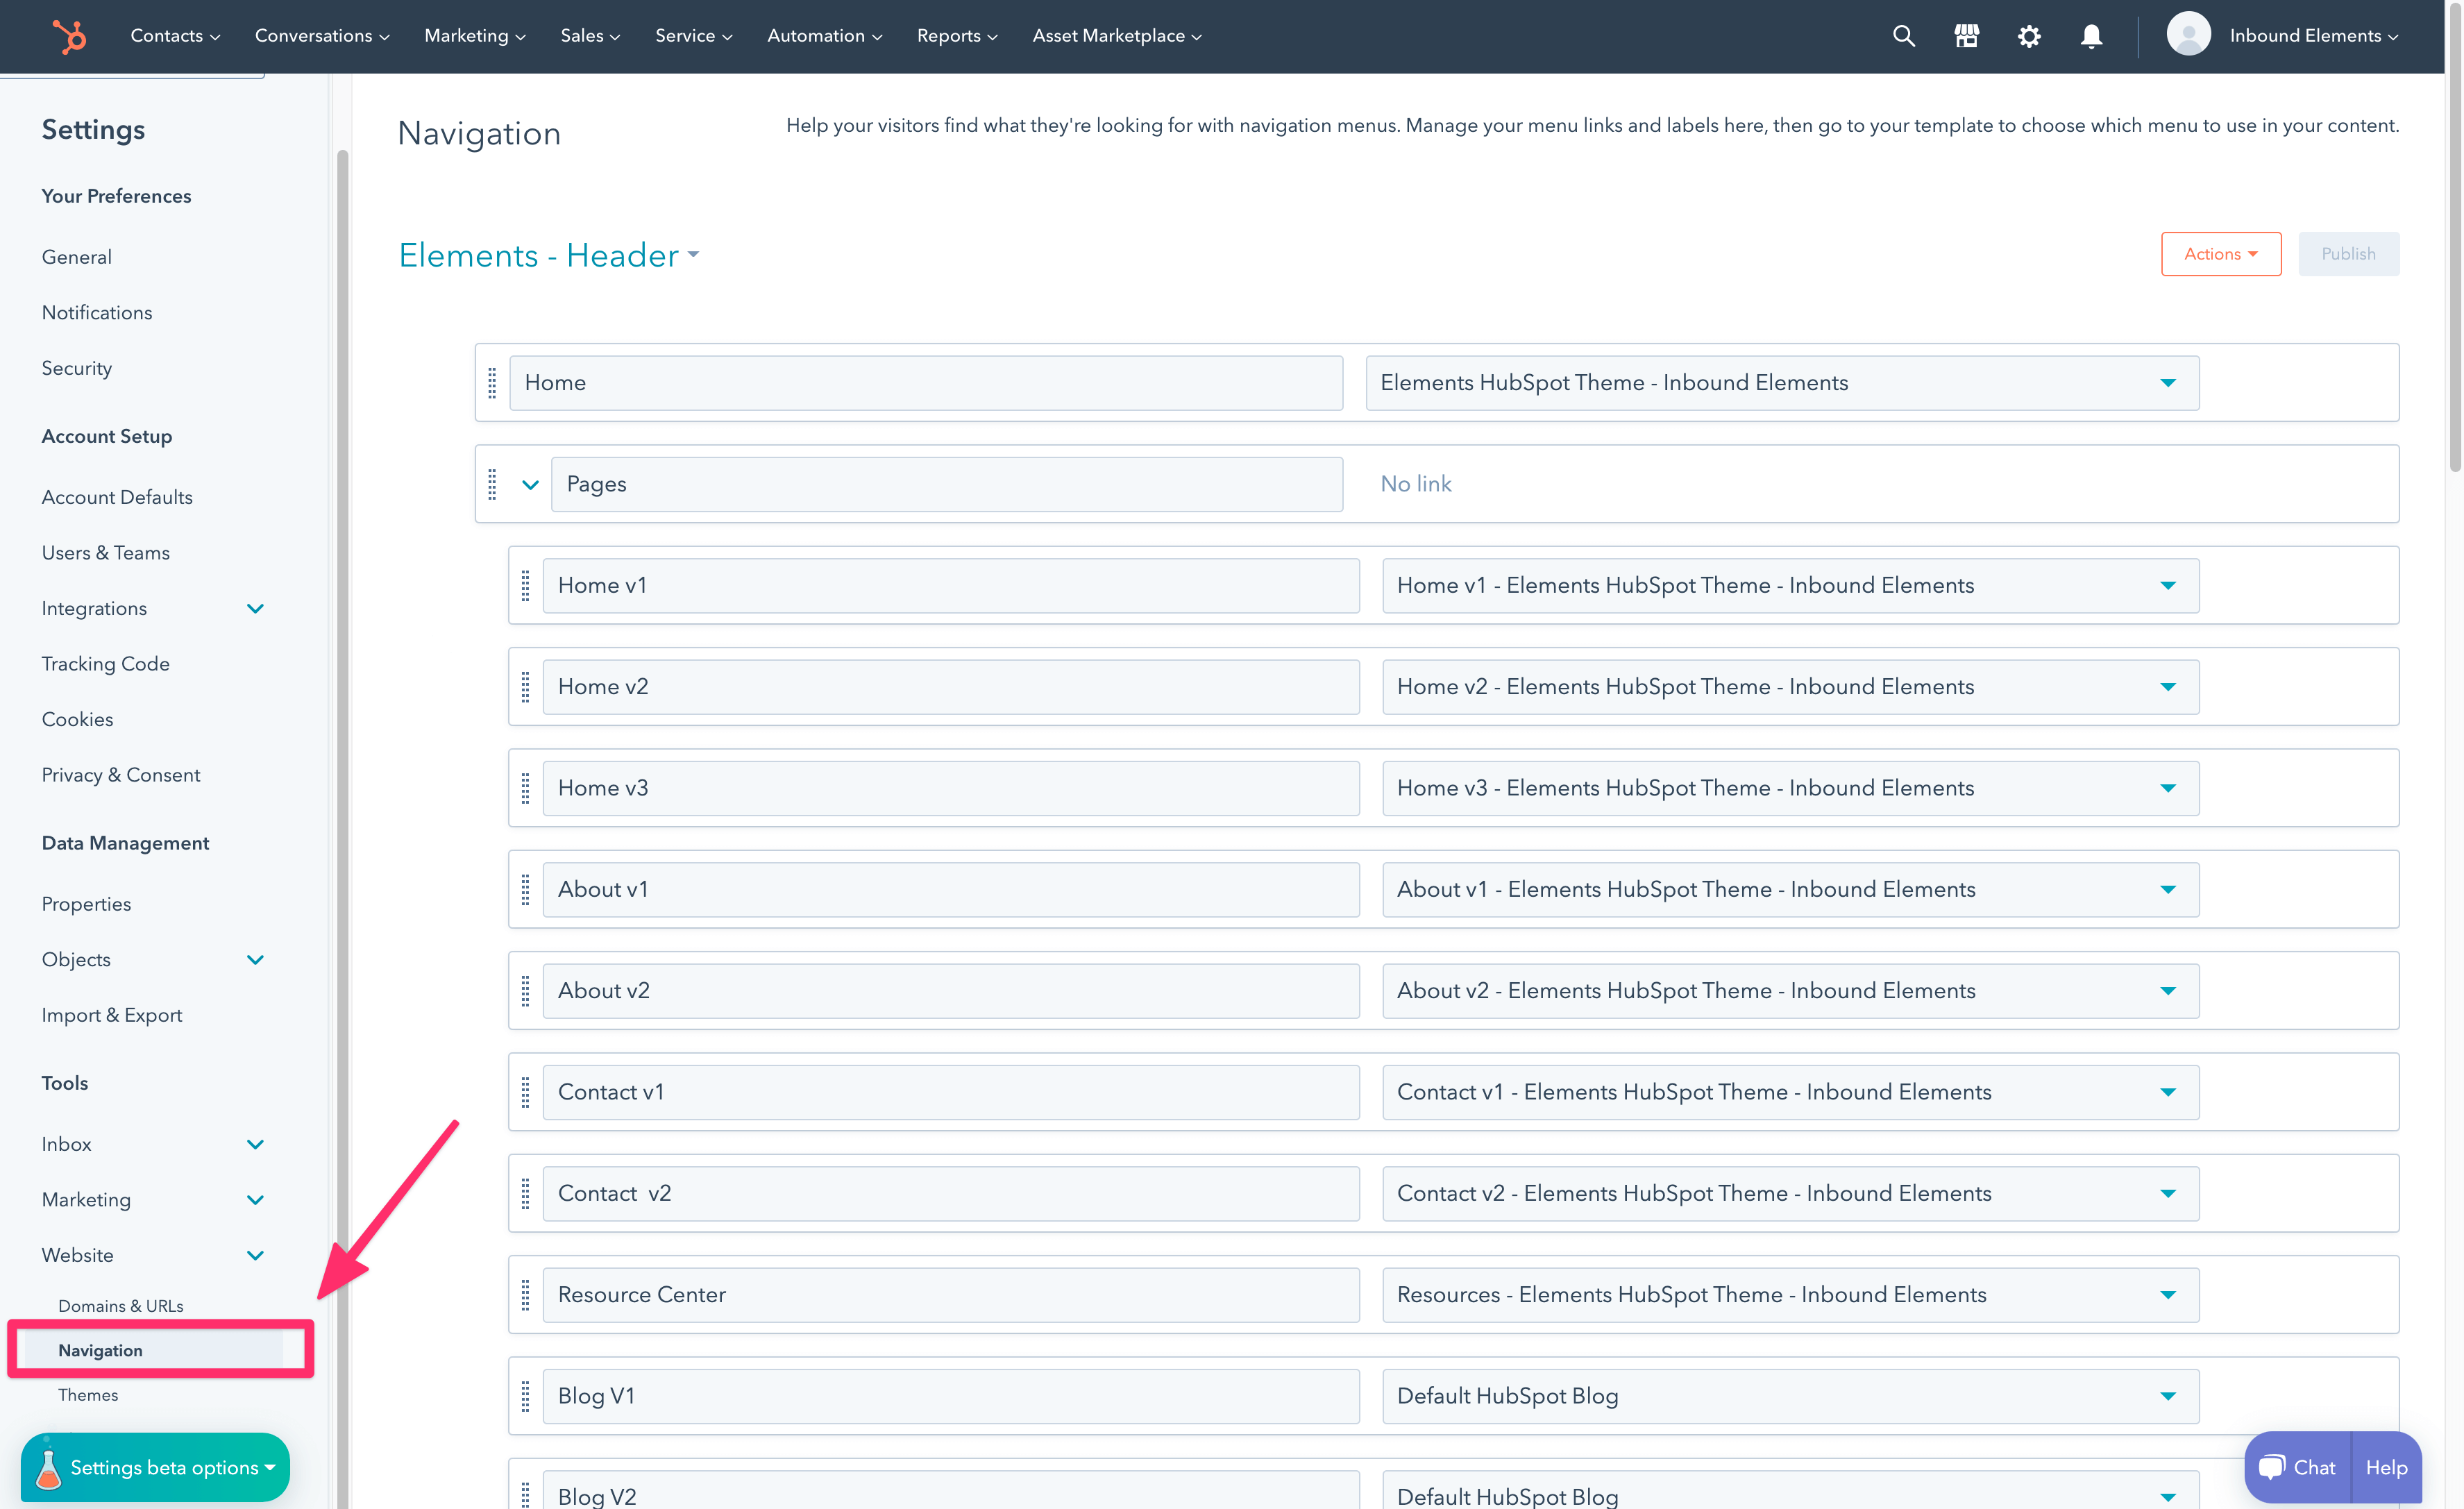
In this section you just need to select your header (you can also create a new one), add your menu links, and then select it in the Elements Theme Menu module, as you can see below:
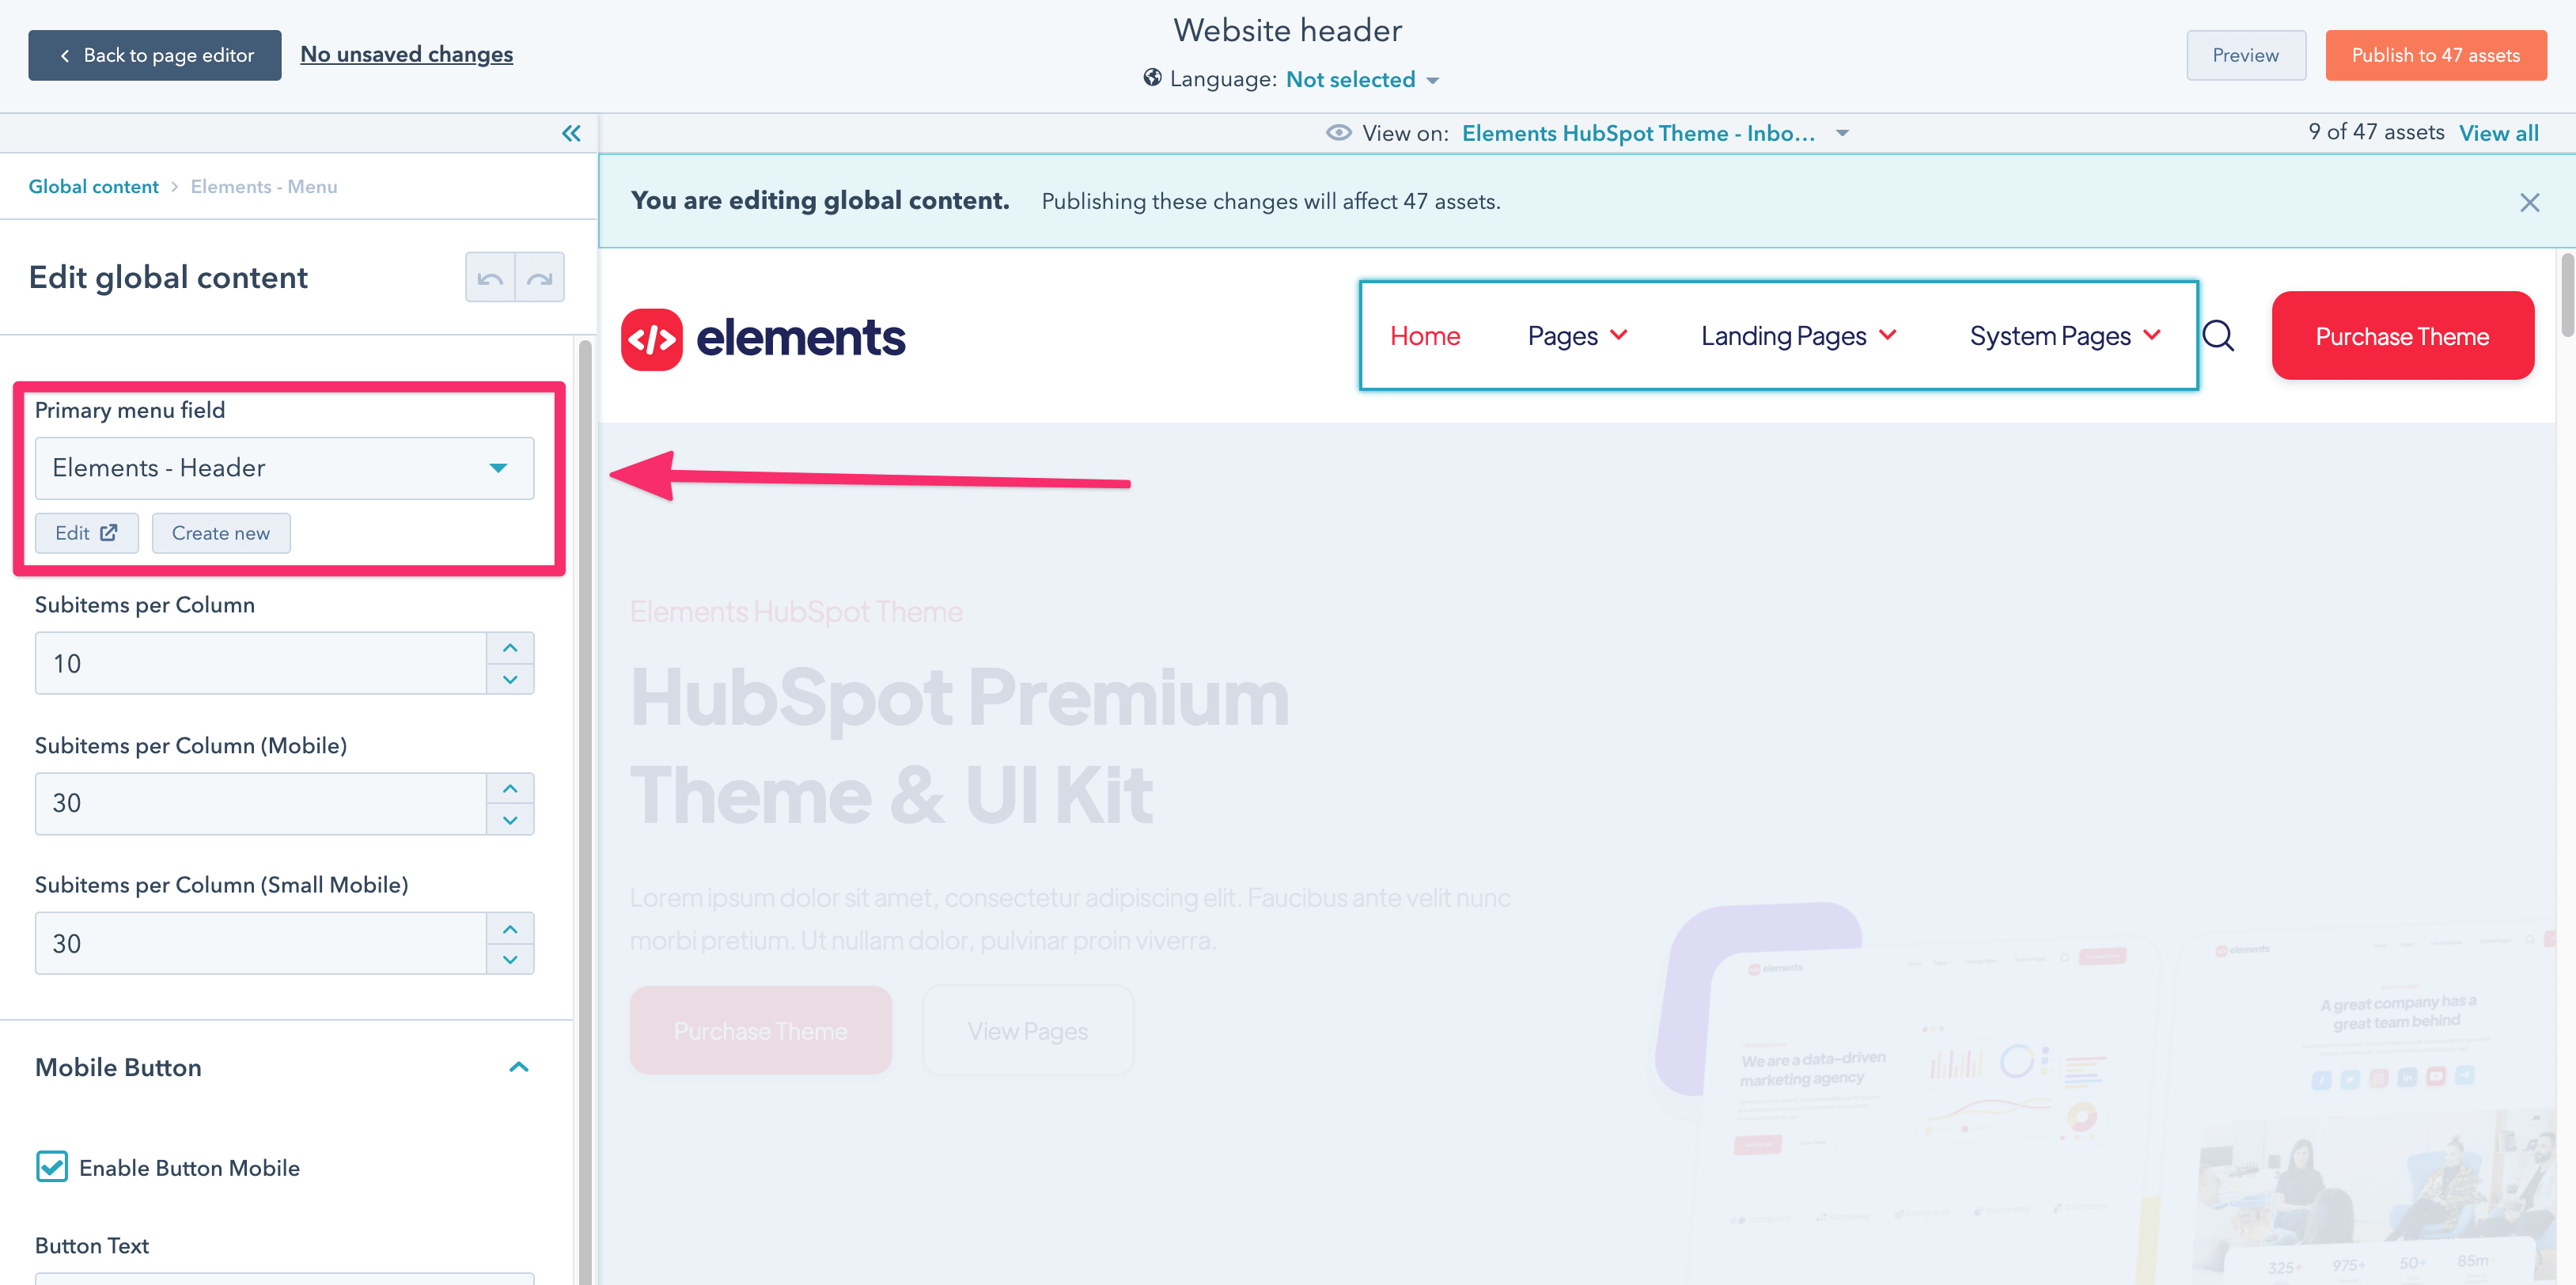
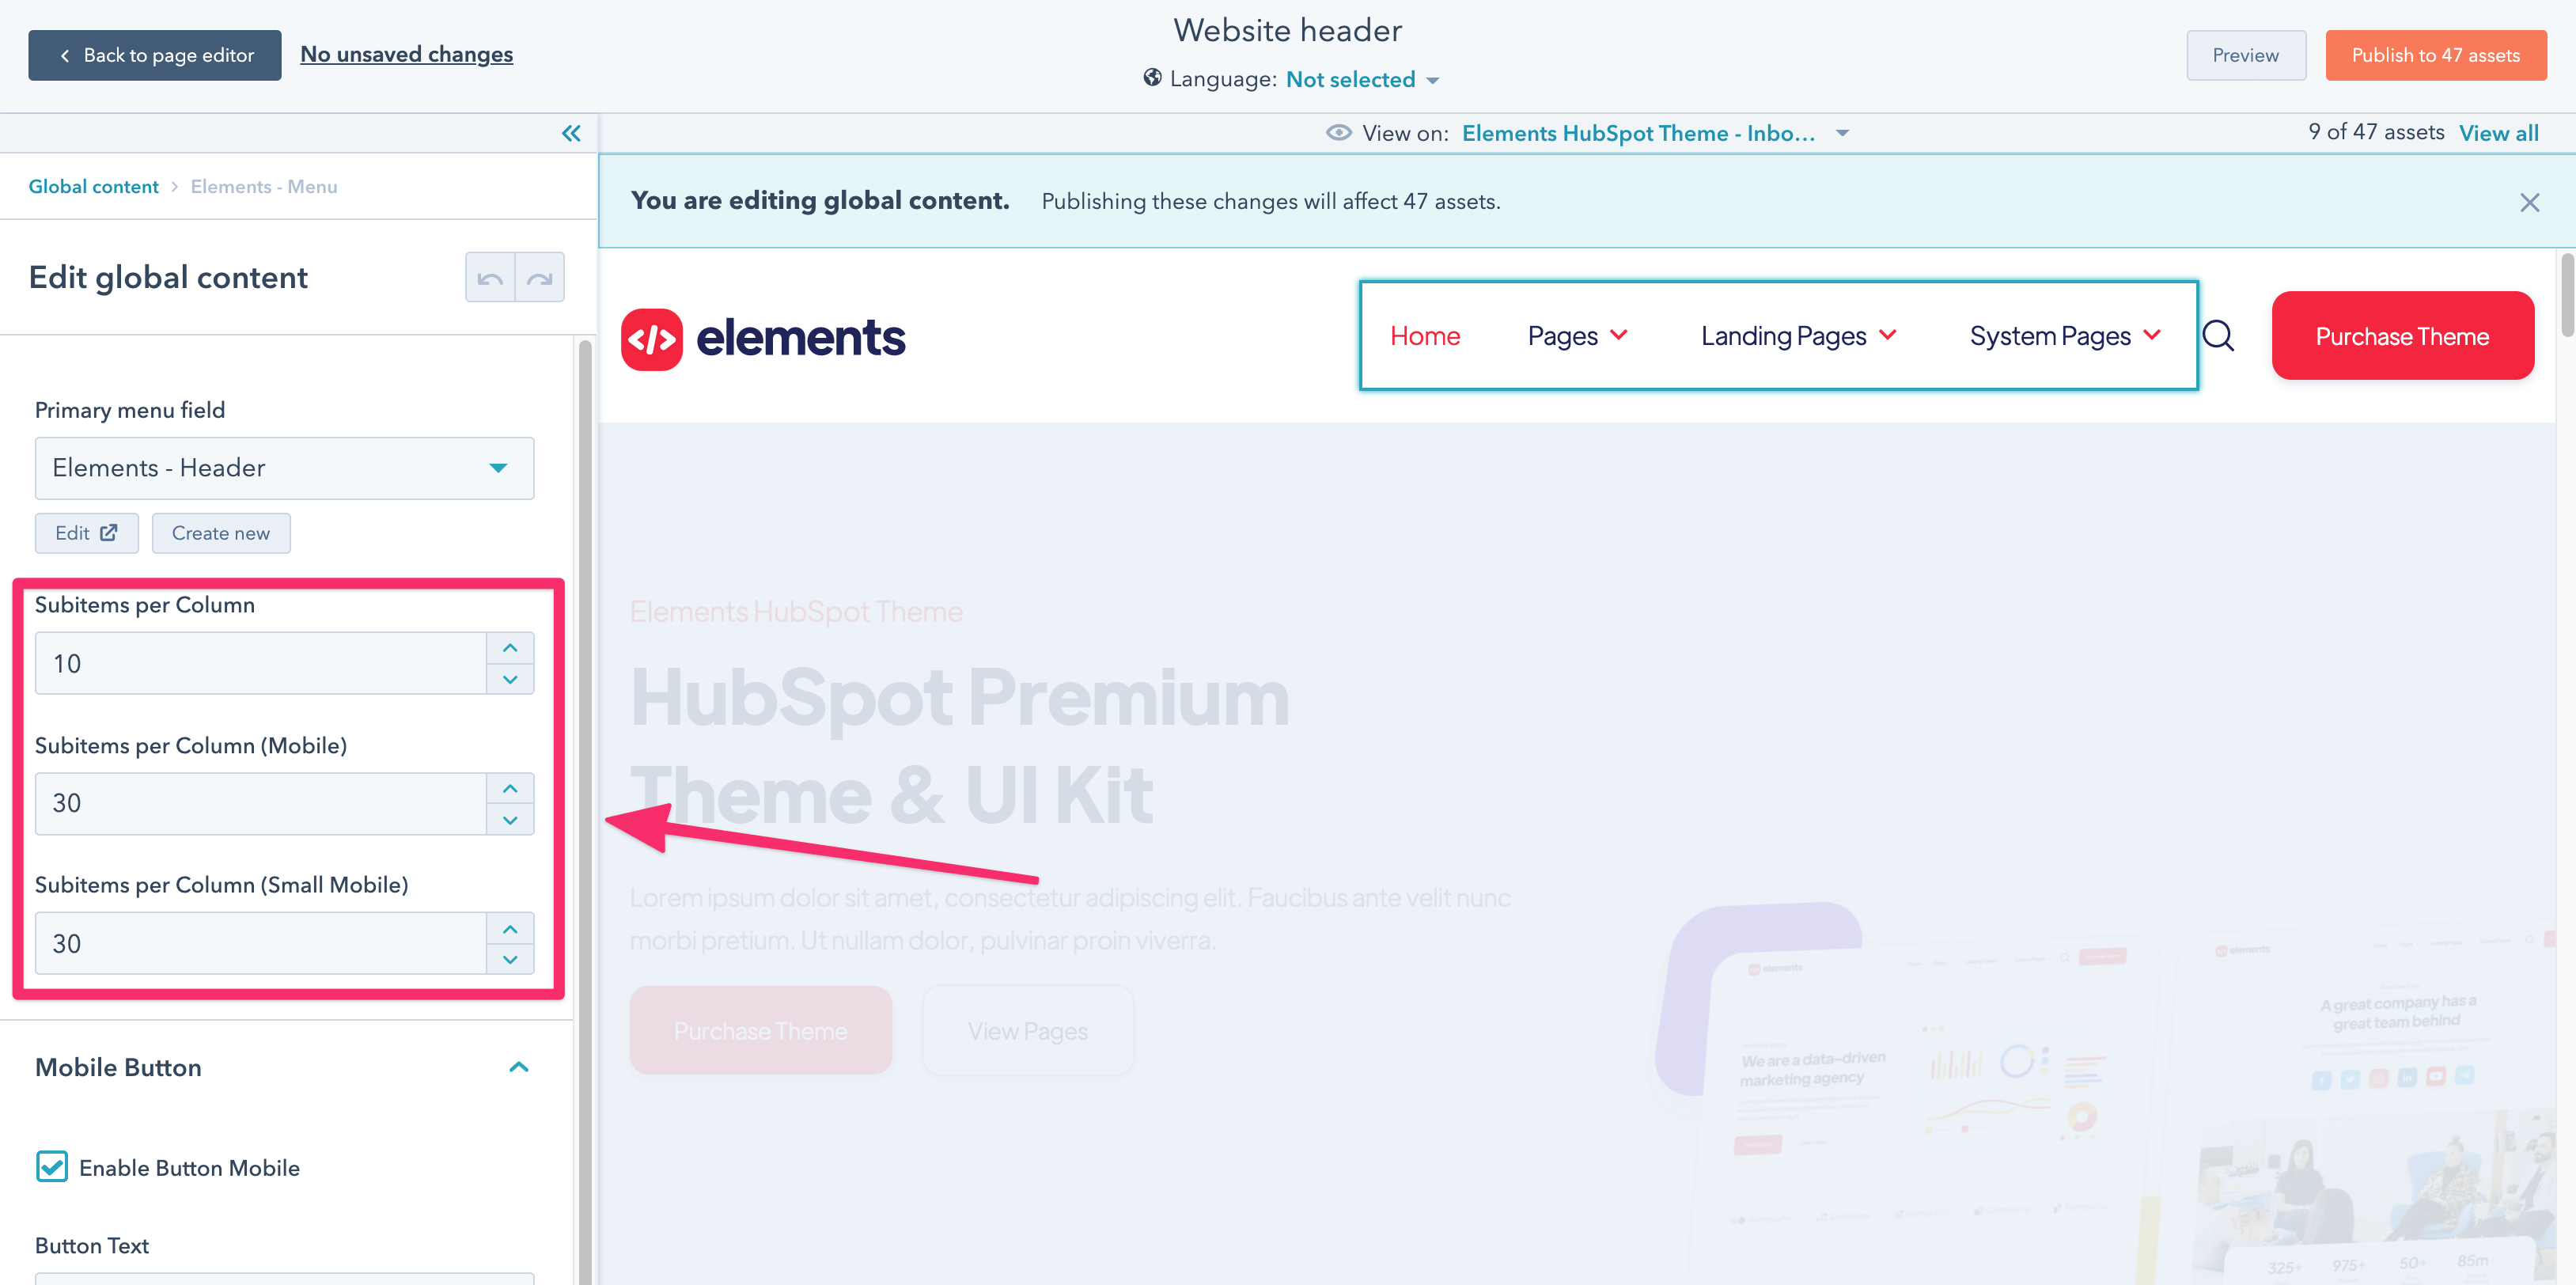
If you would like to have a Mega Menu (a menu dropdown with a lot of links, just like ours), Elements already has a built in option for it.
You just need to select the number of links and columns you would like the mega menu to have, add the links in the Navigation section, and it will be automatically formatted as a mega menu, no extra work needed.
The settings can be found in the menu section of the Header, as you can see below:
For the footer, the story is pretty much the same as the one in the Header.
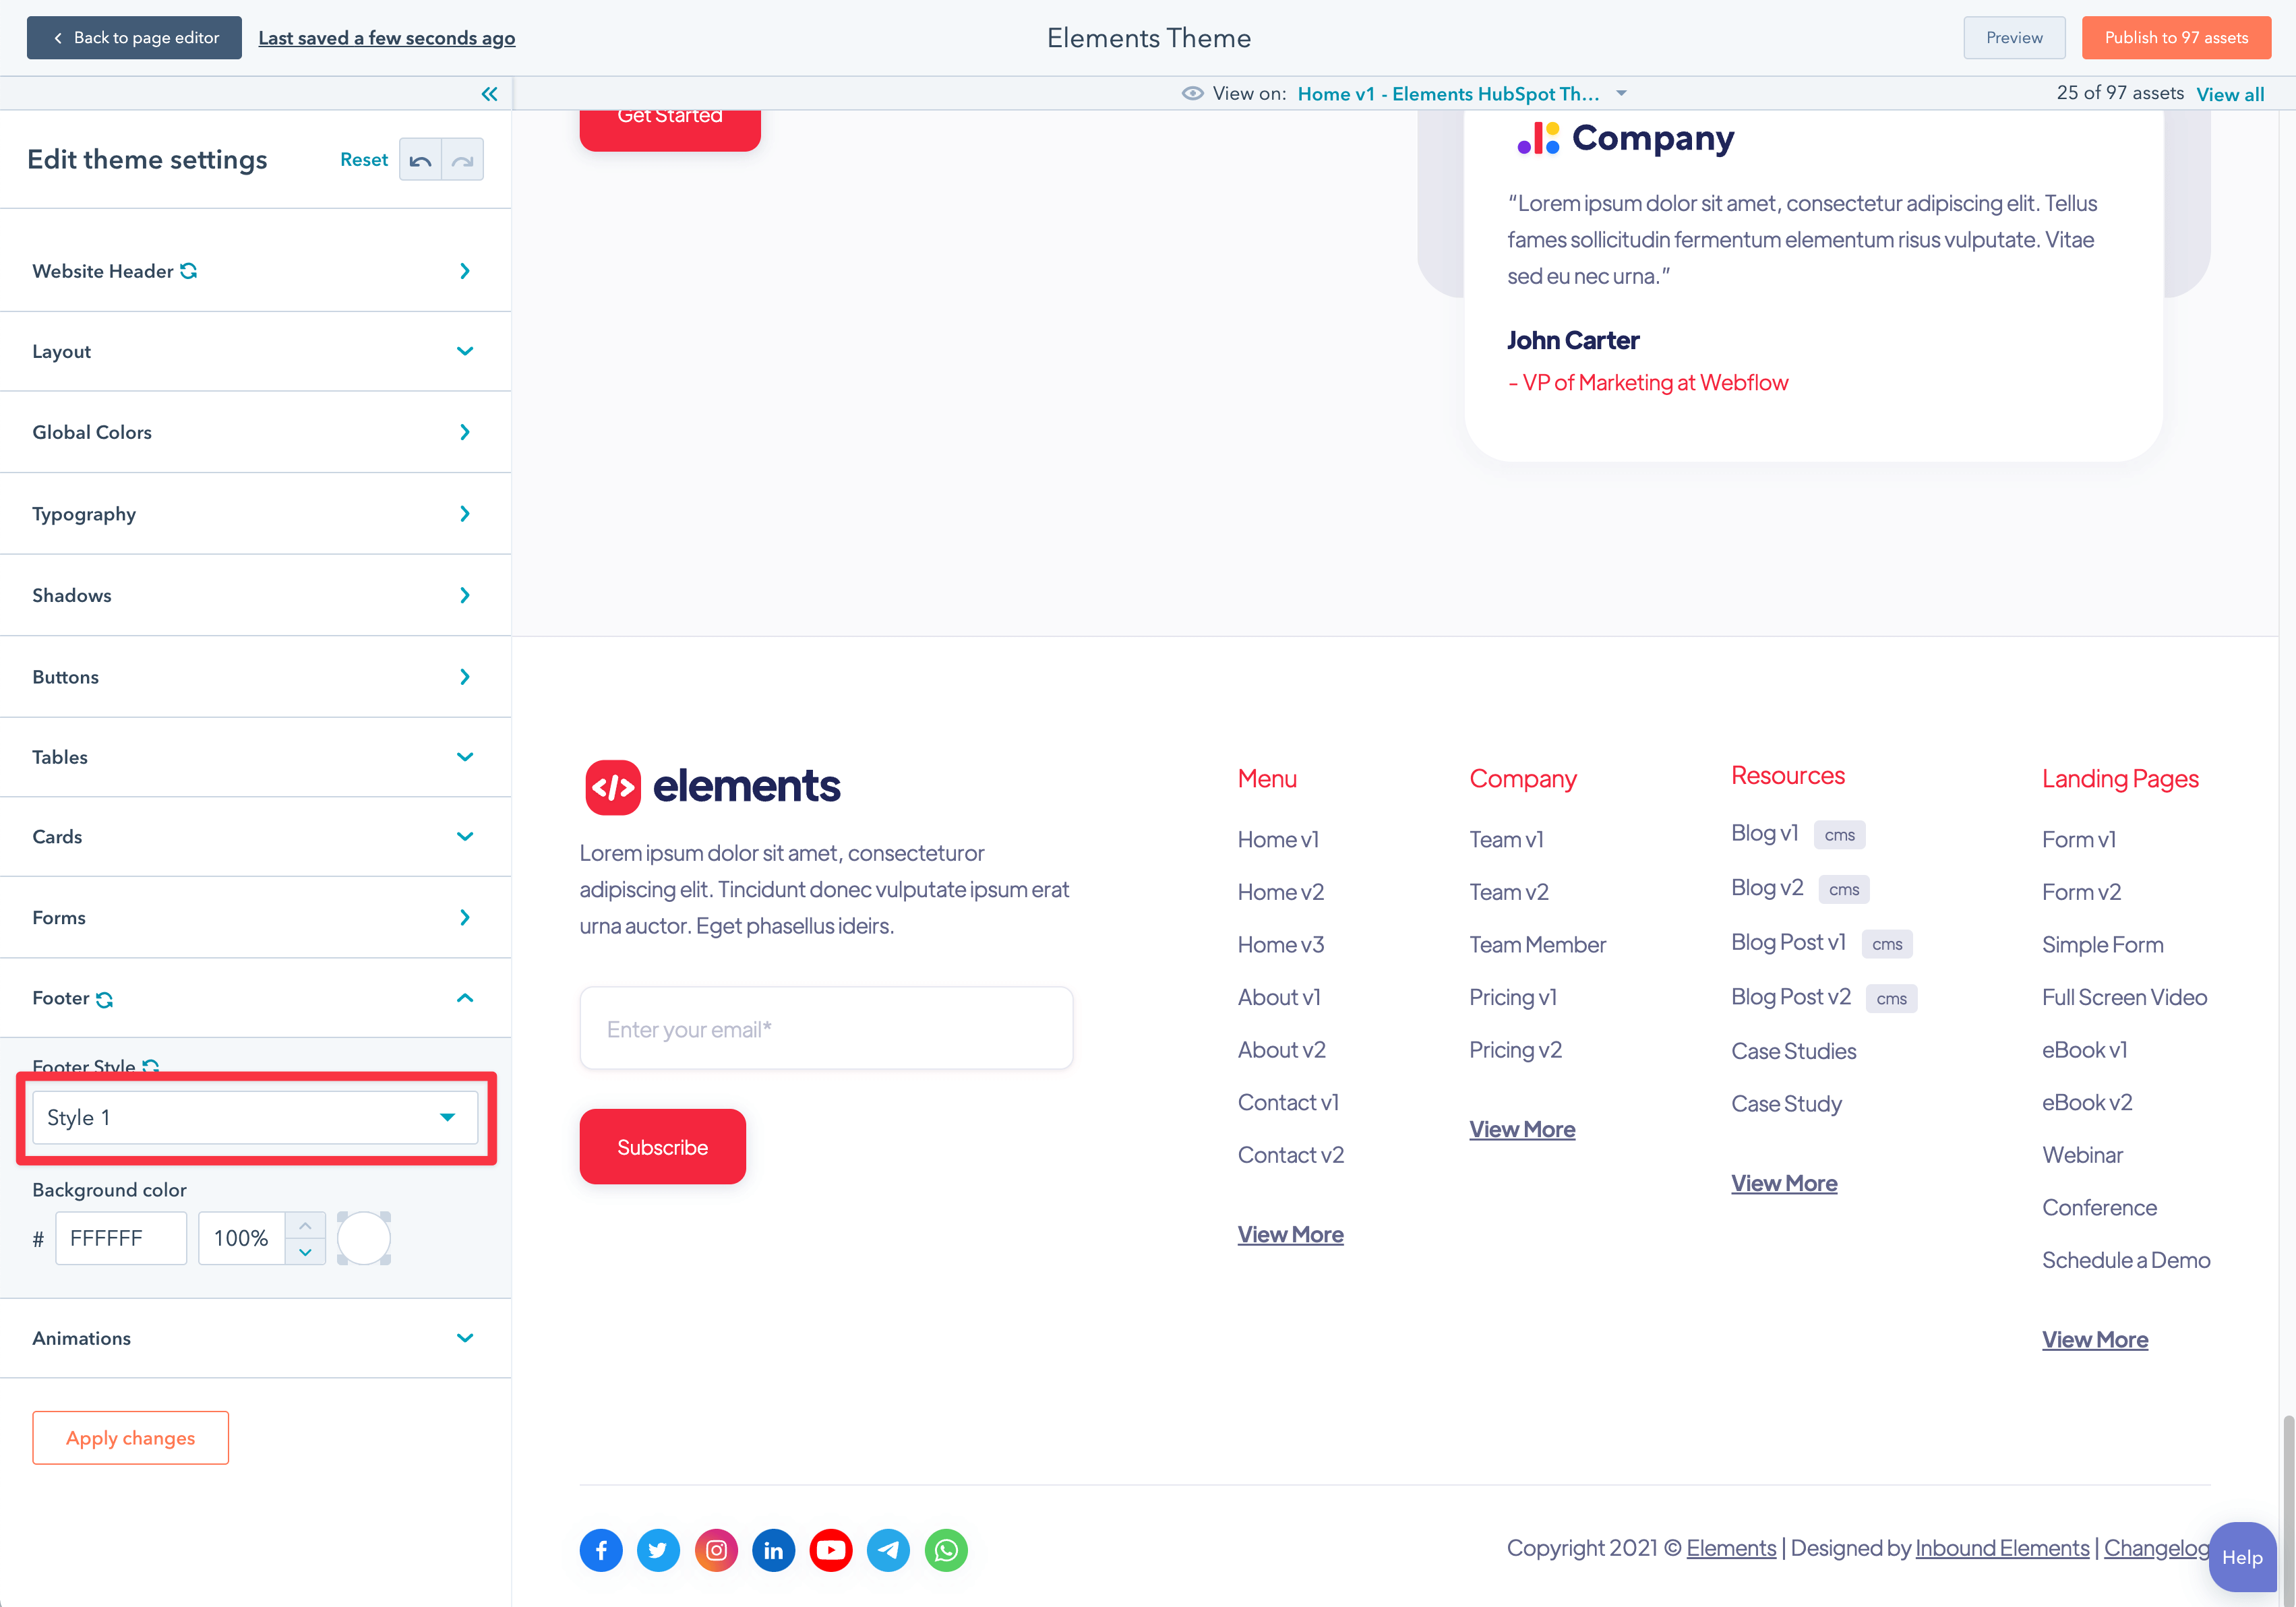
First, you should choose the Footer version you would like to use on your website. By default, the Elements HubSpot Theme will use the Version 1, however, you can go to edit any page, then click on Design > Edit Theme Settings, and you are going to arrive to the Theme Customization Settings.
Once you are in here, you need to select the Footer settings, and choose your favorite footer. In order to preview all of them, you can just select them, click Apply Now, and then Preview.
Once you selected your preferred footer, it is now time to customize it.
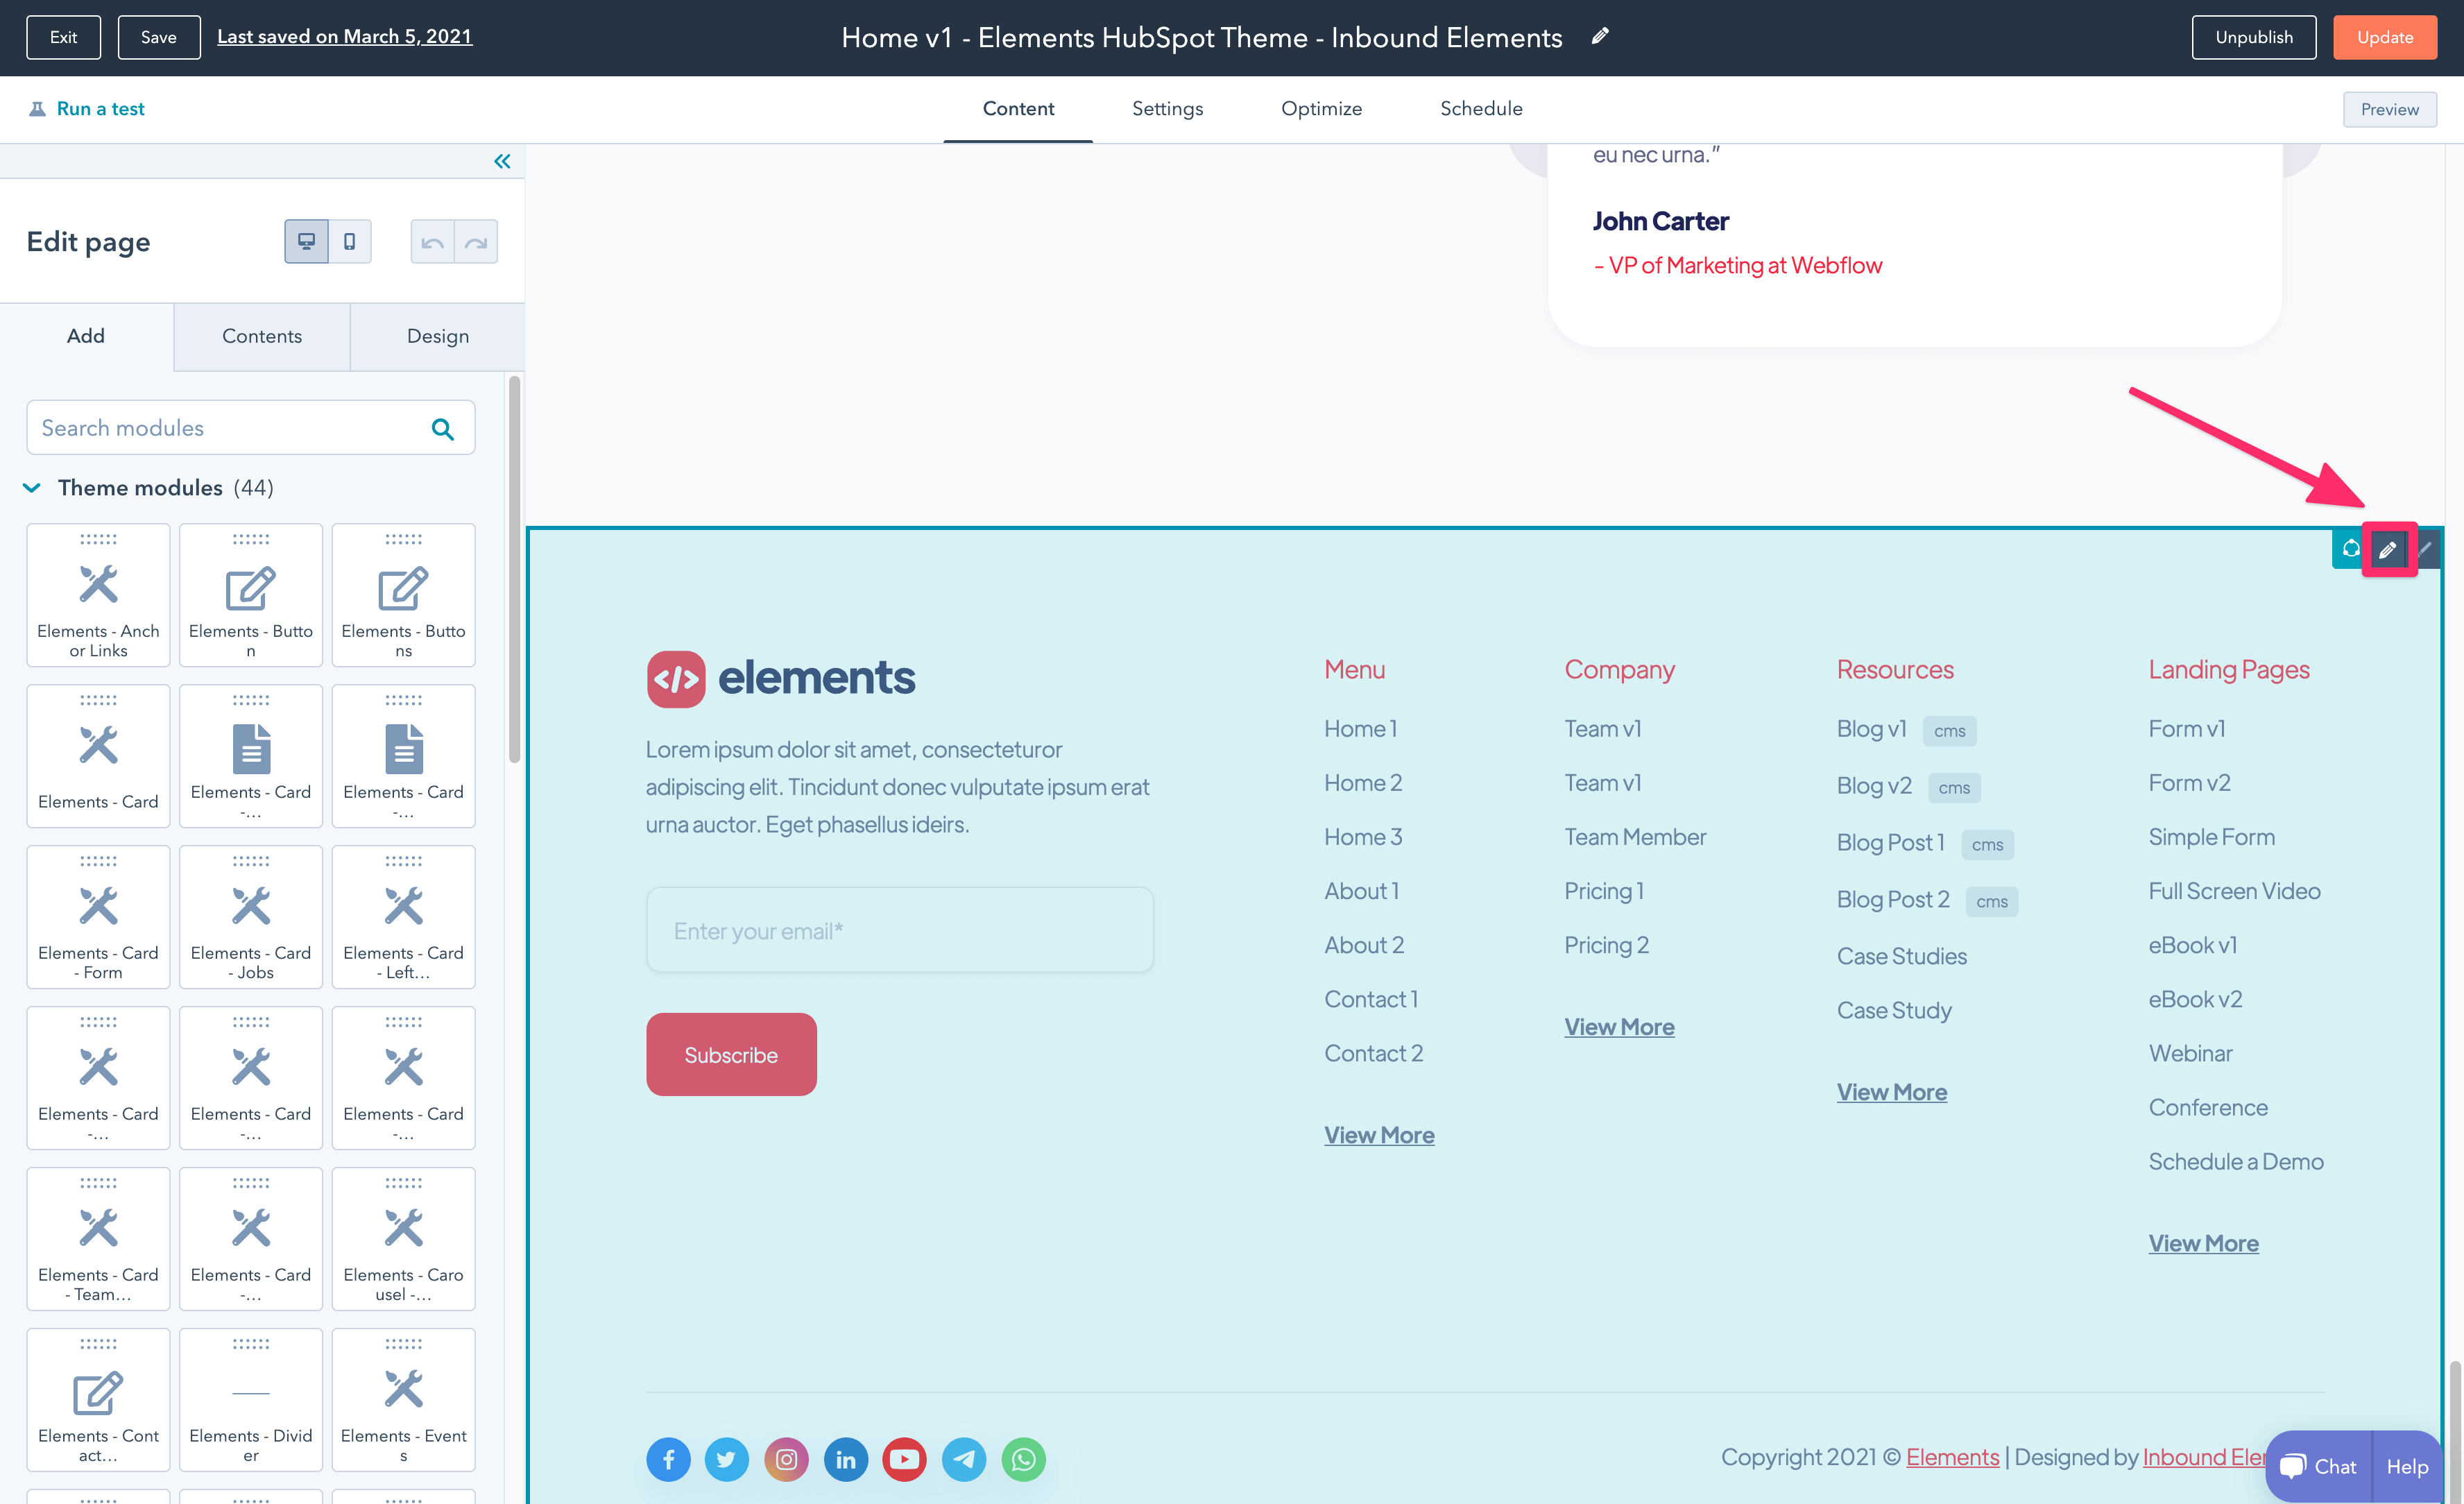
In order to edit the Global Footer section, you just need to edit any website page, scroll to the bottom, and you will find the footer.
Just click Edit Module, and you will be redirected to the screen to start editing the footer.
Once you are in there, you will notice that all sections are editable, so you can easily click on any of the left sidebar Modules, and start editing it. The most important ones are the following:
Once you are in the Footer editor, you just need to click the Footer logo, and you will be able to edit it and upload your company logo.
Just like on the header, we recommend you to upload the logo as SVG format (Scalable Vector Graphics) as it will be super light and look perfectly sharp on every device. However, if you don’t have a vector version of your logo, a PNG or JPG will work great too.
![]()
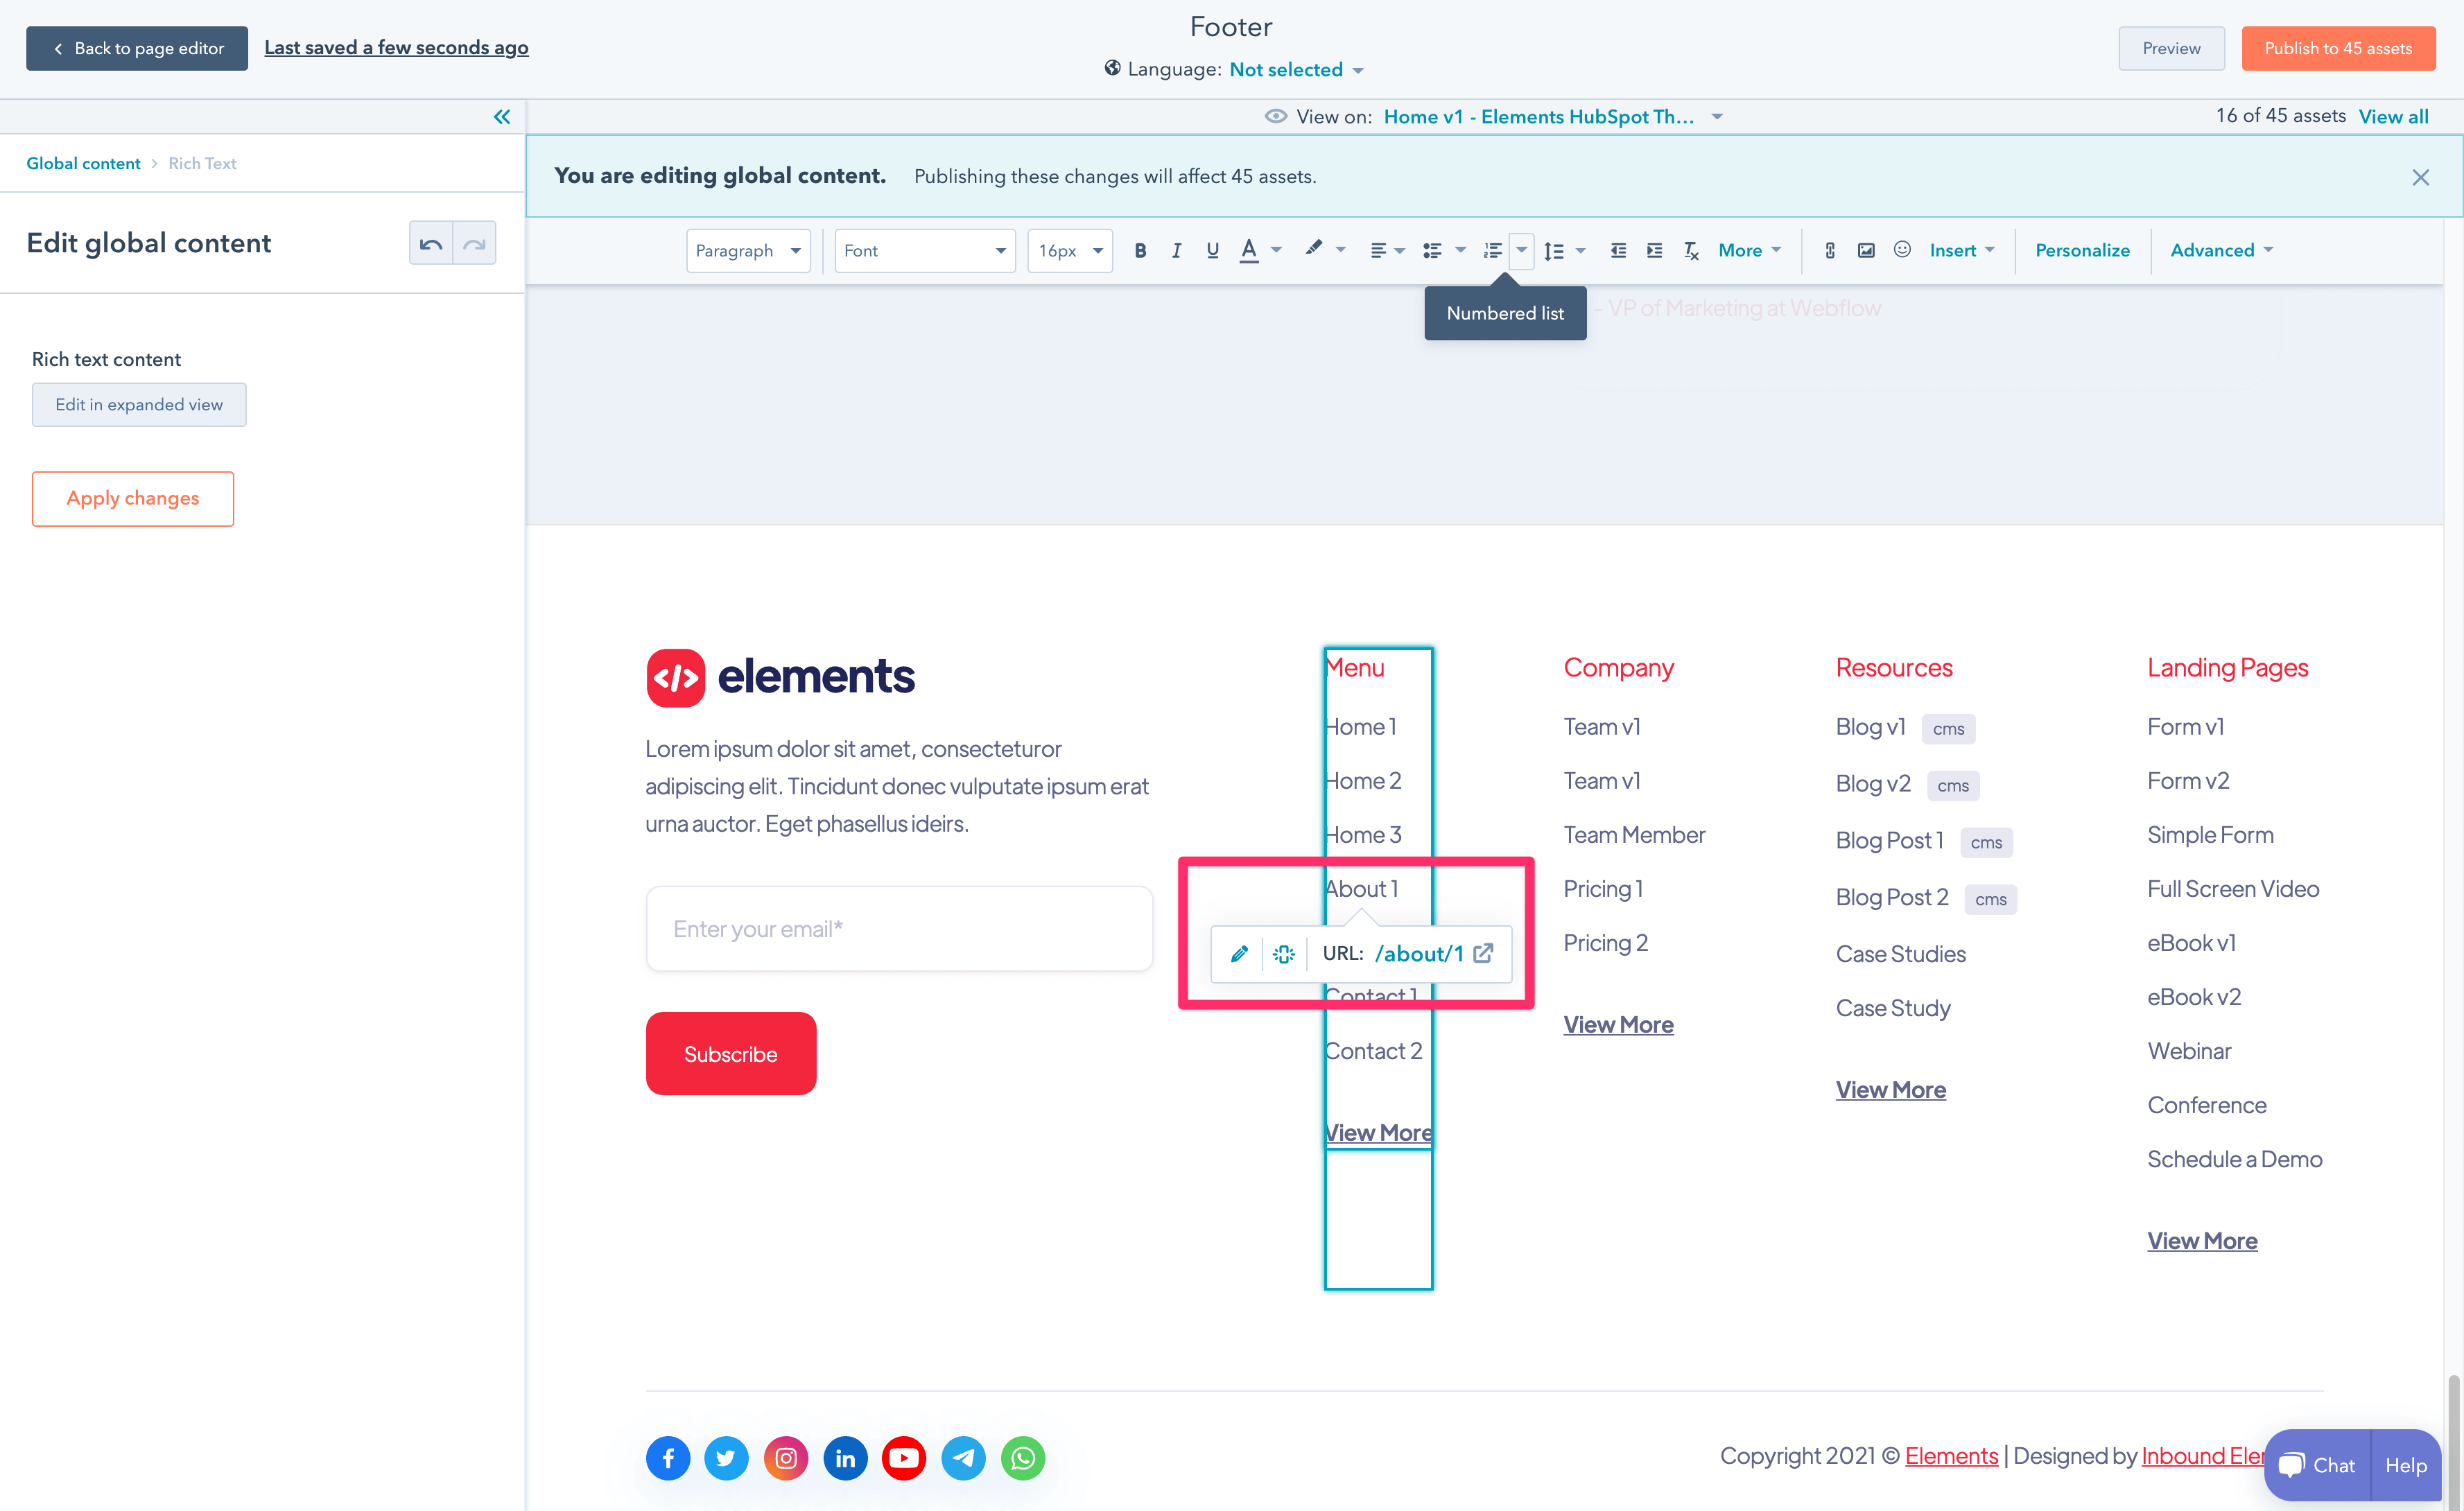
Regarding the Footer Links, you will notice these are slightly different than the ones in the Header. Unlike the header ones which are edited right from the Navigation in the Website settings, the footer links are edited right on the footer.
Just click over any of the links, and you will be able to edit them as easy as typing right in the rich text. Once you type something else, just change the hyperlink too, and you will be ready to go.
Last, but not least, lets learn how to set up the Blog and Blog Post template from the Elements HubSpot Theme on your website. You will be surprised of how easy it is.
To choose the Blog or Blog Post template, you just need to go to Settings > Website > Blog > Templates, and you will find 2 different drop down selectors.
One will choose the Template for blog posts, and the other one will choose the Template for listing pages (aka, the blog). Select the ones you would like to use (as all the versions of Elements HubSpot theme have 2 variations of each), and click Save.
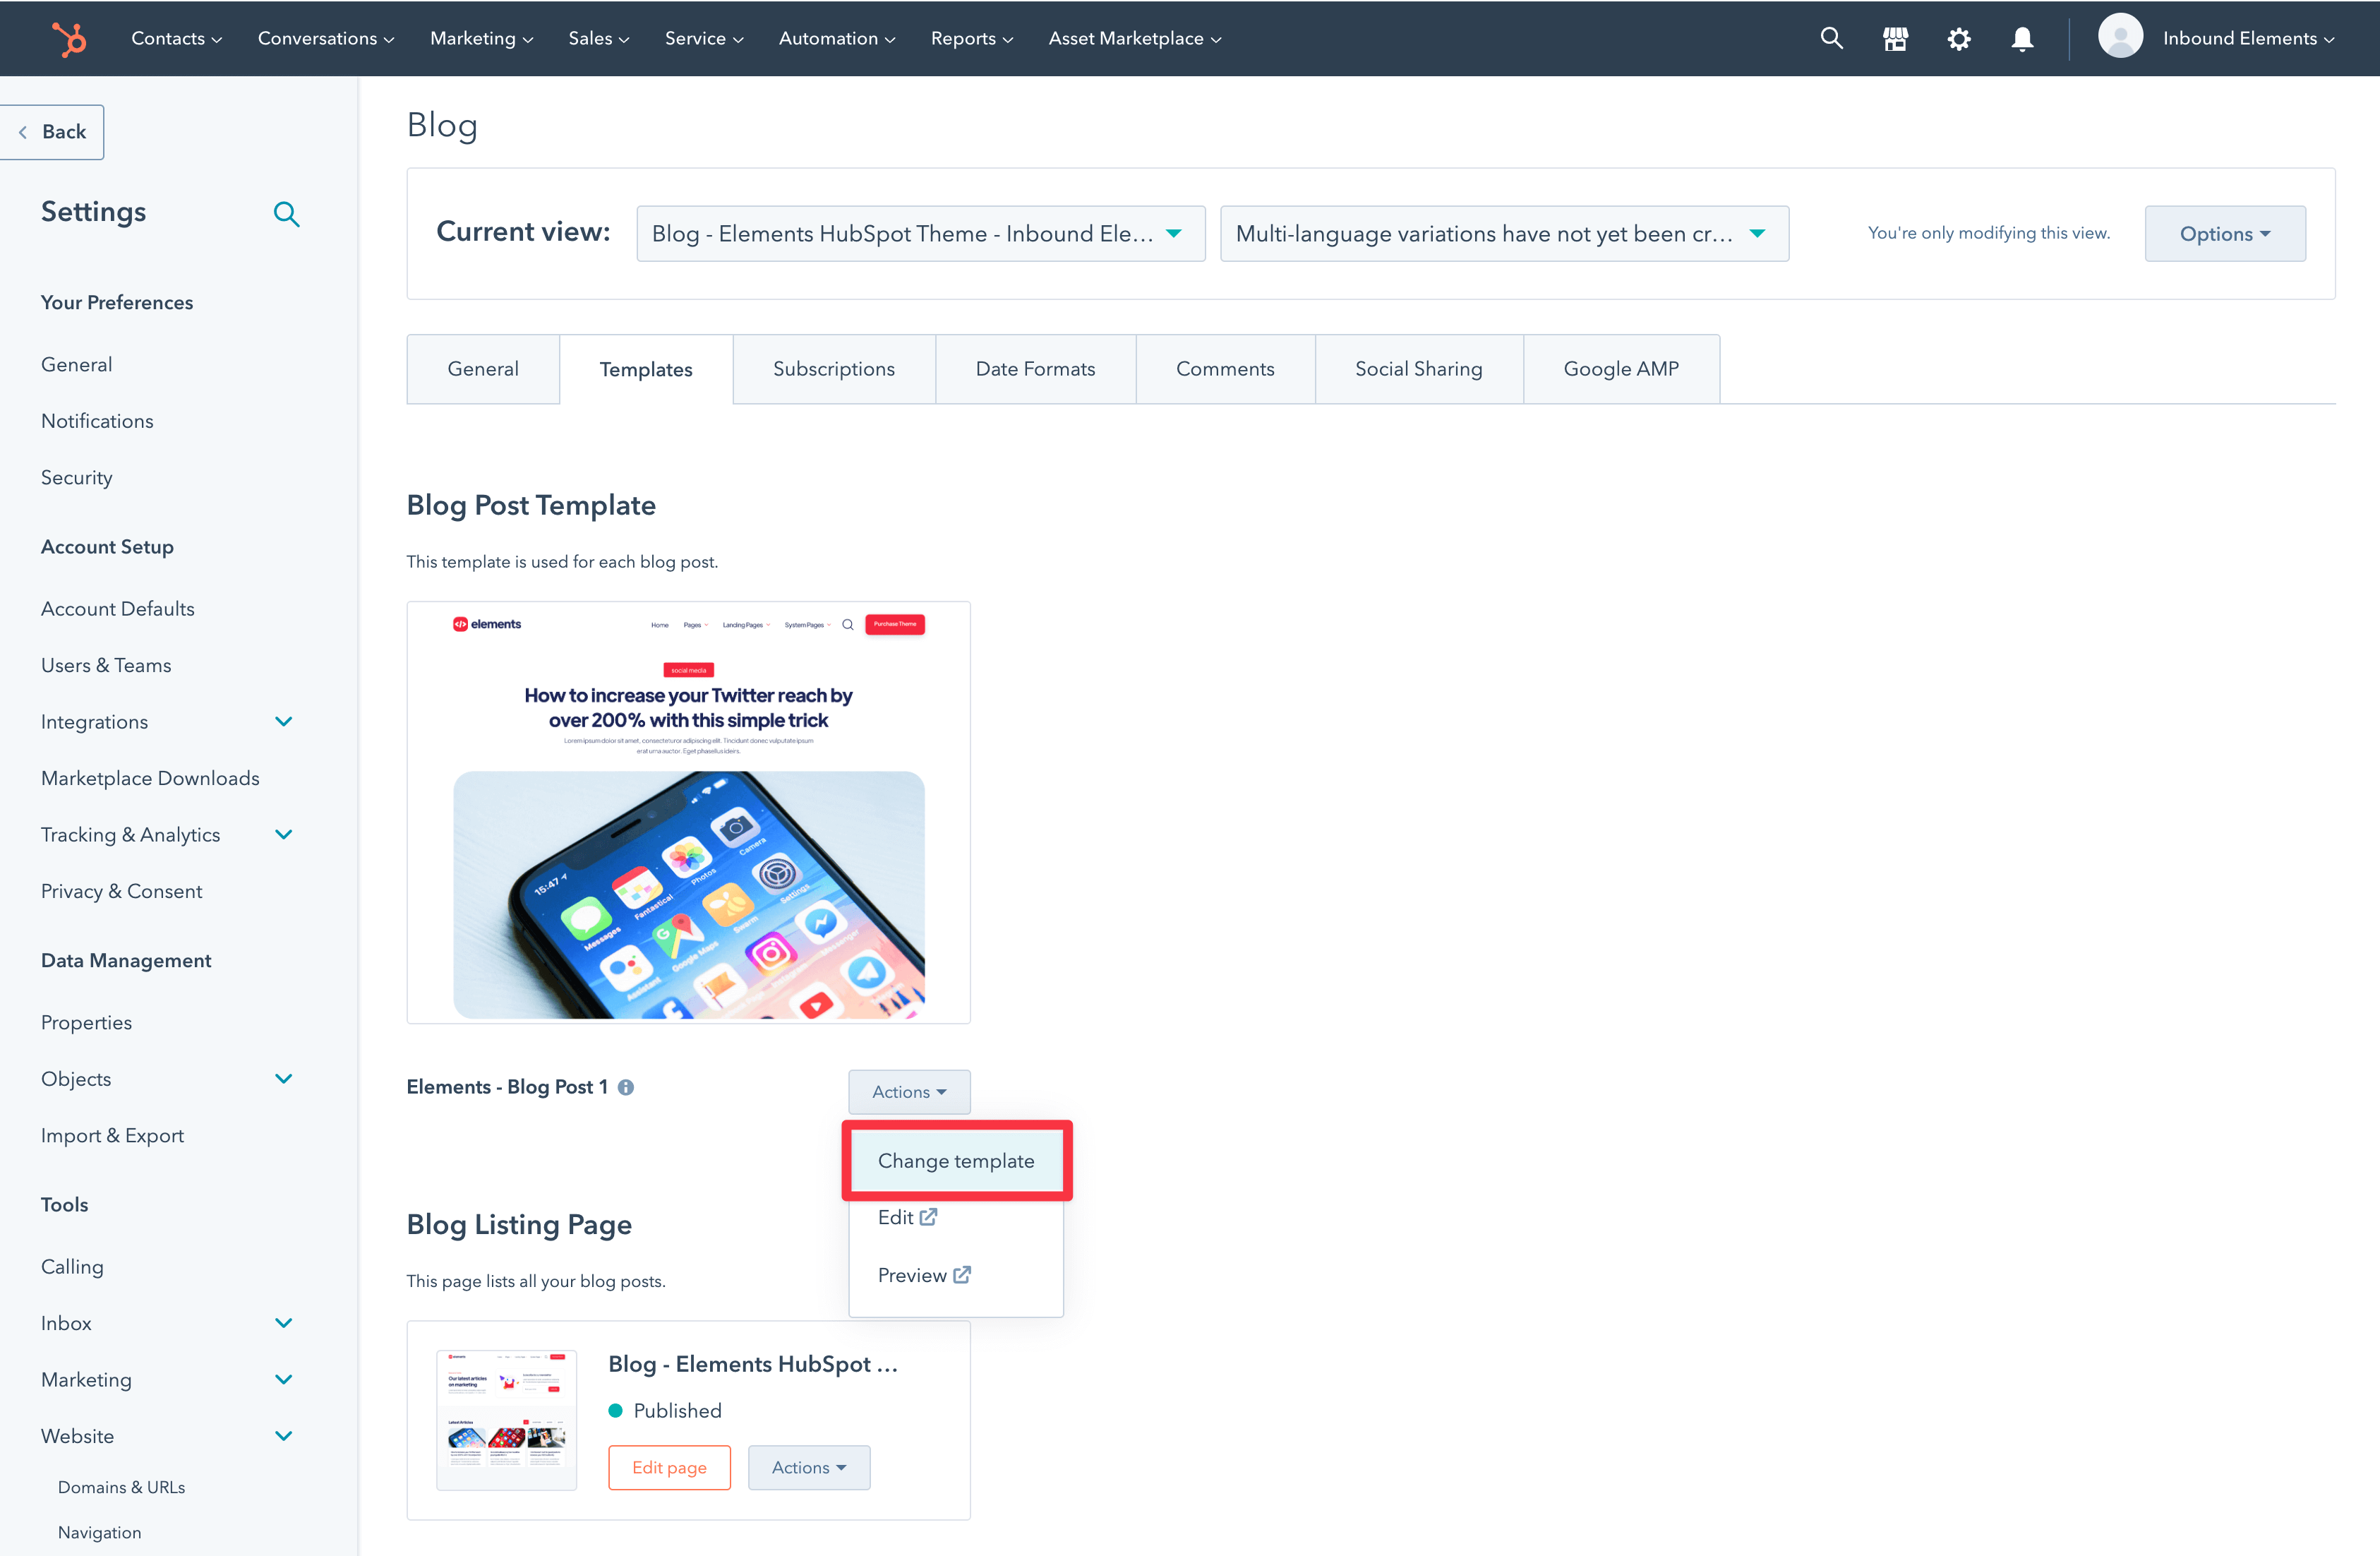
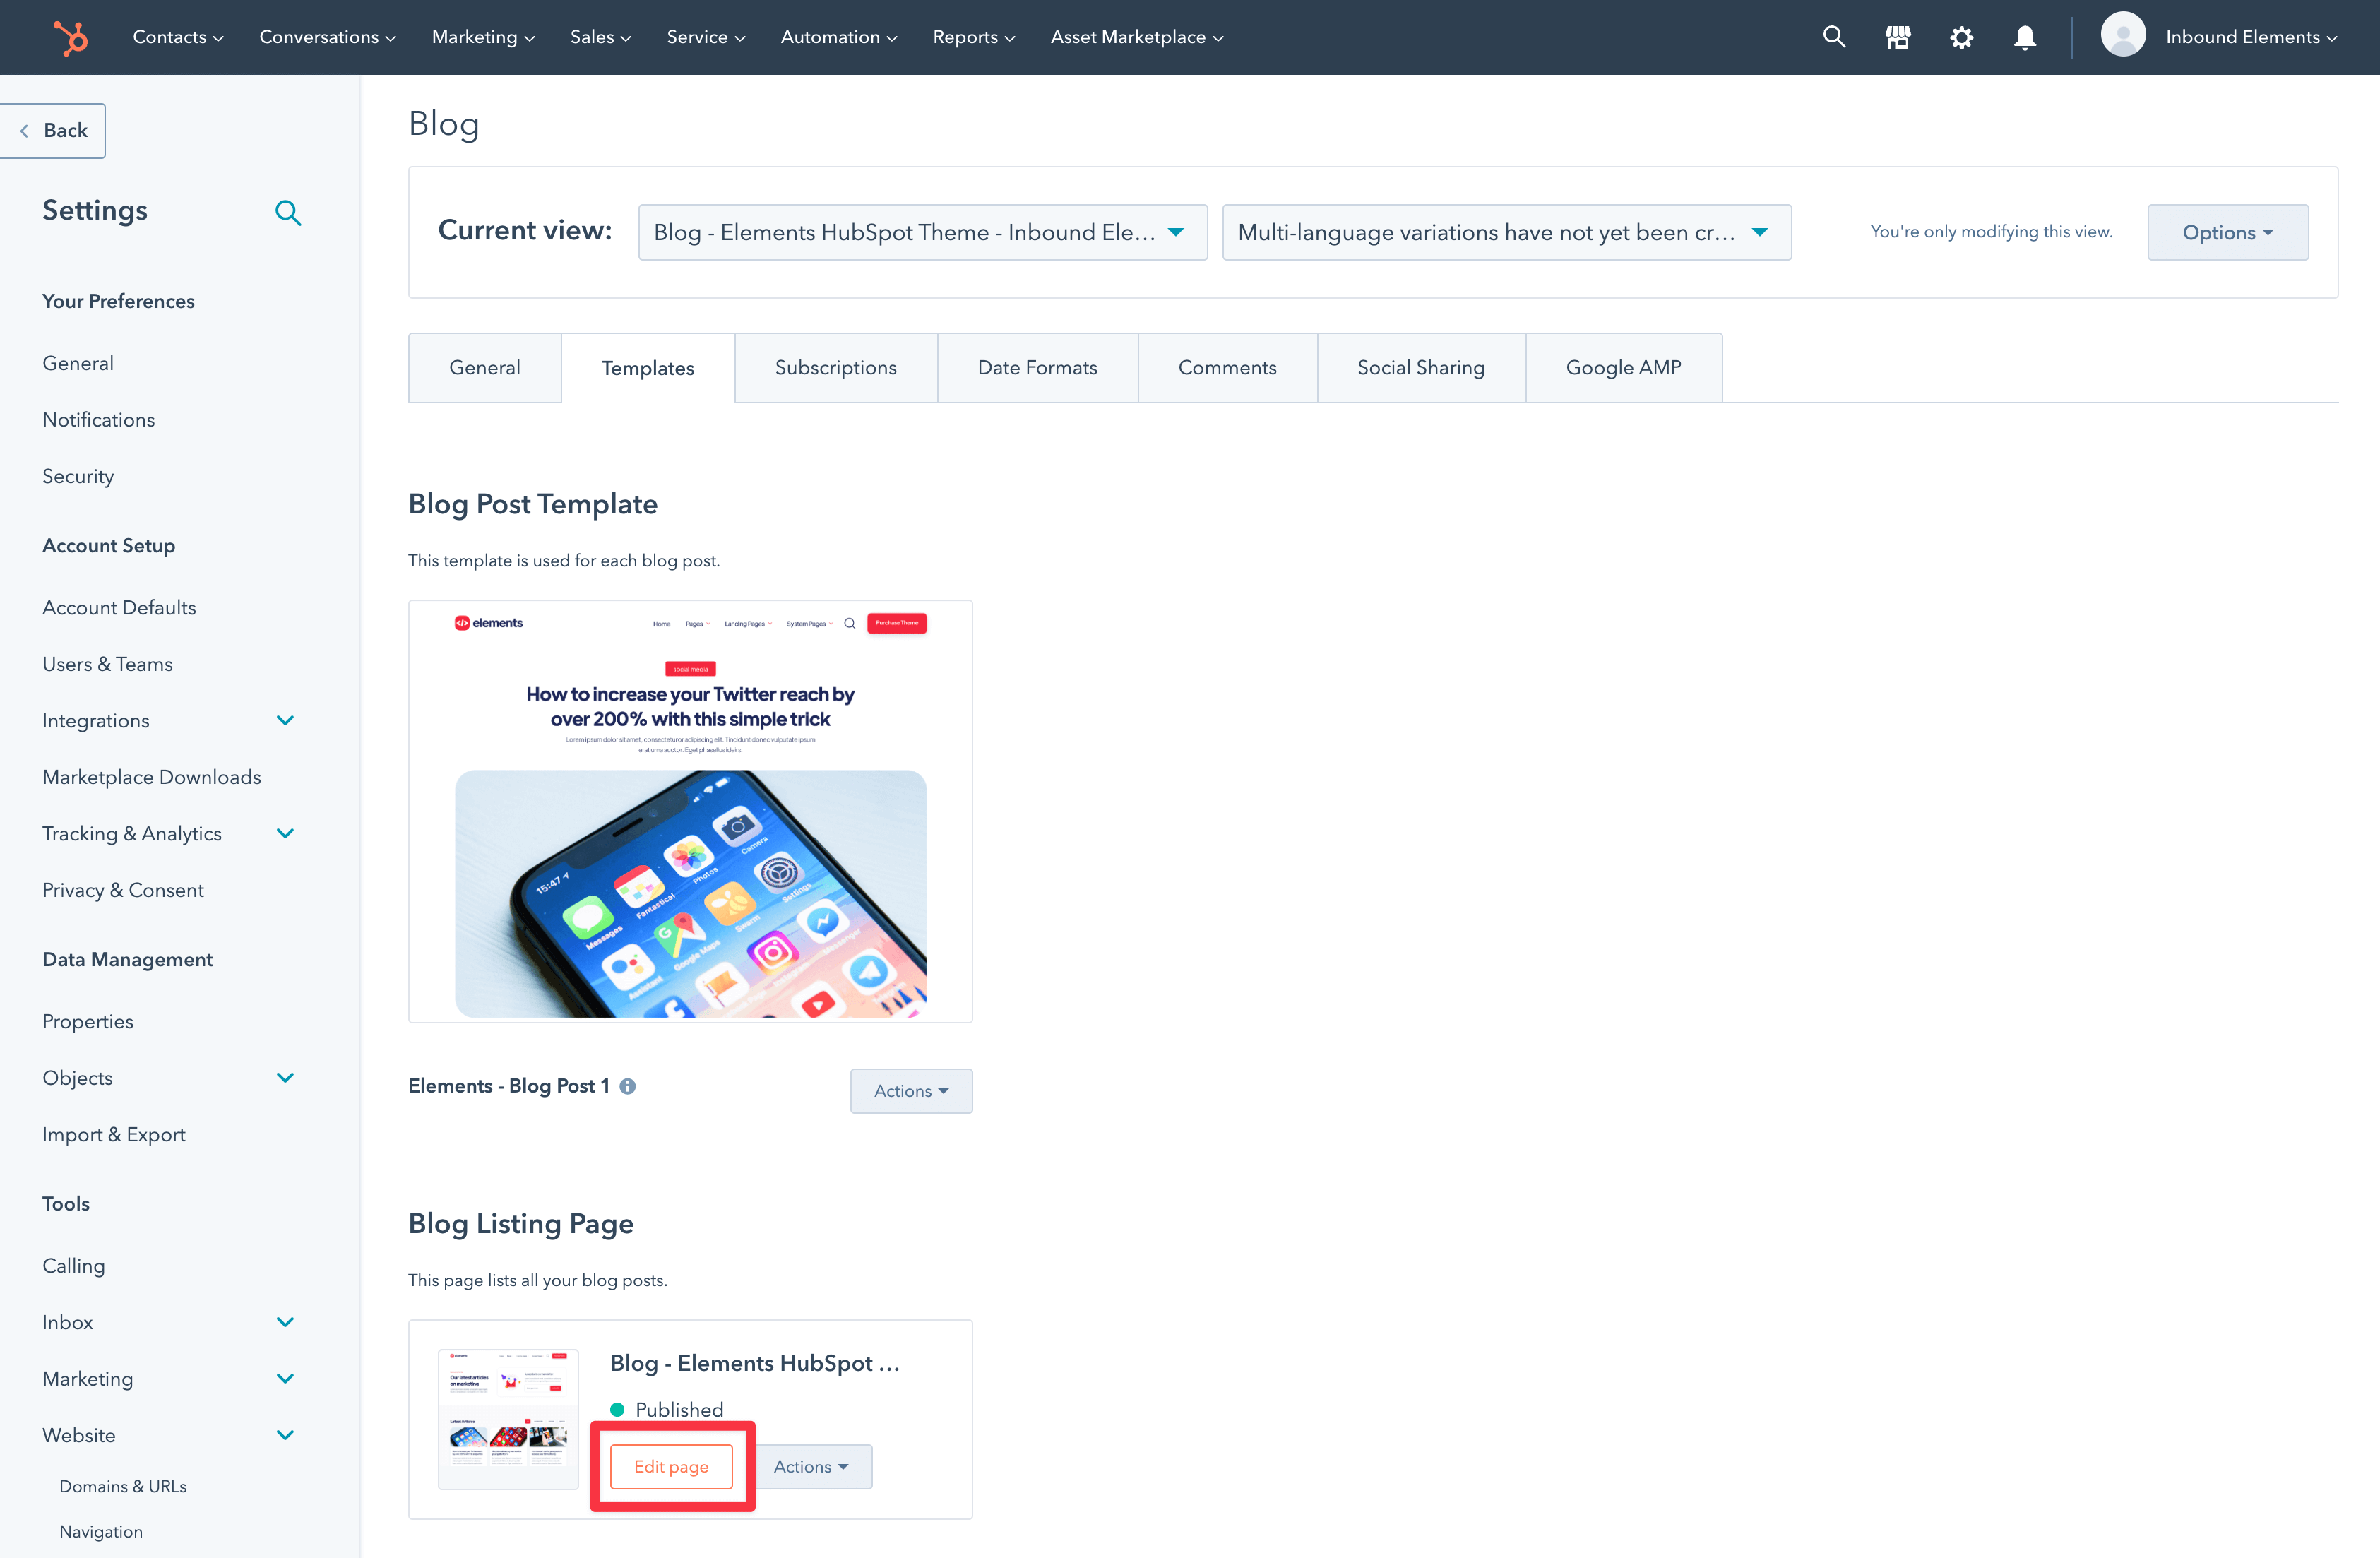
If you want to edit the Blog Page to change any text inside it, or just make any other adjustments, you can just click the orange ‘Edit page‘ button, and you will enter the HubSpot Editor. Please keep in mind that as this is a dynamic page, it is not possible to edit the layout or make major edits, and this is intended to mostly make text edits.
On the other side, unlike the Blog page, the Blog Post page needs to be edited a little differently, and we will cover it below.
If you want to edit your Blog Post page, you need to go to Marketing > Website > Blog and proceed to edit a blog post (or create a new one, if you don’t have one yet.)
Once you are in that view, you will see that you see all the HubSpot modules in the left sidebar, and if you click on them, you will be able to edit them.
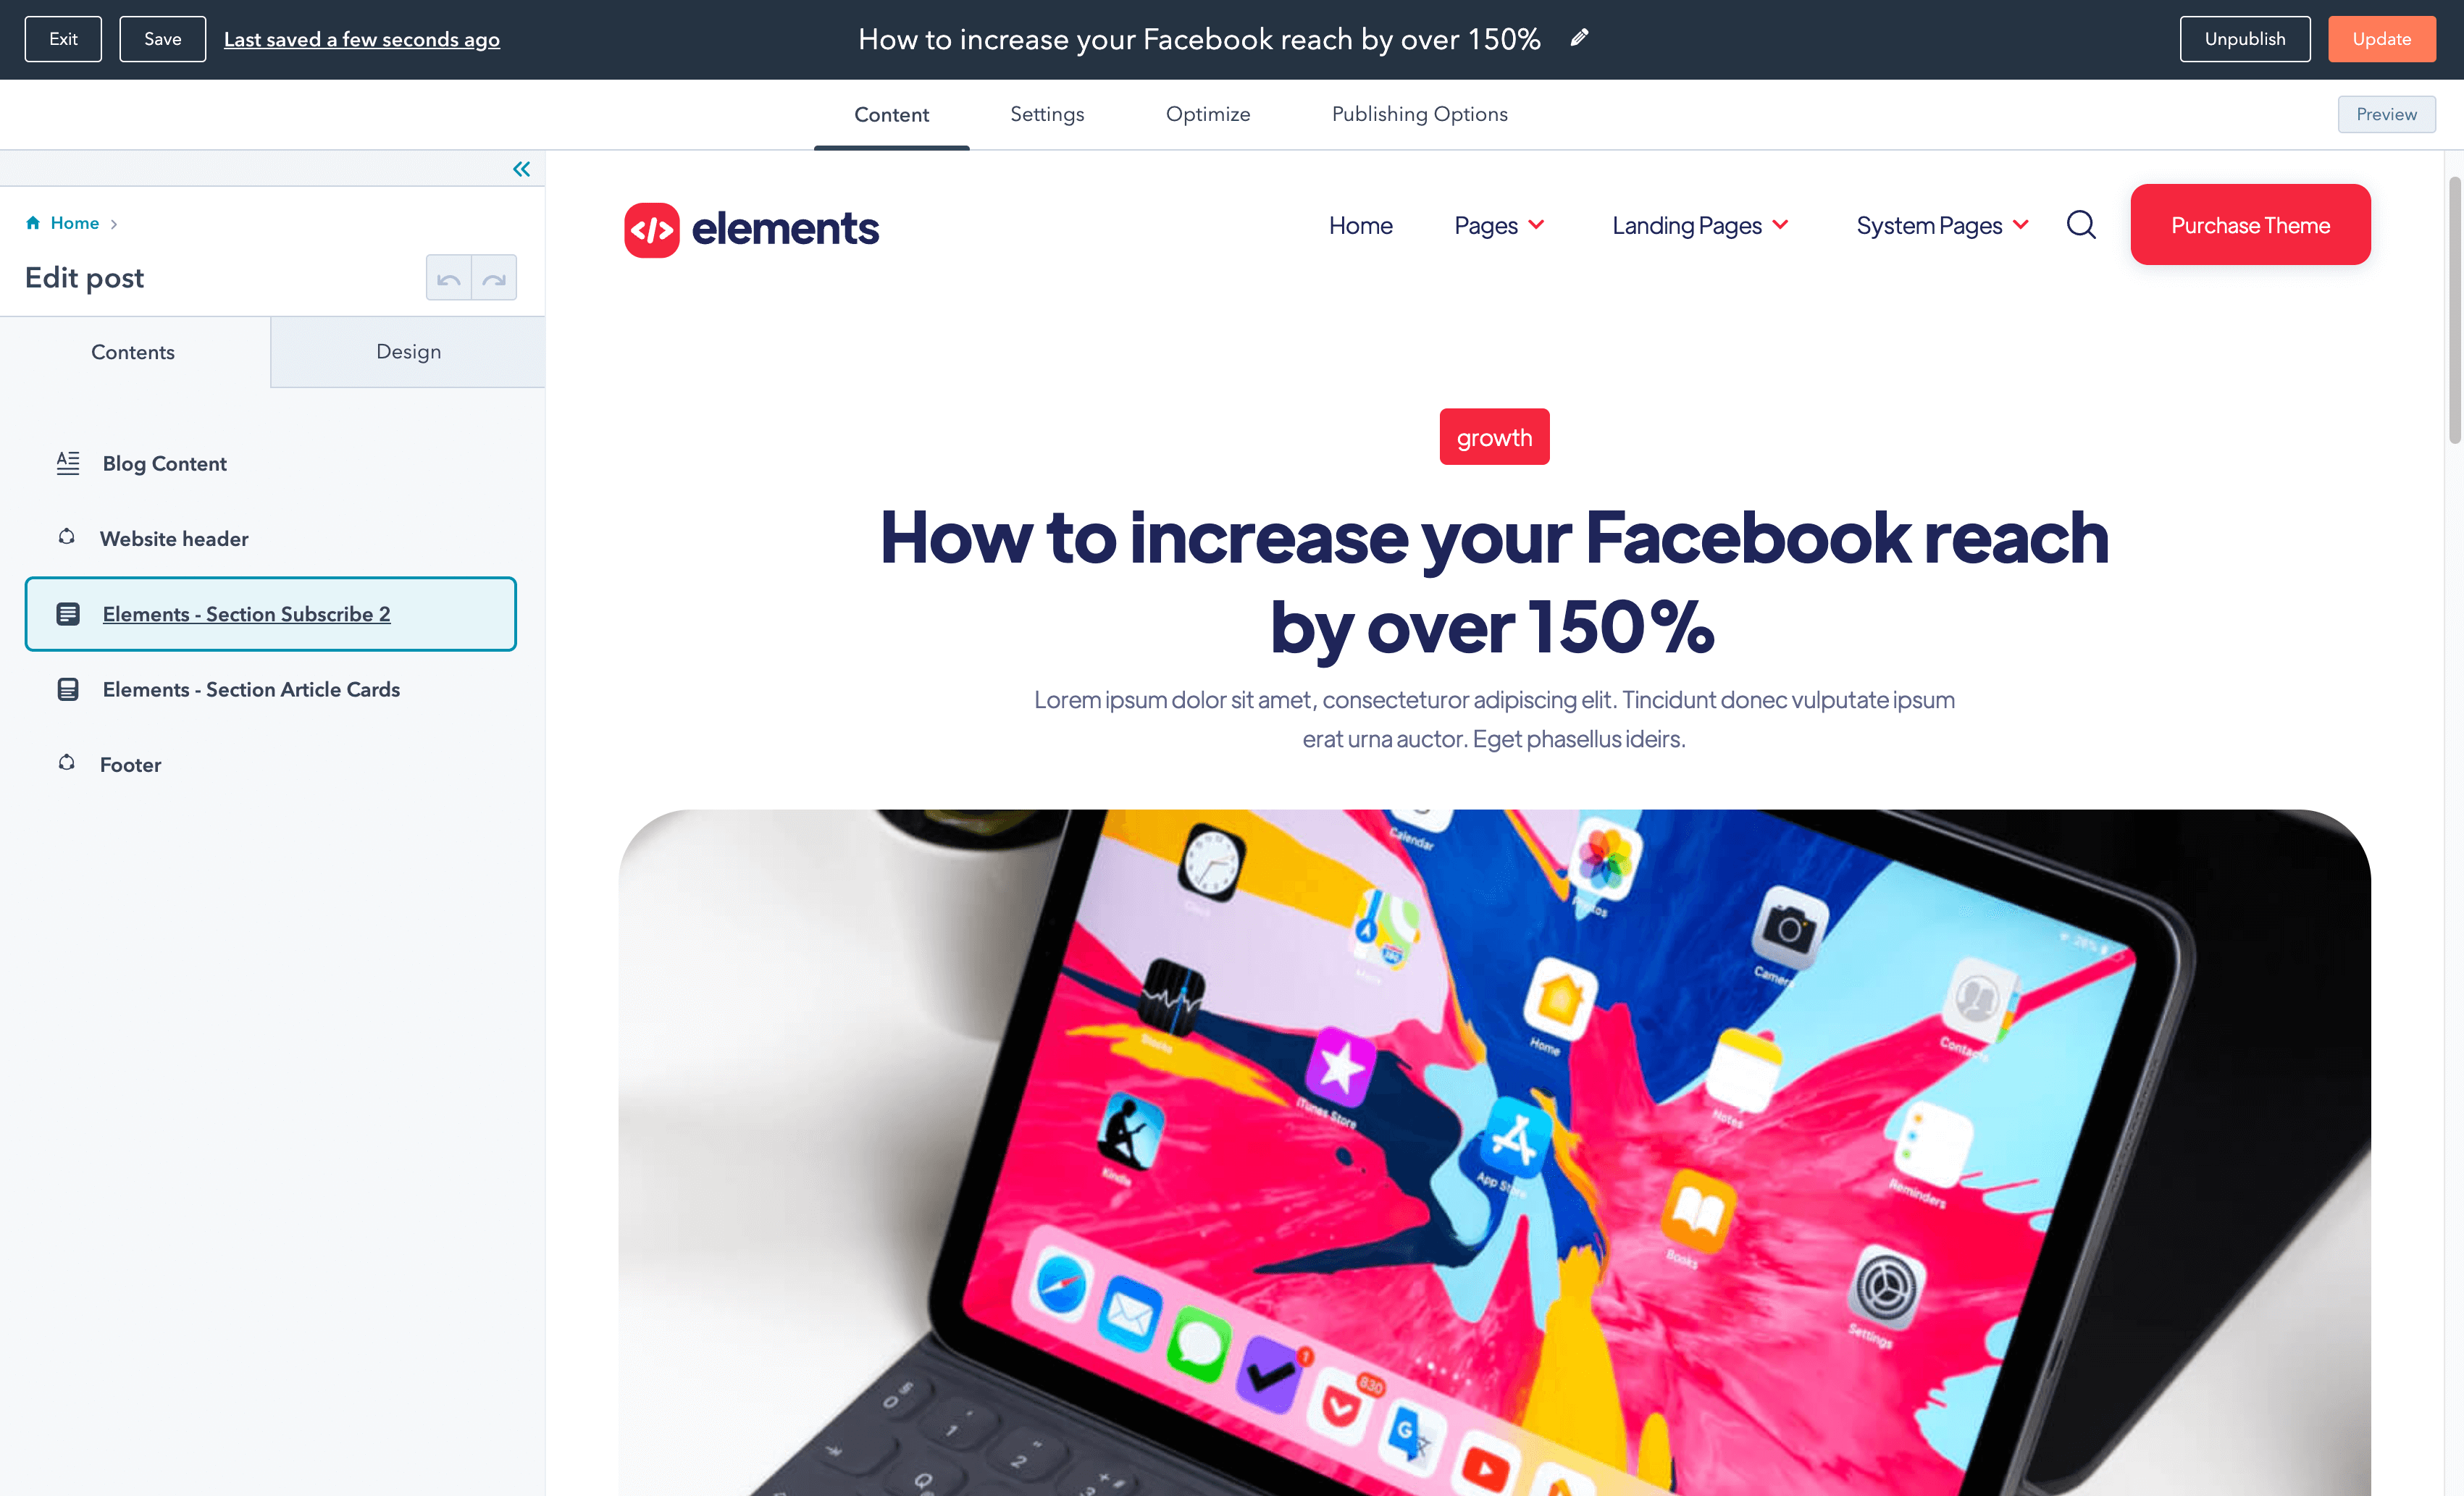
At the point of us writing this documentation, the Blog Post HubSpot Templates are pretty limited, so the only 2 changes that you can do from here are:
Once you edit these, please keep in mind that if you create more blog posts, it is not going to apply these settings automatically, so we highly recommend clicking ‘Duplicate‘ to the last post you created (that has this settings), so this always applies to all your blog posts.
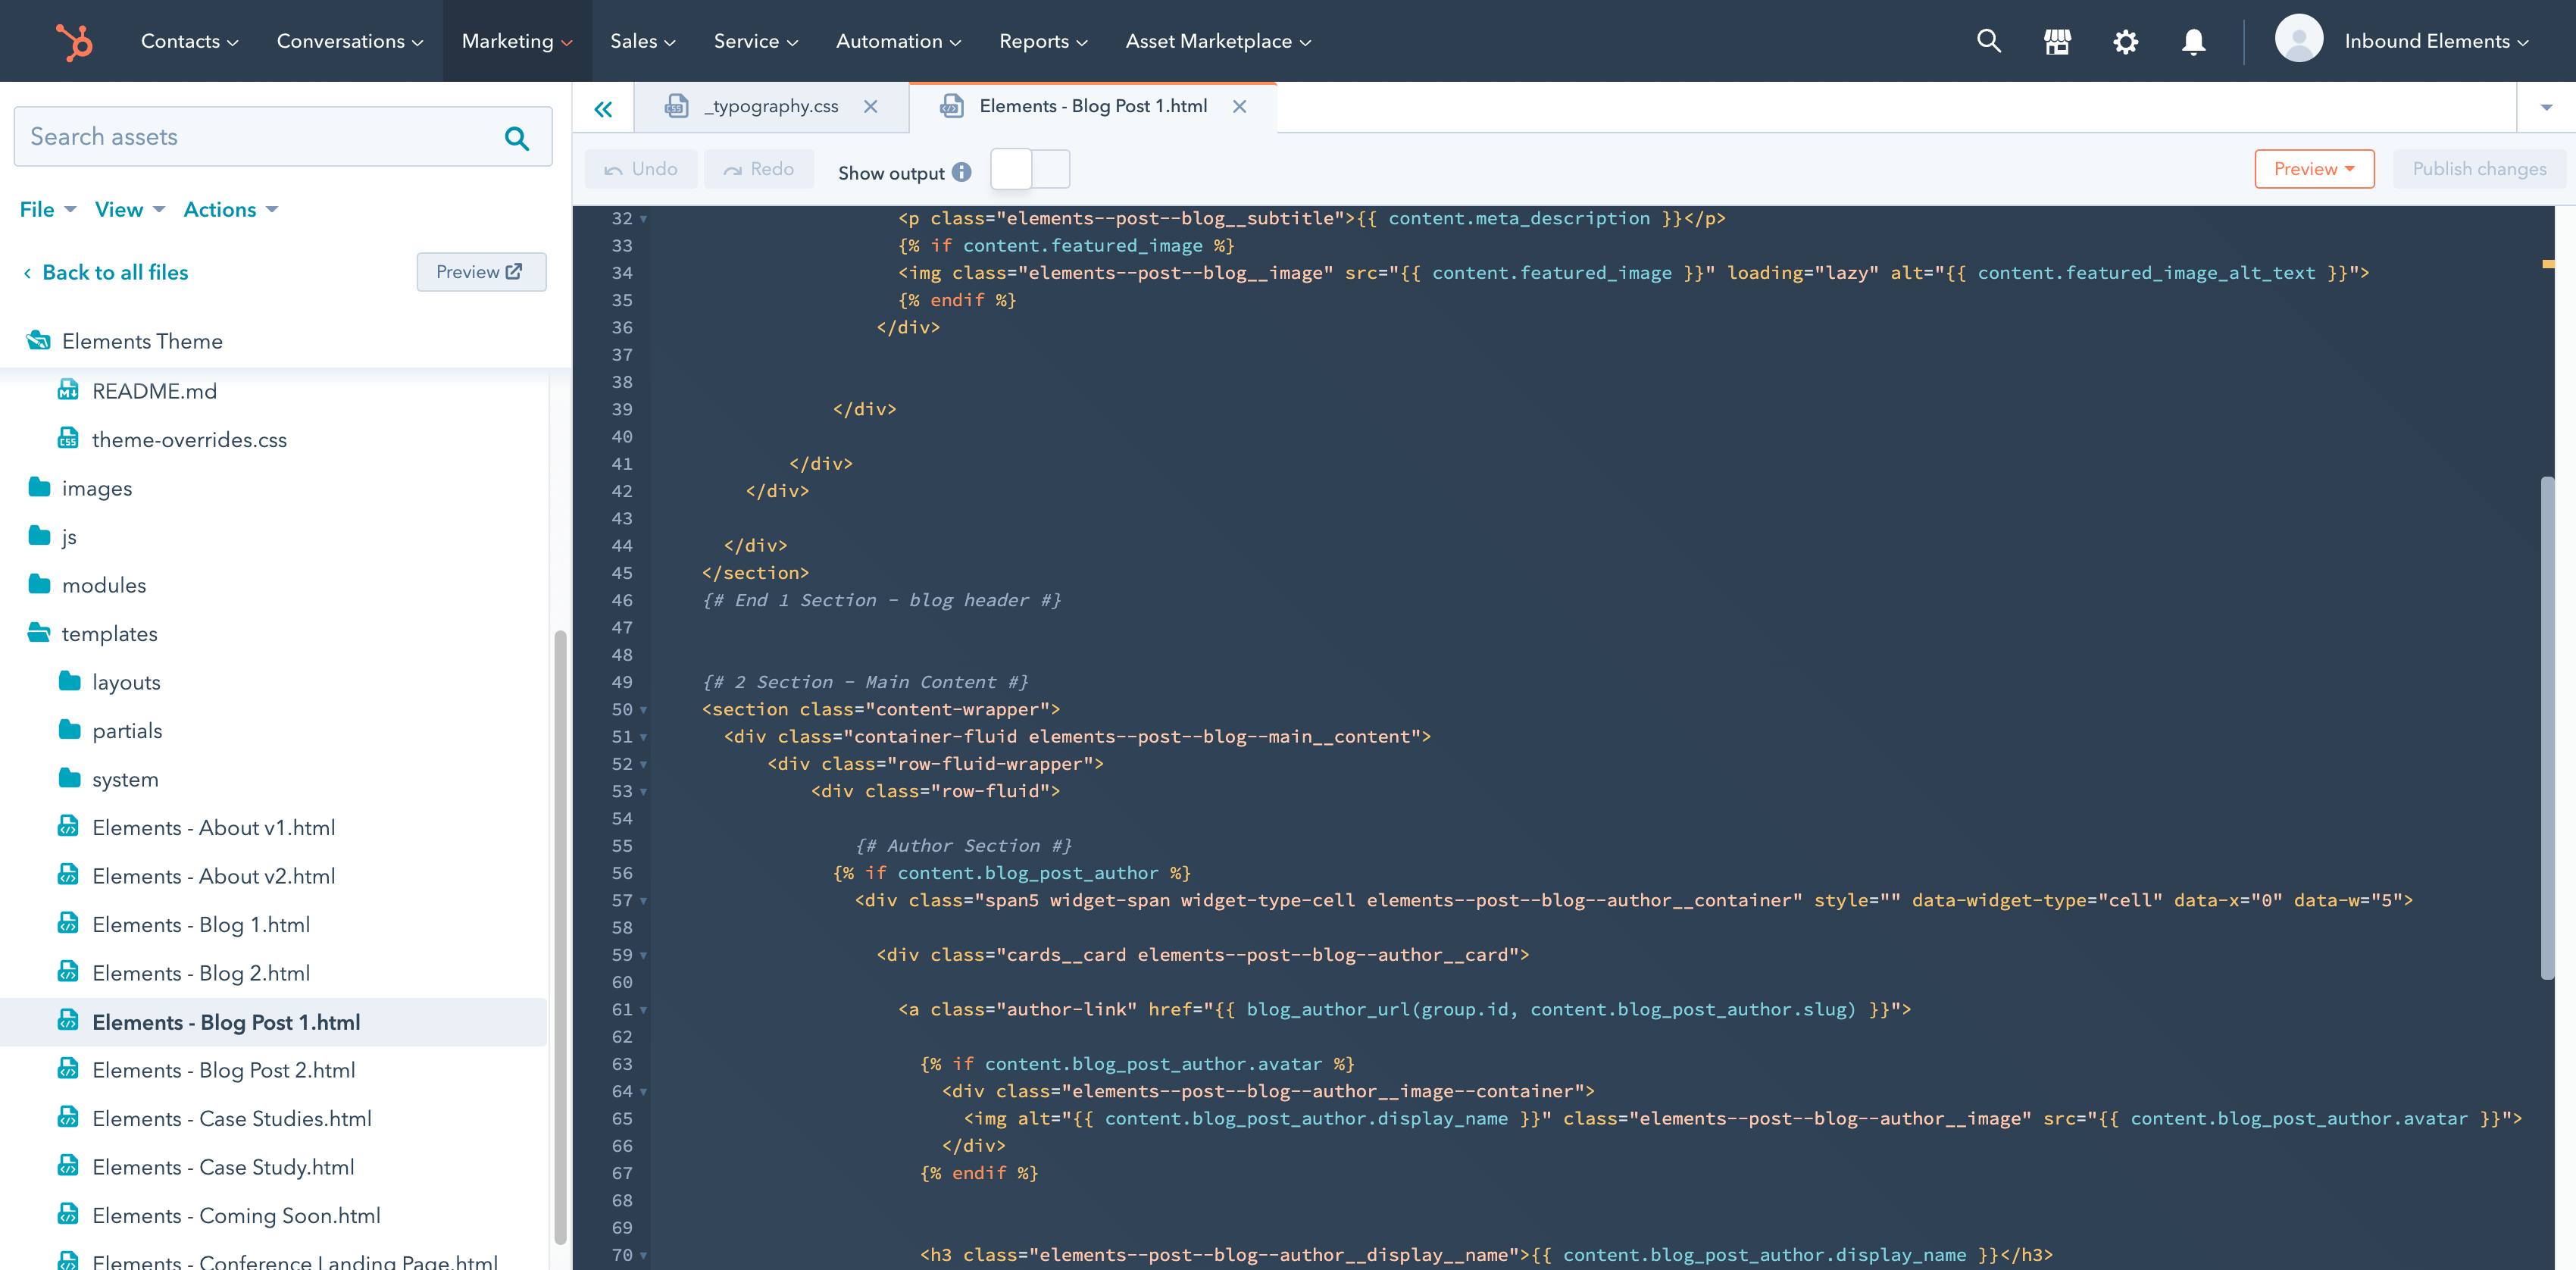
If you are looking to edit more, or to do some major layout changes, you would need to edit the code of the template, and the instructions for that can be found below:
1. You need to go to Marketing > Files and Templates > Design Tools.
2. In the File Manager, locate Elements theme, open its folder, then open Templates, and finally locate ‘Elements – Blog 1.html‘ (Or in case you are using Blog 2 or another theme from the Elements series, choose that one).
3. Open the file, and you will arrive into an HTML code template. We highly recommend knowing the basics of HTML/CSS/JS and HubL in order to edit this, as otherwise some things may break.
If you would like to limit which type of pages show as results in the Search, you can easily do so the following way.
You need to modify each of the 2 search options individually, and it can be done in the following way:
Header Search
To modify the search results from the search in the header navigation, you need to do the following:
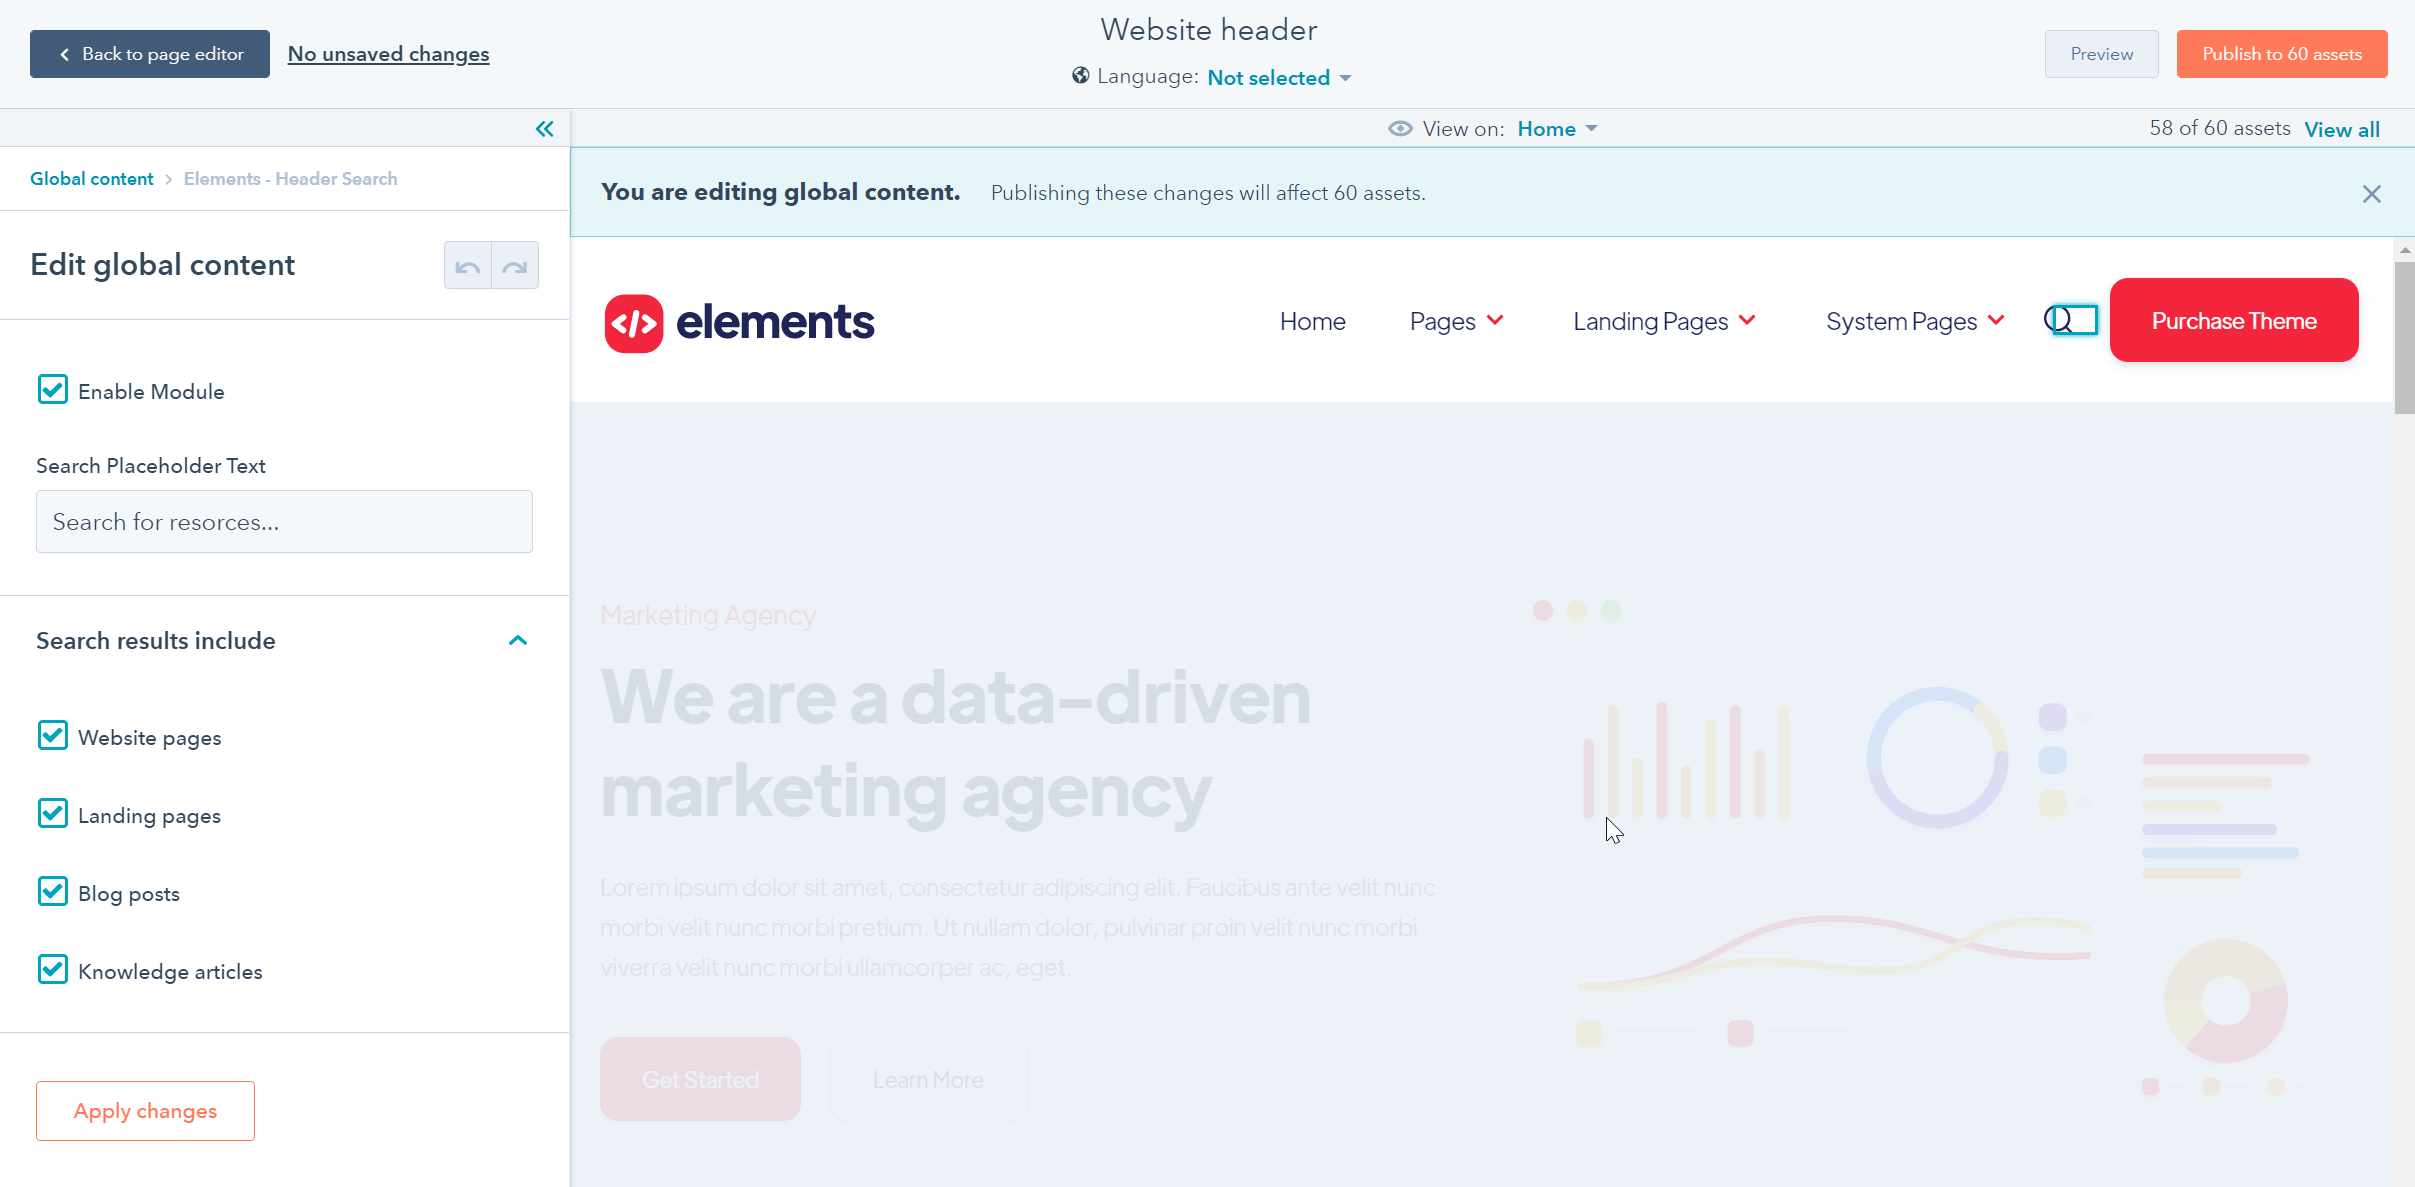
1. Go to edit any page, and then click on the Header module to edit it. It will ask if you want to edit the Global content, click ‘Open in global content editor‘ to proceed.
2. Select the ‘Elements – Header Search‘ element from the left sidebar.

3. On the sidebar you will see an option that says ‘Search results include‘. Choose the types of contents you want the header to search, and click Apply Changes.
Search Page
To modify the search results from the search in the Search page, you need to do the following:
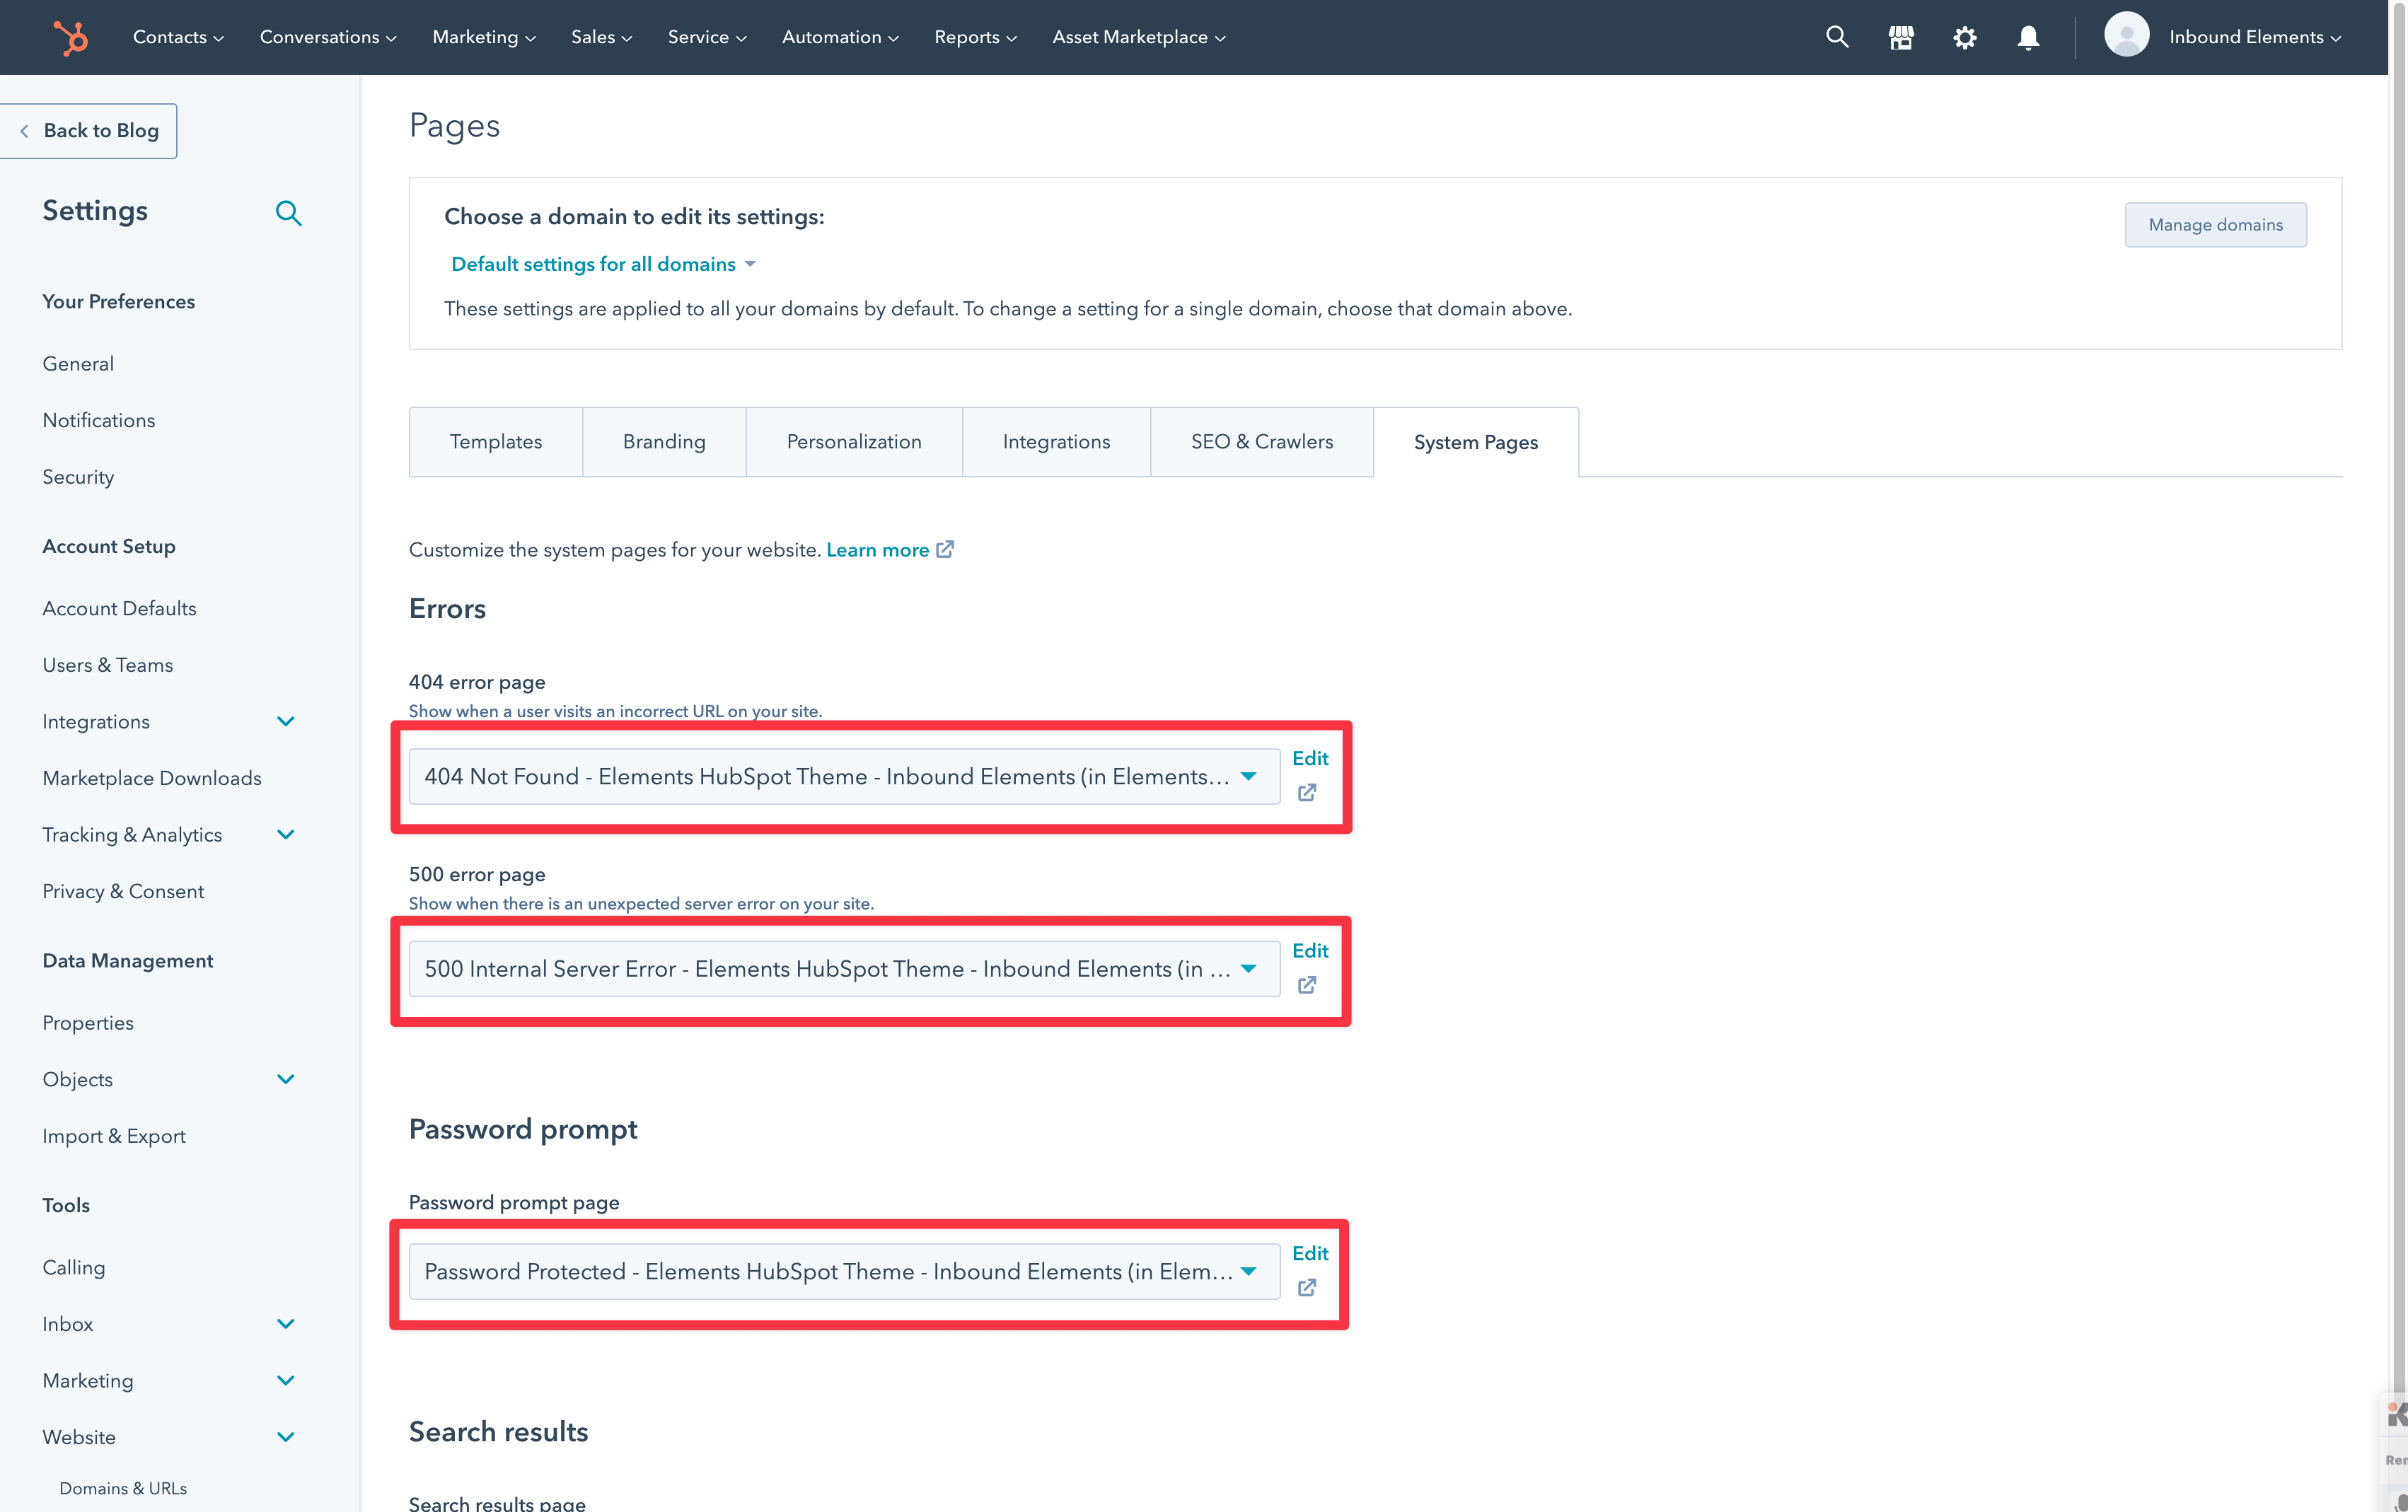
1. Go to Settings > Tools > Website > Pages > System Pages
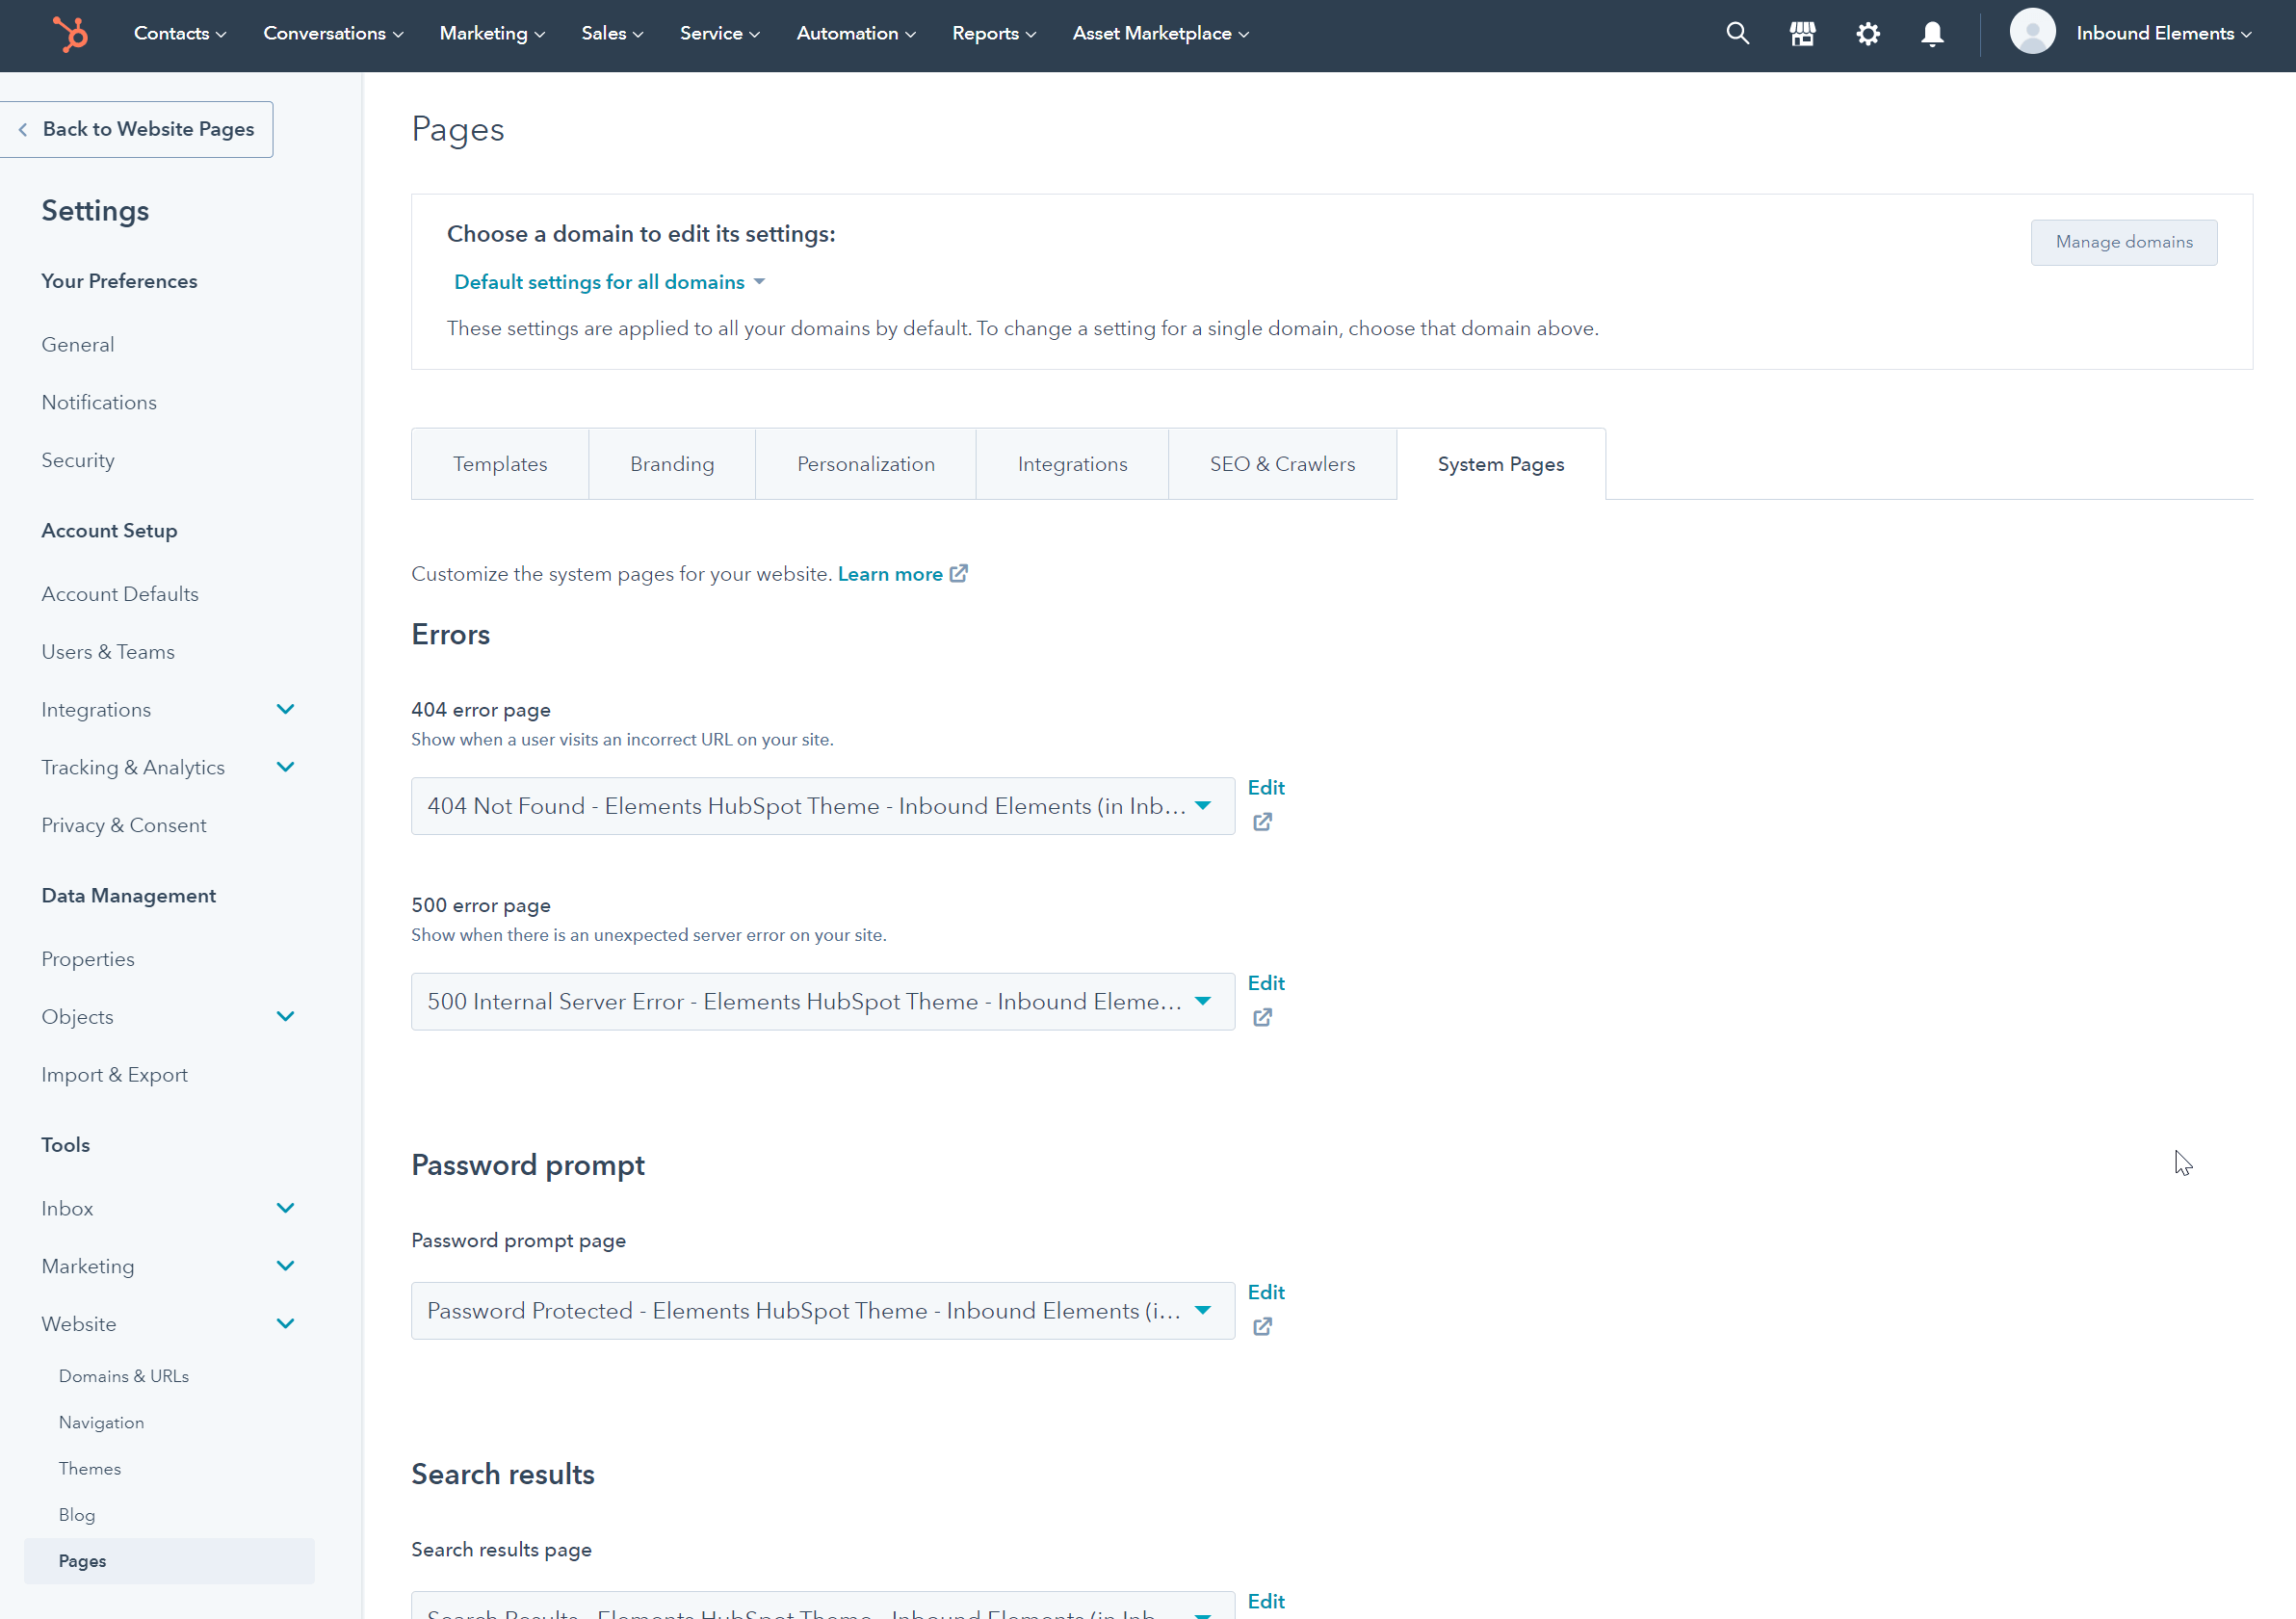
2. Go into the section where it says ‘Search results‘ and click Edit
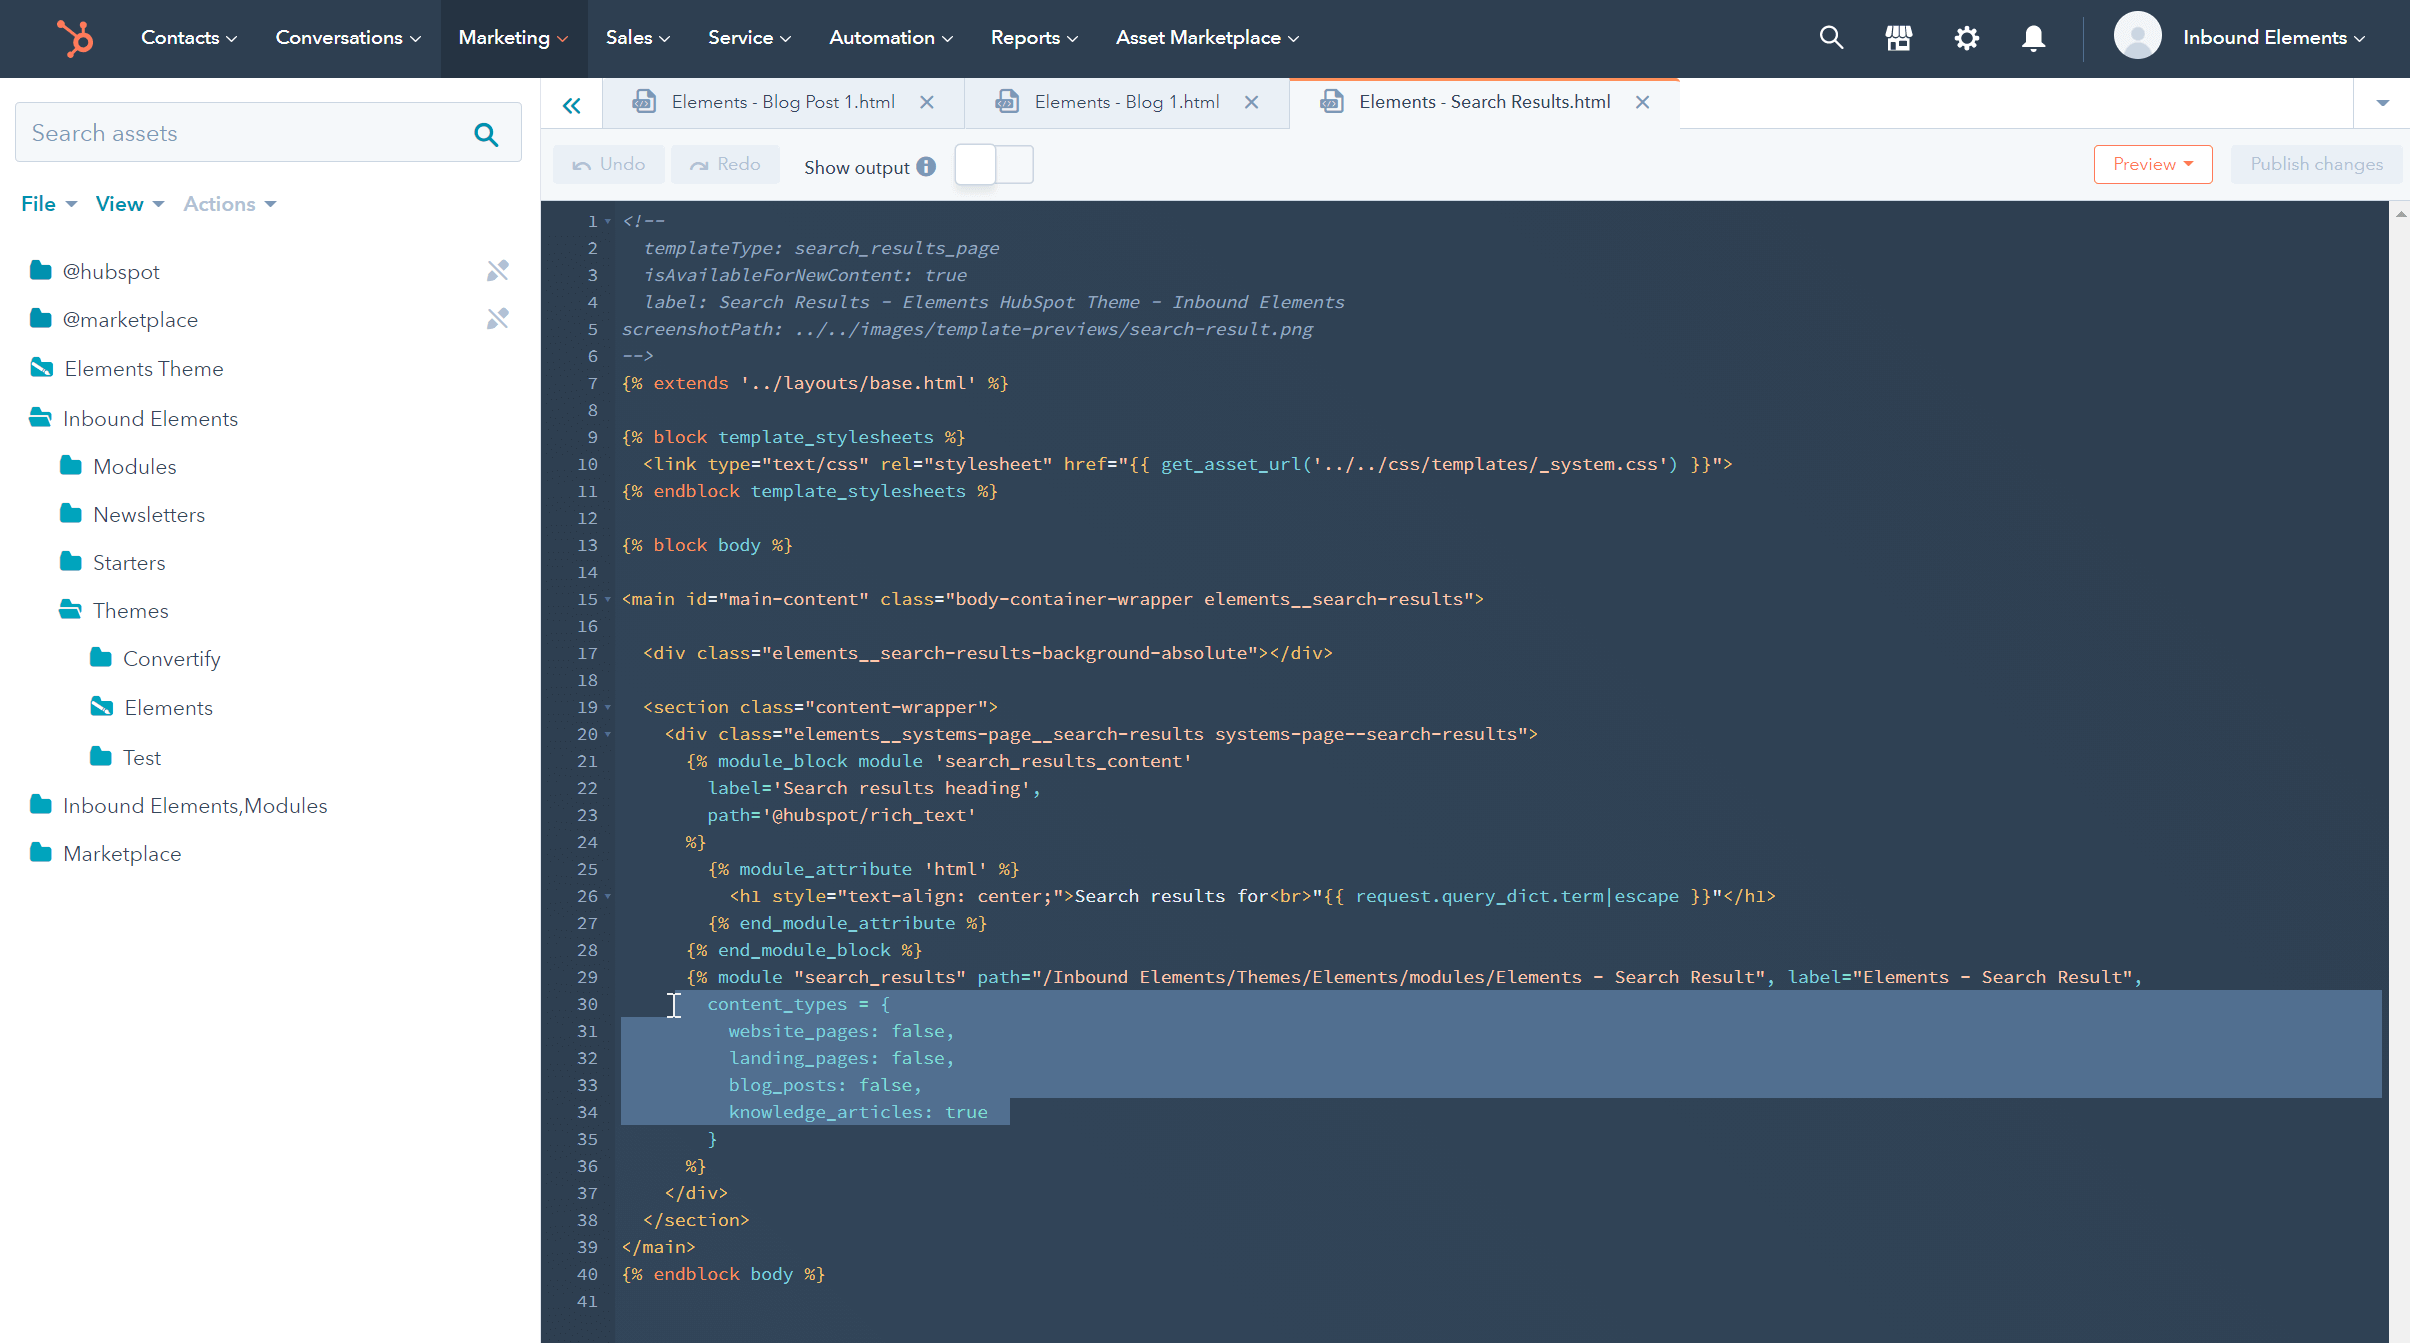
3. It will open a file that includes the Search functionality setup.
4. Go to the line 29 where it has the content_types and add true/false depending on which sections you want to be searched for.
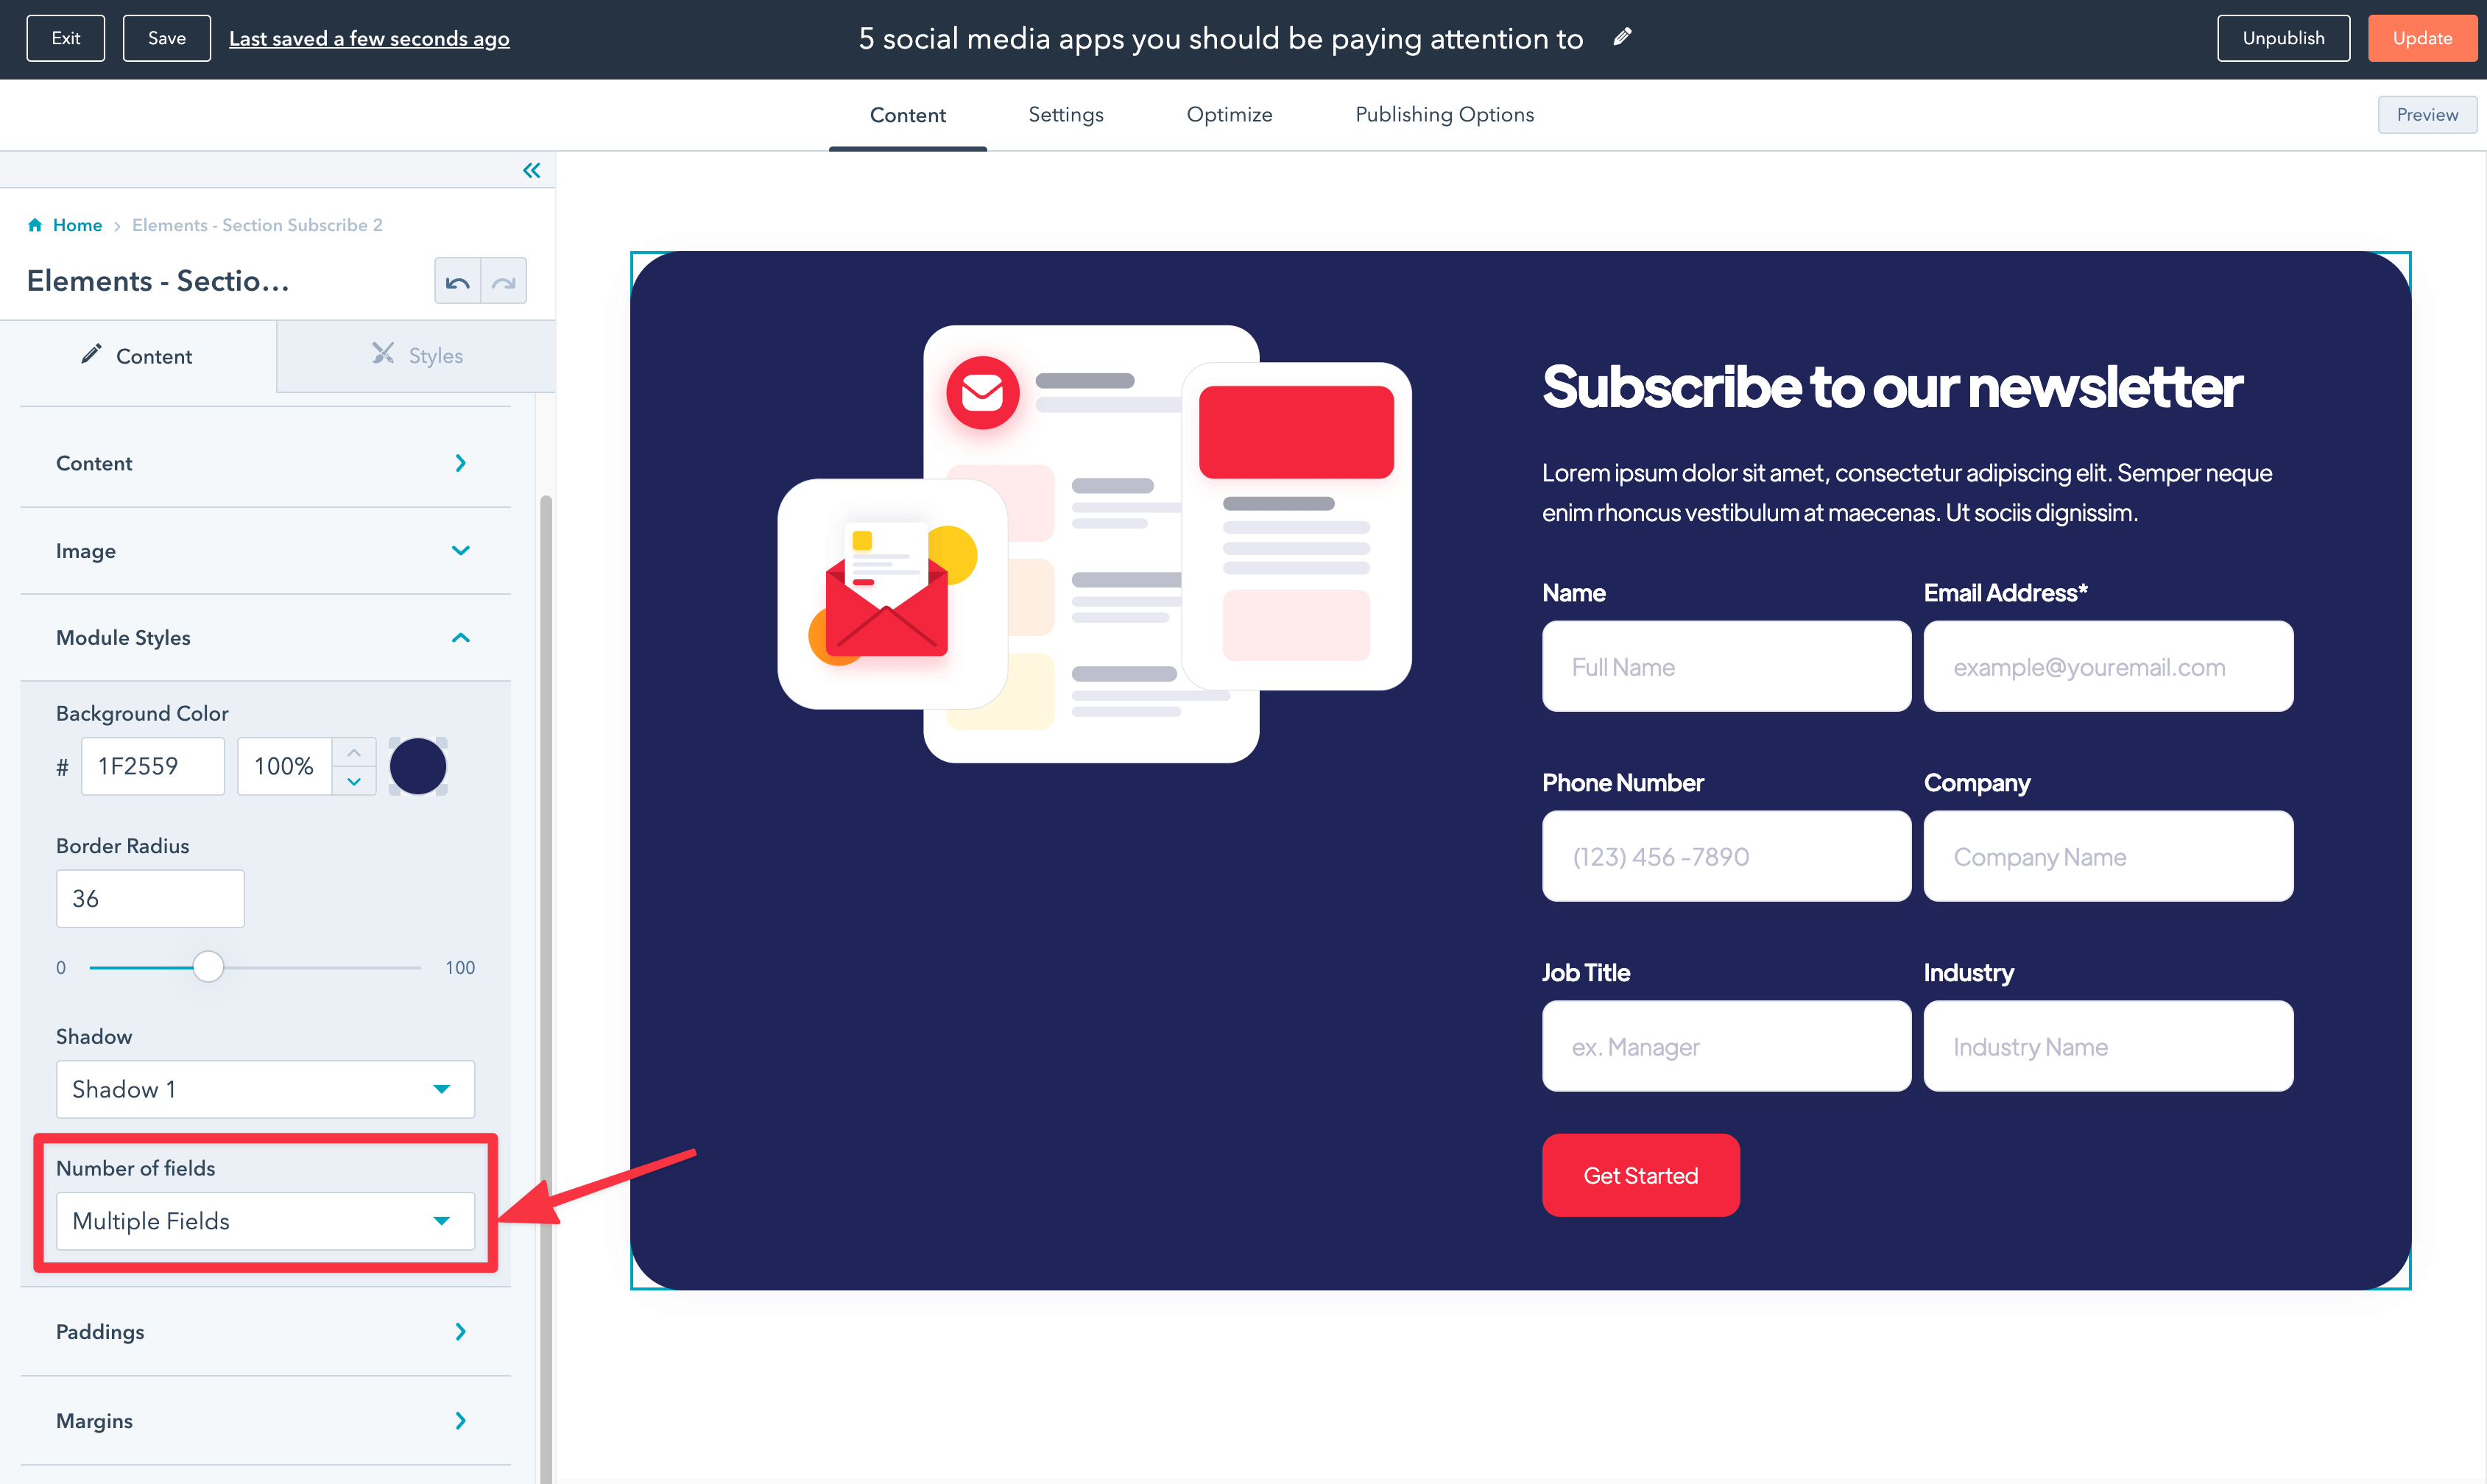
If you are using the call to action module that has a form inside, and when you add a form, you notice that the button is misaligned (like shown in the image below), don’t worries, fixing it is as easy as 1, 2, 3.
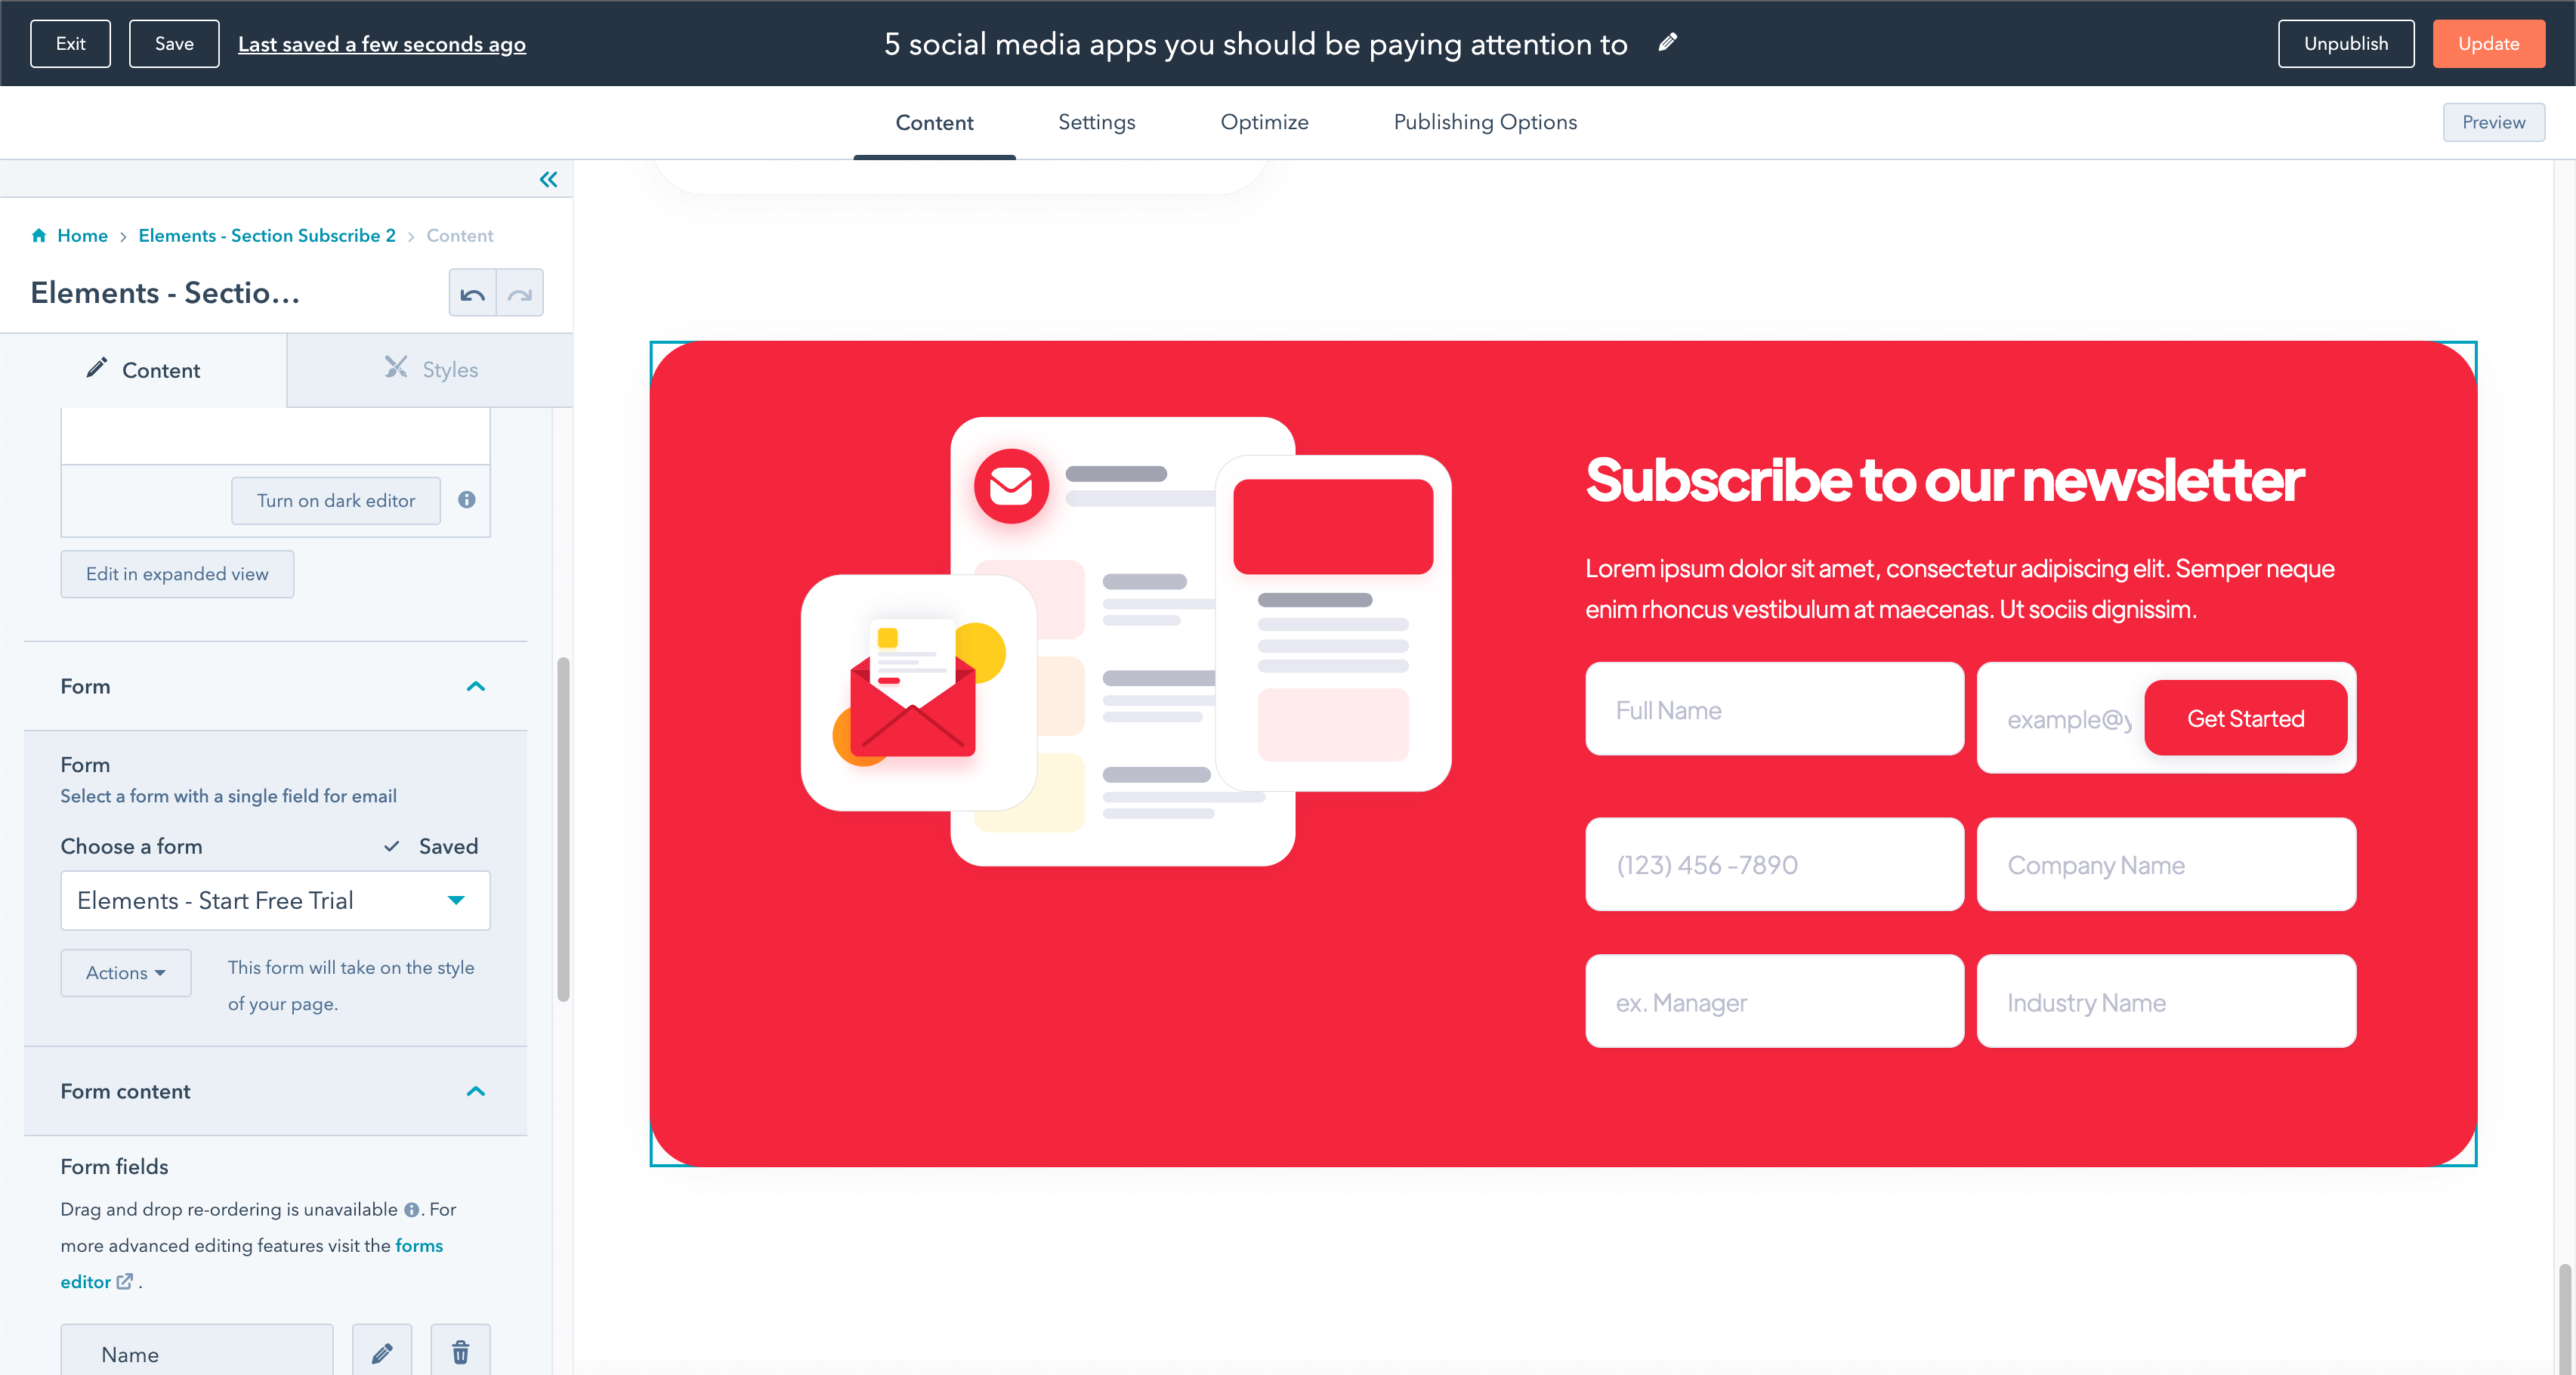
This happens because the module has 2 different options:
This options allows you to customize where the button is shown depending on the number of fields you are using. If your form only has one field, just ensure to select One Field, and if your form has 2+ fields, just ensure to choose Multiple Fields. You can find this setting in Module Styles > Number of Fields.
By default, all of the system pages of Elements HubSpot Theme are not activated when you purchase the theme, however, you can easily activate them by going into Settings > Website > Pages, and then selecting all of the pages individually.
As promised, all the themes from the Elements series HubSpot themes includes the editable Figma design source file that you can use to easily edit any graphics, or re-create layouts easily on Figma.
If you want to get the Figma file, please send us an email to [email protected] with your purchase confirmation, and we will send you the Figma file within 24 business hours.
And that’s all for now! If you arrived to this part of the page, it means you already read all the documentation, so kudos for you.
However, it doesn’t end up here. If you find any issue, bug, or just need some help, feel free to send us an email at [email protected] — Our team of HubSpot Experts will be more than happy to help you.